GitLab Password Guidelines
Passwords at GitLab
Passwords are one of the primary mechanisms that protect GitLab information systems and other resources from unauthorized use. GitLab’s password standard is based, in part, on the recommendations by NIST 800-63B. The password standard sets the requirements for constructing secure passwords and ensuring proper password management. GitLab utilizes 1Password for password management.
1Password
1Password is a password manager that can be used in two different ways - as a standalone application (by purchasing a standalone license) or as a hosted service (by subscribing). GitLab uses 1Password for Business which is a hosted service.
Important: Any personal Passwords stored in your GitLab vault will be inaccessible upon separation with GitLab. Please use the complimentary 1Passsword Families membership subscription that comes with your business account to store any personal passwords. This account will stay with you even in the event that you stop working with GitLab. For more information on how to redeem your free subscription, please follow the steps outlined in this article.
Ideally you memorize one strong password - hence the name - and let 1Password generate and manage strong, unique passwords for every site for which you have a login.
GitLab requires all team members to use Okta as a primary entry and access point for SaaS and other company applications while utilizing 1Password for password management. GitLab utilizes Okta for SAML/SSO and passwordless authentication for many applications, so the need to store passwords in a password manager will diminish over time.
If you want to use 1Password for your private passwords not related to your work at GitLab, there are a few options.
Please note our 1Password for Business license agreement includes the 1Password for Families feature, which you can share with up to 5 family members.
For your Okta password and other passwords that you won’t store in Okta, use 1Password as your password manager and set a strong and unique master password.
- Keep your Master Password a secret. No other team members should know it, including admins. If the Master Password is known or disclosed to someone else, it should be changed immediately.
- Post a message in #it_help if you forget your Master Password.
- Consider using a generated Master Password. Most human-created passwords are easy to guess. Let 1Password create a strong Master Password. But: you will need to memorize this Master Password.
- Do not let your password manager store the master password. It is okay to store the username.
- For more information, review 1Password’s Getting Started guide and view this video that guides you through the sign-up process.
- For account administrators, review 1Password’s admin guide.
Terminology
Following this guide, it will be helpful to understand a few terms we’ll be using throughout.
- App: A native 1Password application (macOS, iOS, Windows, Android).
- Extension: A web browser extension/plugin that communicates with the App to provide access to your passwords securely without leaving the browser.
- Vault: What 1Password calls any grouping of secure data, such as logins or secure notes. Sometimes called a “keychain”.
1Password guidelines
- If you install the macOS application, install 1Password via this link 1Password
- If you have a YubiKey, it can be added as a 2-factor method to your 1Password account for convenience.
- When traveling, consider using 1Password in “Travel Mode”, see more on that below.
- Do not share credentials via email, issue comments, chat etc. This includes email addresses to login and API keys. Use 1Password vaults for this and if sharing a one-off password, the built-in “Share” feature.
- If you do not have access to a vault create an access request issue.
- Use Watchtower to find passwords that need to be changed. Watchtower tells users about password breaches and other security problems on the websites they have saved in 1Password Teams, so users can take action. This is not something account administrators can review for team members, so it is up to you to enable! Enable Watchtower by going to your 1Password app and then to Preferences > Watchtower.
- Use the “Security Audit” functionality of 1Password to meet the password standard. It will report reused passwords, weak passwords, accounts that are missing 2-factor authorization, and so forth that can then be fixed.
- Do not copy passwords from inside a 1Password vault to a personal password vault or other password store. 1Password should be the only password vault used for teams. Team passwords should not be duplicated or placed in personal password vaults where they can potentially be exposed to compromise.
- When asked security questions (what is your favorite pet, etc.) do not answer truthfully since that is easy to research. Make up an answer and write both the question and answer in 1Password. Consider using the Password Generator function in 1Password for this.
- During offboarding, your 1Password account is deleted, which includes the Employee vault in the GitLab team account. If you want to keep your personal passwords, please copy/move them to your Primary vault which you will have if you signed up for an individual account before joining the GitLab Team account.
- Deprecated When documenting the location of shared credentials in the handbook refer to the items with NAME_OF_SITE credentials in VAULT_NAME. For example:
“for access please see the AOL credentials in the Luddite vault”.
- Deprecation note: This is for existing accounts only. New accounts should be created by creating an issue to add it to Okta.
1Password for teams
1Password for Teams stores all Vaults on the 1Password servers and allows for sharing between multiple people on the same team. Every GitLab team member who needs access to a shared vault should consult their departments for any shared vault information.
Each member of the team has a vault called Employee which only you can see, and allows you to store personal credentials within the GitLab team’s account.
To really get the full benefit of 1Password, you’ll need to hook our Business account up to one of the native apps.
Adding the GitLab team to a 1Password app
This guide will cover setting up the macOS app. It’s their lead platform and is the most up-to-date. These instructions may or may not work for the Windows version. If you use 1Password 6 without a 1Password.com account, make note of this.
- Download and install the 1Password macOS app.
- Launch the app.
- Click “Sign in to your 1Password account” button. If there is no such button please follow the instructions for updating 1Password.
Now you’ll need the Emergency Kit PDF that 1Password told you to save when you registered your Business account. Note: Store the Emergency Kit safely. Store a copy of the Emergency Kit on a USB flash drive or print a copy and store it in a vault at home or safe deposit box — somewhere not online or accessible by anyone other than yourself.
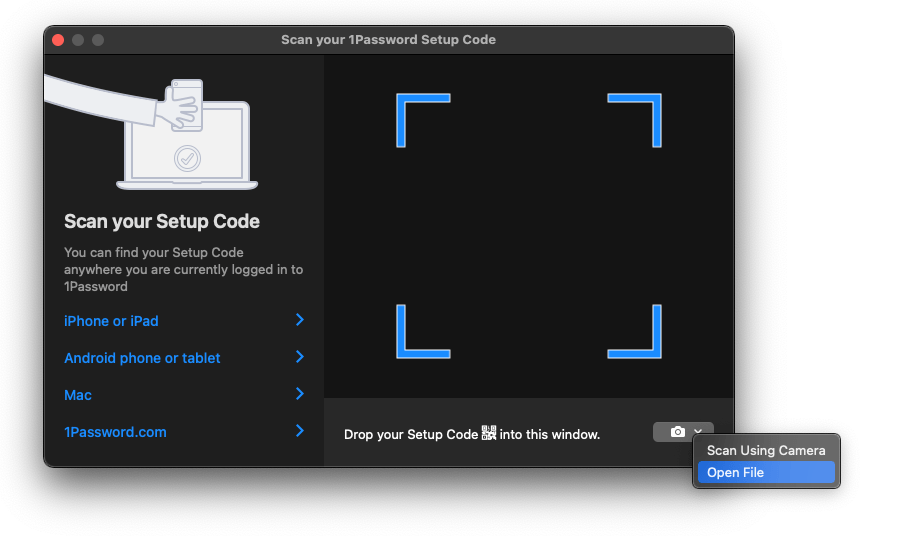
If you saved it as a digital PDF file:
- Open the PDF file
- Click Scan QR Code
- Open the PDF file with the scanner by clicking on the camera icon
If you printed the PDF:
- Click Sign In Manually
- For Team URL enter gitlab.1password.com
- For Account Key enter the Account Key from your Emergency Kit
- For Email Address enter your
@gitlab.comemail - For Master Password enter the password to your Teams account (not the password you created above when you chose “I’m a new user”)
After the Team is added, you should see some notifications about vaults being added to 1Password. By default you’ll have the Private vault, but may have access to others.
Shared Vault Etiquette
- In general, 1Password items should be self-documenting. This is especially important for items in team vaults such as those to which a team member gains access once part of the GitLab team or they are granted access via their baseline entitlements issue. Always make sure the
title,username, andnotesfields are meaningful. - Deleting items is fine as they are kept in the “recently deleted” tab indefinitely. It’s also fine to leave them in their respective vault but delete the account on the system associated with the item. In the second case, and in order to prevent confusing team members, edit the title (e.g.
[Deleted on 2024-02-14]) to reflect the purposeful deletion of the account and explain briefly who and why removed it in the notes.
Vaults
Click the Vault Selector in the upper-left corner of the window:
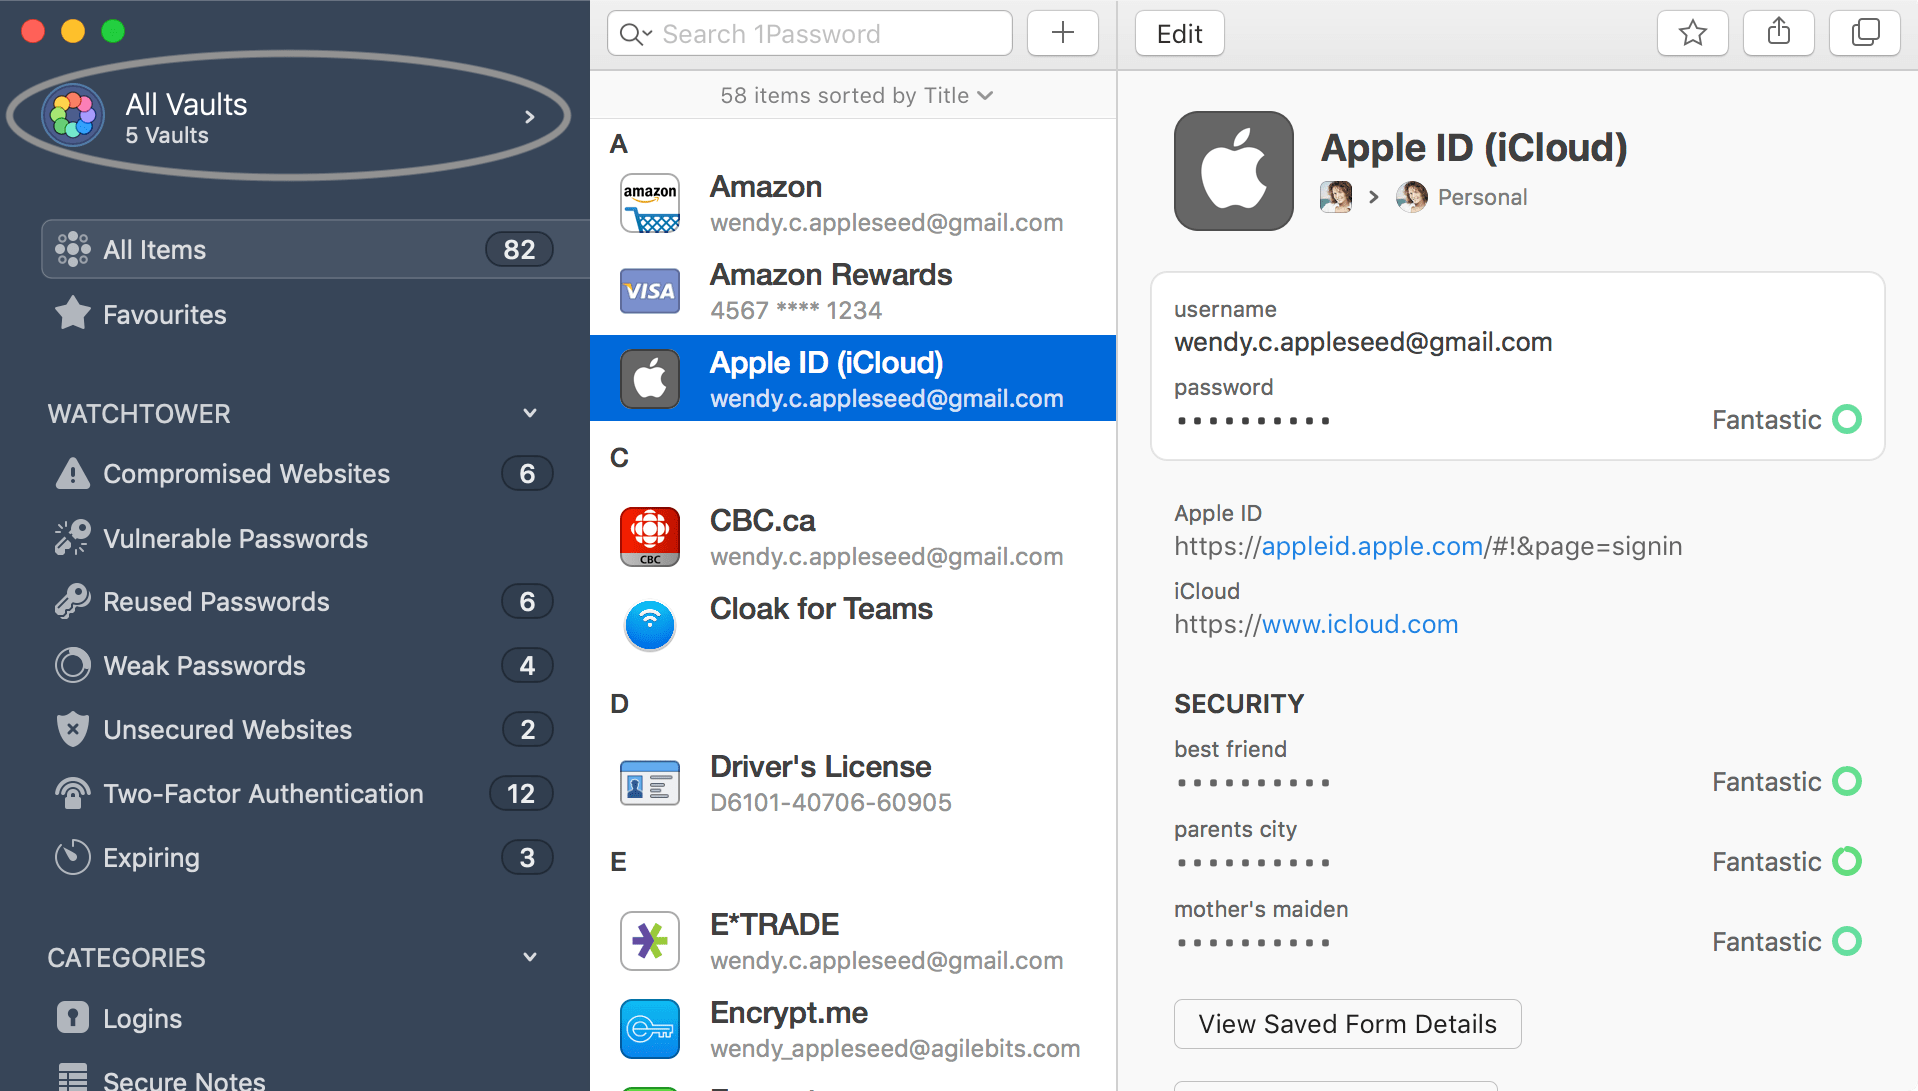
GitLab team members have access to a Employee vault by default, which is your hosted, private vault that is part of the GitLab 1Password for Teams account. Since the Employee vault is part of the GitLab Business account, it should be thought of as company property (like the @gitlab.com email account), however the vault cannot be viewed by anyone else on the team, including admins. If you choose to store truly personal information in the Employee vault, it opens up the possibility that you would be separated from this information if you offboard. Such truly personal information is therefore better to store in your Primary vault, which is associated with you instead of with the GitLab Teams account, assuming that you added an individual account.
People may request access to other vaults such as shared vaults that their teams/departments have created.
Browser extension
Go to Browser extensions and install the extension for whatever browser you’re using. You should not need a beta version here.
With the extension installed, you should be able to go to a site that you have credentials stored for in 1Password and log in:
If you don’t see the site listed in the results window, make sure you’re using the correct vault:
Saving logins
When 1Password detects a login form submission, it may ask if you want to save the login with a dialog like this:
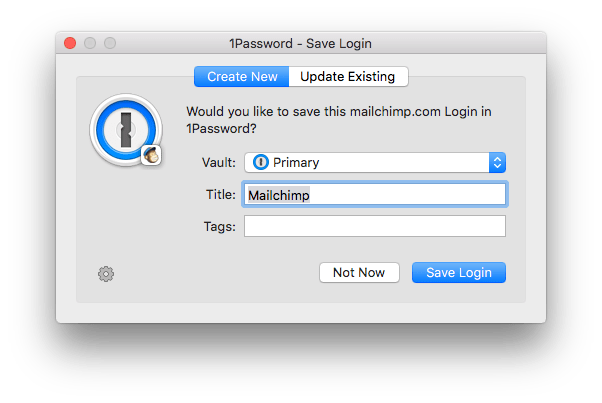
If you do want to save it, make sure the appropriate Vault is selected first.
Managing SSH keys
Starting with version 8, 1Password can operate as the single source of truth for your SSH keys. This includes generating private keys, storing them securely, filling your public keys in to sites like GitLab.com, and unlocking the keys automatically when performing git operations.
More information is available in the official documentation.
CLI integration
During development it is often necessary to use test secrets locally on your development machine. Even though these secrets have a limited scope of access, it’s still best practice to avoid writing them unencrypted to disk. Manually loading them into environment variables or using them for CLI commands directly also risks them being written to disk as part of your shell history. For a more secure approach, use 1Password’s CLI utility which can help manage local secrets securely.
1Password CLI integration supports secure handling of secrets used in command line tools, config files, and scripts executed on your laptop. To setup the CLI integration, follow the getting started guide.
It is recommended to store secrets such as personal access tokens in 1Password. Avoid storing secrets in unencrypted files or using them directly on the CLI. Many shells write a command history to disk and where the secret is used literally on the command line this will be written to the command history unencrypted.
Example for configuring glab with 1Password CLI (requires 1password version 8 or higher):
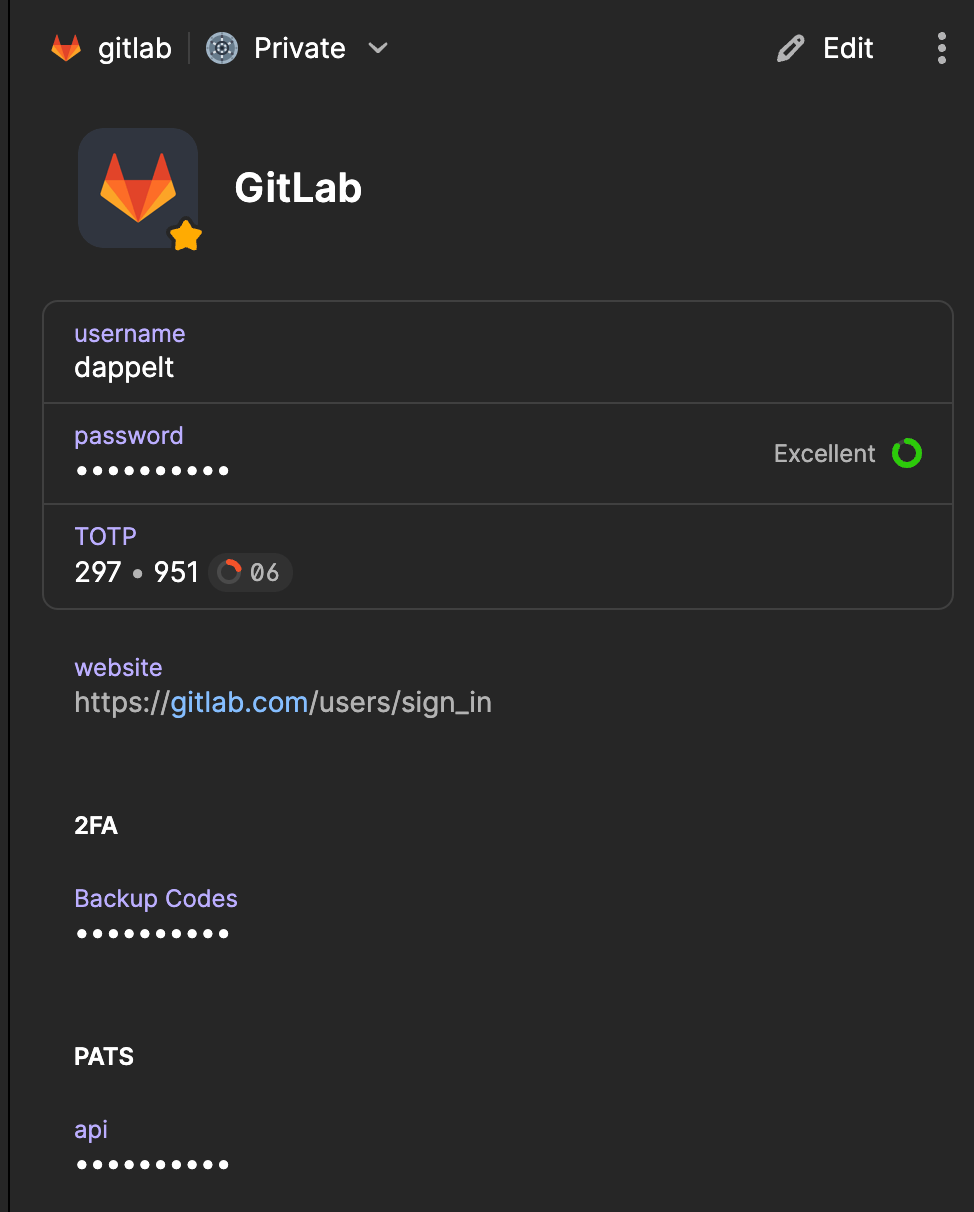
- Store your access token in 1Password. In the entry for your GitLab account, create a new section
patand add a fieldapi. Insert the value of your PAT into the newly created fieldapi.
- Store a secret reference to the access token in an
.envfile.
The environment variable name goes before the equals sign, and the path to the secret in 1Password goes after. You can store multiple variable secret pairs per file when you need to use secrets together. The paths can be obtained by viewing the credential in the 1Password GUI, clicking the dropdown menu and selecting “Copy Secret Reference”.
## format is op://vault-name/item-name/[section-name/]field-name
echo "GITLAB_TOKEN=op://Private/GitLab/pat/api" > $HOME/.gitlab-pat.env
- Run processes using the secrets
When running processes which need the secrets, run it under the control of 1Password, so it can pass the variables correctly.
To do this, prepend op run --env-file="<path to your env file>" -- to the command you wish to run, and replace any secrets with the relevant variable
So for example
glab api version
would become:
op run --env-file=$HOME/.gitlab-pat.env -- glab api version
Where the process is interactive or has dynamic output (progress bars, etc) you may need to disable masking to make the display work correctly. You can do this by adding --no-masking
Manually adding op run every time for common tasks is cumbersome, so check out
the tools and tips section for more user-friendly configurations.
Several accounts and unlocking the app
If you are planning to use both the GitLab team account and a separate individual account you should first add your separate individual account to the app first (Preferences > Accounts). By doing this you will be able to unlock the 1Password app using the Master Password of the individual account.
If you were using 1Password before joining GitLab, and you receive a prompt titled Migrate To Account, choose I’ll move later. There is no harm in doing this, and it is easy to move items between vaults.
1Password for your private passwords
You are encouraged to use 1Password for your private passwords, not related to your work at GitLab. This makes it less likely for a security breach to occur. You can purchase a standalone license or start an individual subscription, or take advantage of the complimentary 1Password for Families feature, which you can share with up to 5 family members.
Two factor authentication and time-based one time passwords
As stated in the GitLab Password Standards, the usage of 2FA is mandatory for all GitLab team members. Users without 2FA enabled that are stale for over 30 days will be blocked/suspended until resolved. This improves the security posture for both the user and GitLab. If any systems provide an option to use SMS text as a second factor, this is highly discouraged. Phone company security can be easily subverted by attackers allowing them to take over a phone account.
Okta is configured such that it only supports the use of WebAuthn. 1Password TOTP should only be used when WebAuthn is unavailable.
A FIDO2/WebAuthn hardware token can be used as a secure and convenient 2-factor authentication method for Okta, Google Workspace, GitLab instances, and many other sites. If you do not have one, you may request one via the Yubibot. GitLab’s standard is Yubico’s YubiKey. For more information on FIDO2/WebAuthn, visit the Tools and Tips page.
If shared access to a single account is required by multiple team members, for example, a social media account, an Okta new application setup Issue should be created. The credentials will be stored and shared via Okta.
If you find an existing shared account in 1Password, create an Issue to get it migrated to Okta.
1Password provides an alternative solution that does not require using your smartphone: 1Password Time-based One Time Passwords (TOTP). 2FA codes are displayed directly in the 1Password app running on your laptop (Note: this can not be set up via 1Password browser extension or 1Password web app).
To enable TOTP for a saved account:
- Open 1Password app
- Go to the item for which you want to set up TOTP
- Click Edit in the bottom right corner
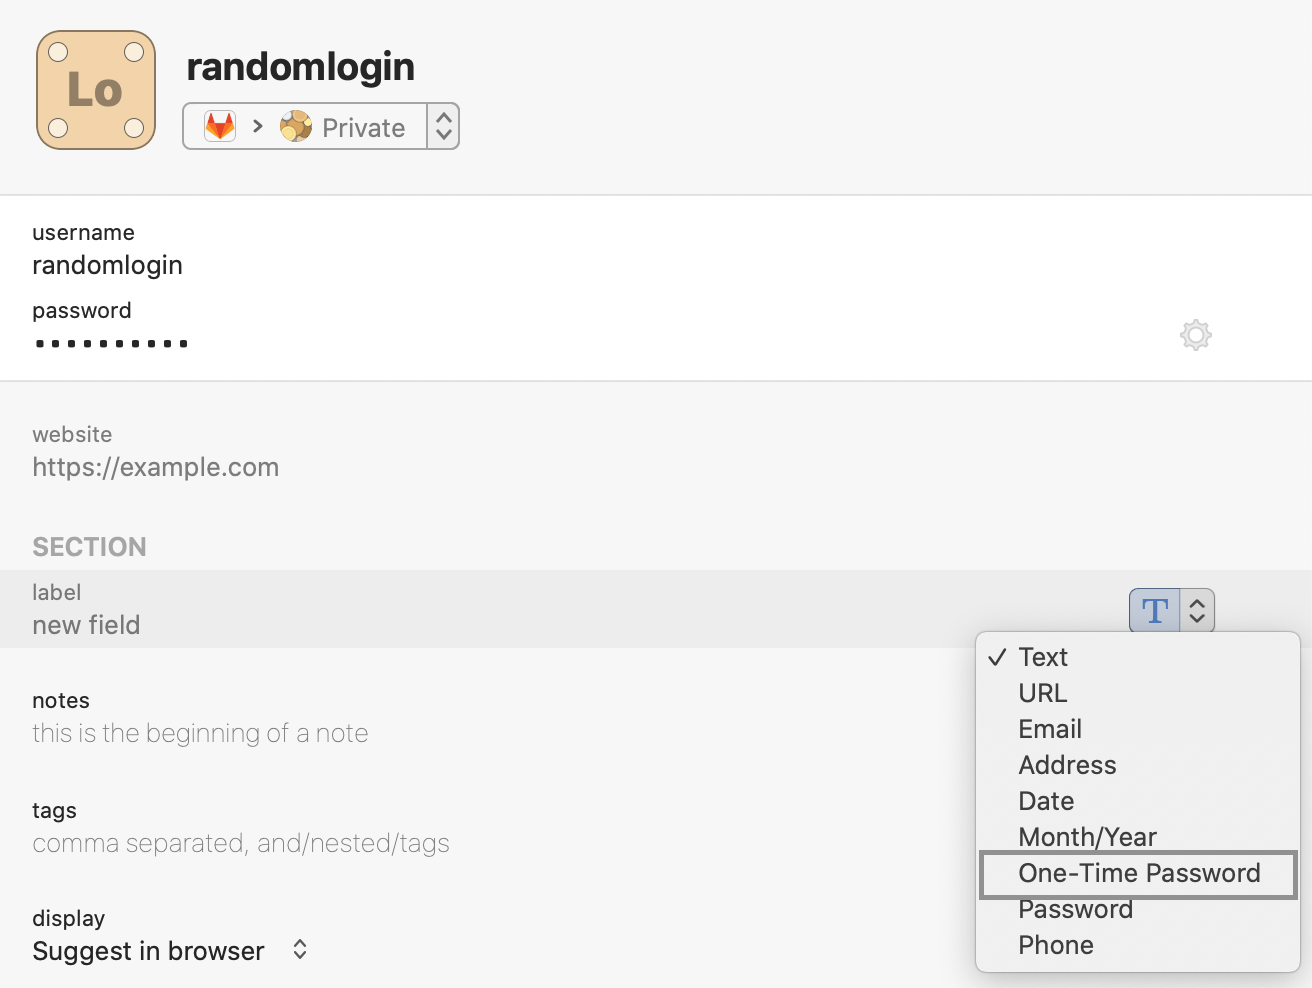
- Add a new field by clicking on the field type dropdown (it offers a “Text field” by default)
- Select One-Time Password
- Click QR code icon that appeared

- Scan QR code using the transparent window
- Click Save
- 2FA code should be displayed now
Please refer to demo video 1password TOTP setup
Please refer to the 1Password blog for more information on how TOTP works.
If scanning the QR code using the “transparent window” with the 1Password Mac app fails on a recent macOS, please consider using the 1Password iOS app instead. This mechanism works the same way, and supports Touch ID to login.
If unsure which mechanism to use, we require using WebAuthn (when possible) as a TOTP for 2FA.
Follow this guideline when getting a new mobile device, if you are using Google Authenticator as a TOTP mechanism.
There may be cases where TOTP might be used with a non-GitLab account. If you have any questions and need to speak with the Security Team, you can contact Security
Passkeys
1Password has implemented a feature supporting for Passkeys, which are the credentials used in FIDO2/WebAuthn on sites such as Okta. This feature can allow passwordless sign in to sites that require username and password. Passkeys can also serve as a type of MFA. Passkeys store a public key in the app and a private key within the 1Password vault.
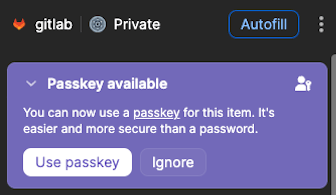
Setting up Passkey is simple. Open a login page or select the sign in button on the website or app. You’ll typically see a prompt to complete an authentication step, usually with Biometrics, or YubiKey. You may see something like the image below.
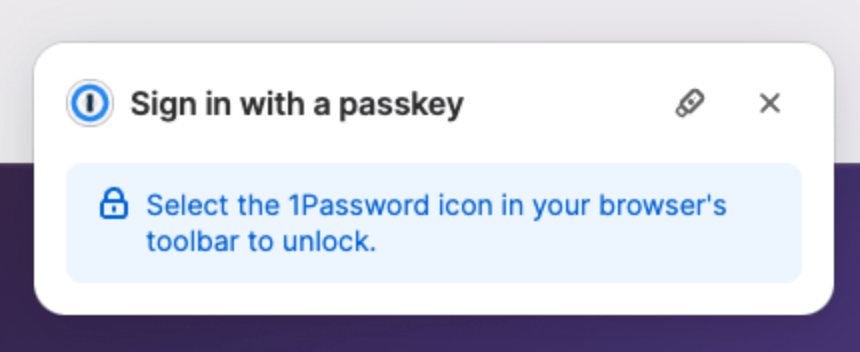
At that point, the key pairing is created and 1Password will use this method of sign in going forward. Note, not all sites are supported at this time. If you’re curious about setting this up on a site you use, you can always open 1Password, select that login tab, and see if the “Passkey Available” notification is showing.
You may need to follow different steps with the specific sites in order to complete Passkey setup, follow the prompts of the site and 1Password and you’ll be set for logging in with a Passkey via 1Password.
Example usage
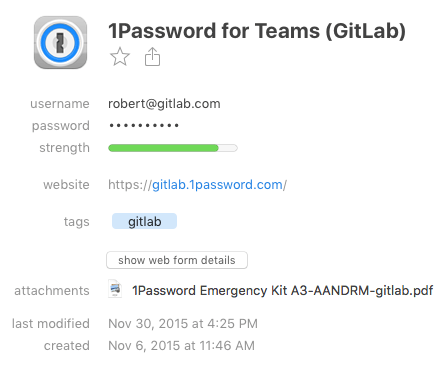
This is an example of how Robert, one of our developers, uses 1Password:
Once you fully commit to using 1Password to manage all of your security information, it really does make life easier.
I memorize one strong password and let the app generate everything else. Every site I use has a unique password that I can’t compromise because I don’t even know it, and a hacked site can’t compromise it because the password is never re-used on another site.
I store my shipping and credit card info in 1Password and use the browser extension to quickly fill out shipping and billing information on shopping sites.
I store my passport data, along with a digital scan, in 1Password; driver’s license info and scan; insurance info; software license keys; any important information that needs to be secure but still easily accessible when I need it, from anywhere. I sync my personal vault to my personal iCloud so it’s available on my phone, tablet, laptop, and desktop.
Even my 1Password for Teams account information is stored in my personal Primary vault, with the Emergency Kit PDF as a secure attachment. I have no idea what the password is. I’ve never actually typed it. And that’s the idea:
Traveling with 1Password
When traveling with a device that has access to the GitLab 1Password vaults, be sure to enable Travel Mode in 1Password. Travel Mode removes copies of any 1Password vaults that are not tagged as “safe for travel” from your mobile devices. None of the GitLab shared vaults are marked as safe for travel so you will need to either create a dedicated travel vault or mark your Private vault as safe for travel.
Once you have enabled Travel Mode open 1Password on each device you will be taking with you so that it can sync with 1Password.com and remove any vaults that cannot be used while traveling.
For more information on Travel Mode and how it works, see the AgileBits blog.
Securing Docker Registry User Credentials
Docker can store user credentials in an external credential store as a more secure alternative to storing credentials in the Docker configuration file.
Using osxkeychain (macOS)
To configure Docker to use osxkeychain for secure credential storage, follow these steps:
-
Install the
docker-credential-osxkeychainhelper via Homebrew:brew install docker-credential-helper -
Configure
~/.docker/config.jsonto useosxkeychainas your Docker credstore:{ "credsStore": "osxkeychain" } -
Log in using
docker login registry.gitlab.com, and enter your email and password (PAT) when prompted. -
Validate that the credentials were not saved as base64-encoded text in
~/.docker/config.json.
Using pass (Linux)
Prerequisites
To configure Docker to use pass for secure credential storage, follow these steps:
-
Download the latest
docker-credential-passbinary from the releases page. -
Make the
docker-credential-passbinary executable withchmod +x docker-credential-pass. -
Move the
docker-credential-passbinary to your$PATH(e.g.,sudo mv docker-credential-pass-v0.8.0.linux-amd64 /usr/local/bin/docker-credential-pass). -
Obtain and copy the GPG key ID that
passwill use for encryption viagpg --list-secret-keys --keyid-format LONG. -
Initialize
passwithpass init <gpg-key-id>. -
Configure
~/.docker/config.jsonto usepassas a credstore:{ "credsStore": "pass" } -
Log in using
docker login registry.gitlab.com, and enter your email and password (a valid token) when prompted. -
Validate that the credentials were not saved as base64-encoded text in
~/.docker/config.json.
10563f30)
