Okta Admin Onboarding
Overview
The Okta Admin Onboarding runbook provides setup instructions for team members that have been provisioned a BLACK admin account to get started with setting up Okta, Google Workspace, and 1Password that is configured separately from your PURPLE accounts.
- Handbook Page: Access Level Wristband Colors
- Access Request Template: Admin_Black_Account
- Provisioner Time to Complete: 15-30 Minutes (not including approvals)
- User Time to Complete: 30 Minutes Assisted Sync or 45 Minutes Async
- Who Can Provision: Marcus Whitaker, Mohammed Al Kobaisy
- Runbook DRI: Marcus Whitaker, Peter Kaldis
Transferring Black Accounts to New Laptops
If you’re transferring a Black account to a new laptop, you will not need to follow all of the same tasks. This should be able to be self-serviced without a member of IT.
You should follow the process beginning at ### Task 1.2: Open a Chrome Incognito Browser Window. After that step, steps that are unique to the laptop transfer process are called out as notes under the relevant steps. If no note exists, you should assume the step is required for the transfer process.
Step 0: Provisioner Pre-Work
Provisioner Task 0.1: Verify Approvals
This runbook requires an access request using the Admin_Black_Account template. All approvals must be completed before provisioning can take place.
Provisioner Task 0.2: Create an Admin (Black) User Account
- Create a new 1Password record in your
AR Temp Credentialsvault namedOkta Temp Admin - {firstInitial}{lastName}-admin@gitlab.com. - Set the 1Password record username to `{firstInitial}{LastName}-admin@gitlab.com.
- Use 1Password to generate a 64-char password with numbers and symbols.
- Set the 1Password record website to
https://gitlab.okta.com. - Save the 1Password record.
- Open Chrome and choose your Admin profile.
- Sign in to
https://gitlab.okta.comand navigate to Directory > People. - Click the Add person button.
- User Type:
User - First name:
{First name} - Last name:
{Last name} - Username:
{firstinitial}{lastname}-admin@gitlab.com - Primary email:
{firstinitial}{lastname}-admin@gitlab.com - Activation:
Activate Now - I will set password:
(checked) - Password: (copy from 1Password)
- User must change password on first login:
(checked)
- User Type:
- Click Save.
Provisioner Task 0.3: Add User to Admin Group
This task will automatically provision the user’s Google Workspace email account based on the
G Suite SSOapplication being assigned to the group.
- Navigate to Directory > Groups.
- In the search bar, search for
tf_okta_admin_group_. - Right click and open the groups in a new tab.
tf_okta_admin_group_everyoneit_okta_admin_group_{role}(based on the access request)
- Open the
tf_okta_admin_group_everyonetab. - Click the Assign people button.
- In the search box, search for the
{firstInitial}{lastName}-admin@gitlab.com(not their non-admin user). - Click the
+icon to add the user to the group. - Click the Done button in the top right corner.
- Close the browser tab.
- Open the
tf_okta_admin_group_{role}tab. - Click the Assign people button.
- In the search box, search for the
{firstInitial}{lastName}-admin@gitlab.com(not their non-admin user). - Click the
+icon to add the user to the group. - Click the Done button in the top right corner.
- Close the browser tab.
Provisioner Task 0.4: Add User to 1Password Activation Workflow
This task requires the Google Workspace user account to be initialize for a few minutes before 1Password invitation email can be sent to avoid undeliverable bounce messages. Please take this opportunity to update the access request with the steps that you have performed so far (including screenshots) before starting these steps.
- Navigate to Directory > Groups.
- In the search bar, search for
1PW-Workflow-Activationand open the group. - Click the Assign people button.
- In the search box, search for the
{firstInitial}{lastName}-admin@gitlab.com(not their non-admin user). - Click the
+icon to add the user to the group. - Click the Done button in the top right corner.
- Close the browser tab.
Provisioner Task 0.5: Create 1Password Share Link for Temporary Credentials
STOP! This task should be performed on the same day that you perform the assisted onboarding call and should not be performed at the time that you provision the previous tasks.
- Open 1Password and locate the previous record that you created in your
AR Temp Credentialsvault namedOkta Temp Admin - {firstInitial}{lastName}-admin@gitlab.com. - Just before the Zoom assisted onboarding or migration call, right click on the 1Password record and choose Share.

- Provide the share link via Slack DM or Zoom chat.
This is ephemeral for 60 minutes and the password is about to be changed so there is not a security risk with how you share it.
Step 1: Okta Account Activation
Task 1.1: Copy 1Password Temporary Credentials to Vault
Laptop Transfer?: You can skip this task.
- Open the 1Password share link that the provisioner provided you in the Slack DM.
- If you are not signed into 1Password, you will
- Copy the 1Password record to your
Privatevault. - Open 1Password application and have this record available to quickly edit.
Task 1.2: Open a Chrome Incognito Browser Window
Until we have a Chrome Profile set up with your new email account, we will perform the next few tasks using an incognito browser window to avoid interfering with your existing Okta account.
Laptop Transfer?: You should start with this task.
- Open Google Chrome.
- Press Cmd+Shift+N to open a new incognito browser window.
Task 1.3: Sign in to Okta with temporary password
These steps should be performed in a Chrome incognito browser window.
Laptop Transfer? Use your existing 1Password credentials and recovery information from their previous device. Hint: Mac will copy and paste between devices if both use the same Apple ID to avoid typing out your passwords.
- Open the 1Password record for your temporary credentials to allow you to easily copy the password.
- Copy and paste
https://gitlab.okta.cominto the URL bar of your incognito browser window. - Use your new credentials:
- Username:
{firstInitial}{lastName}-admin@gitlab.com - Password: (copy from 1Password record)
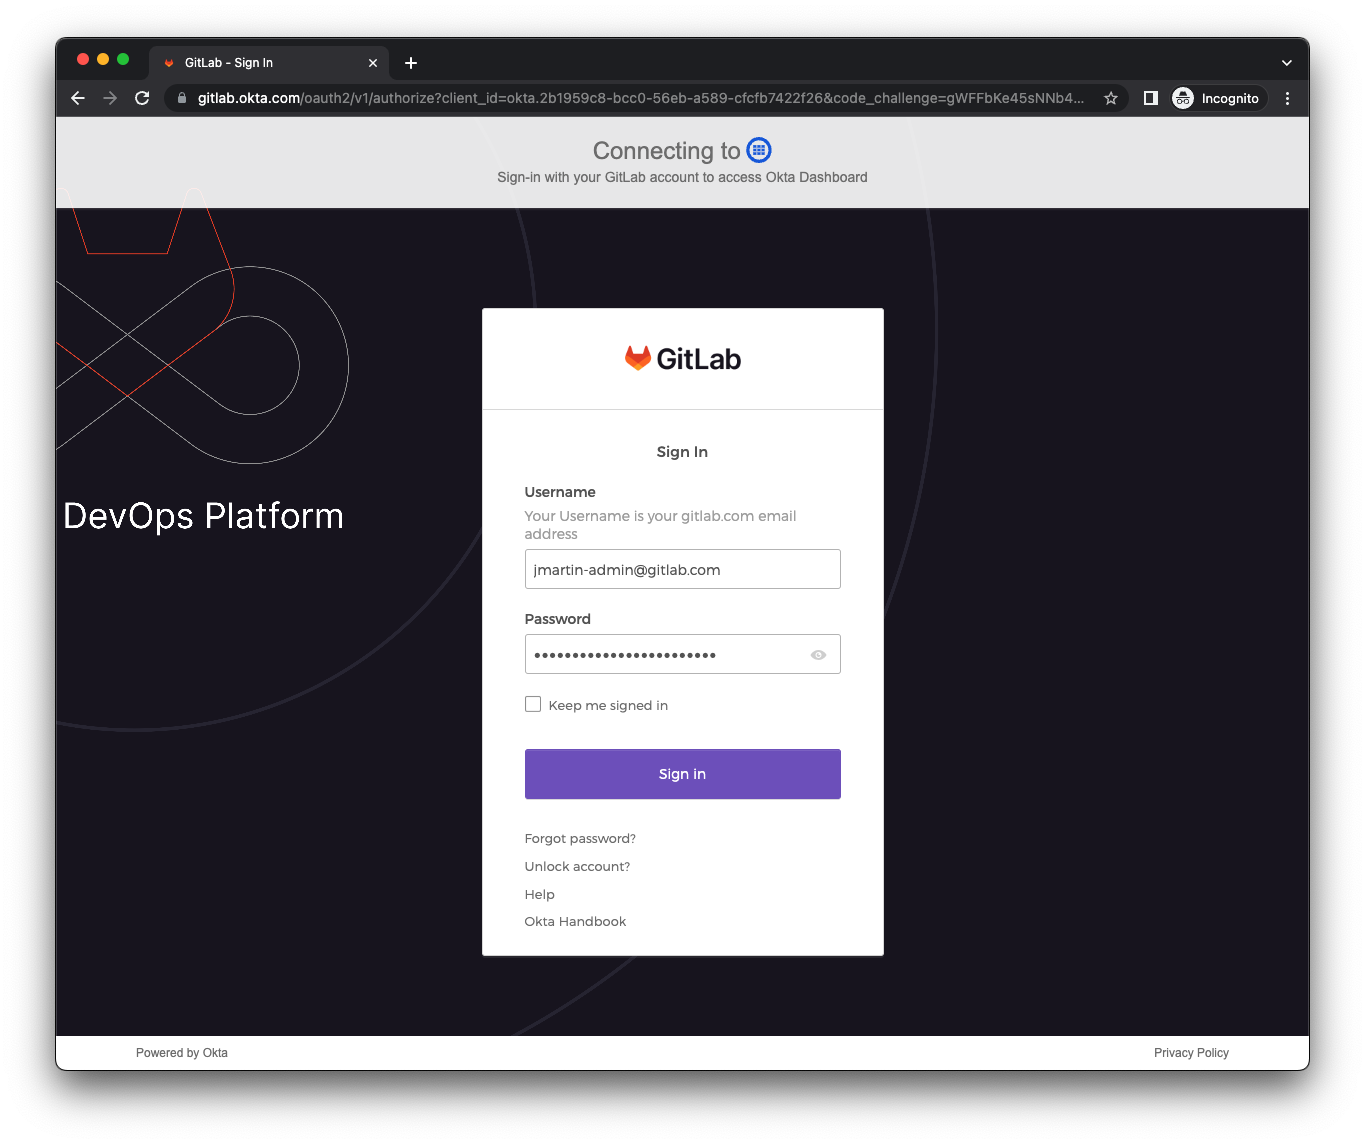
- Username:
Task 1.4: Change Password
Laptop Transfer? You can skip this task.
- You will be prompted that
Your Okta password has expired. - Edit the 1Password record and generate a new password with 64 characters (maximum length in 1Password Web UI). Click Save.
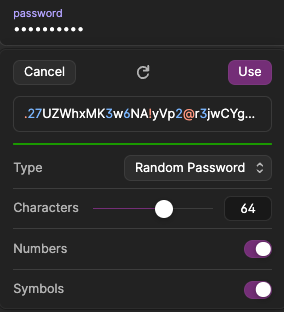
- Copy the generated password into the browser in the New password and Re-enter password fields.
- Click Change Password.
Task 1.5: Set up MFA with YubiKey 5 FIPS
Our Okta admin account policies require
YubiKey 5 FIPSmodels that are verified by IT Engineering behind-the-scenes. There is no way to restrict these models in the Okta configuration, so please be sure not to enroll your Mac Touch ID or other WebAuthn factors. You will be contacted by IT if any of your factors are not allowed and were removed administratively.Laptop Transfer? You can skip this task if you are using the same YubiKey from your old laptop.
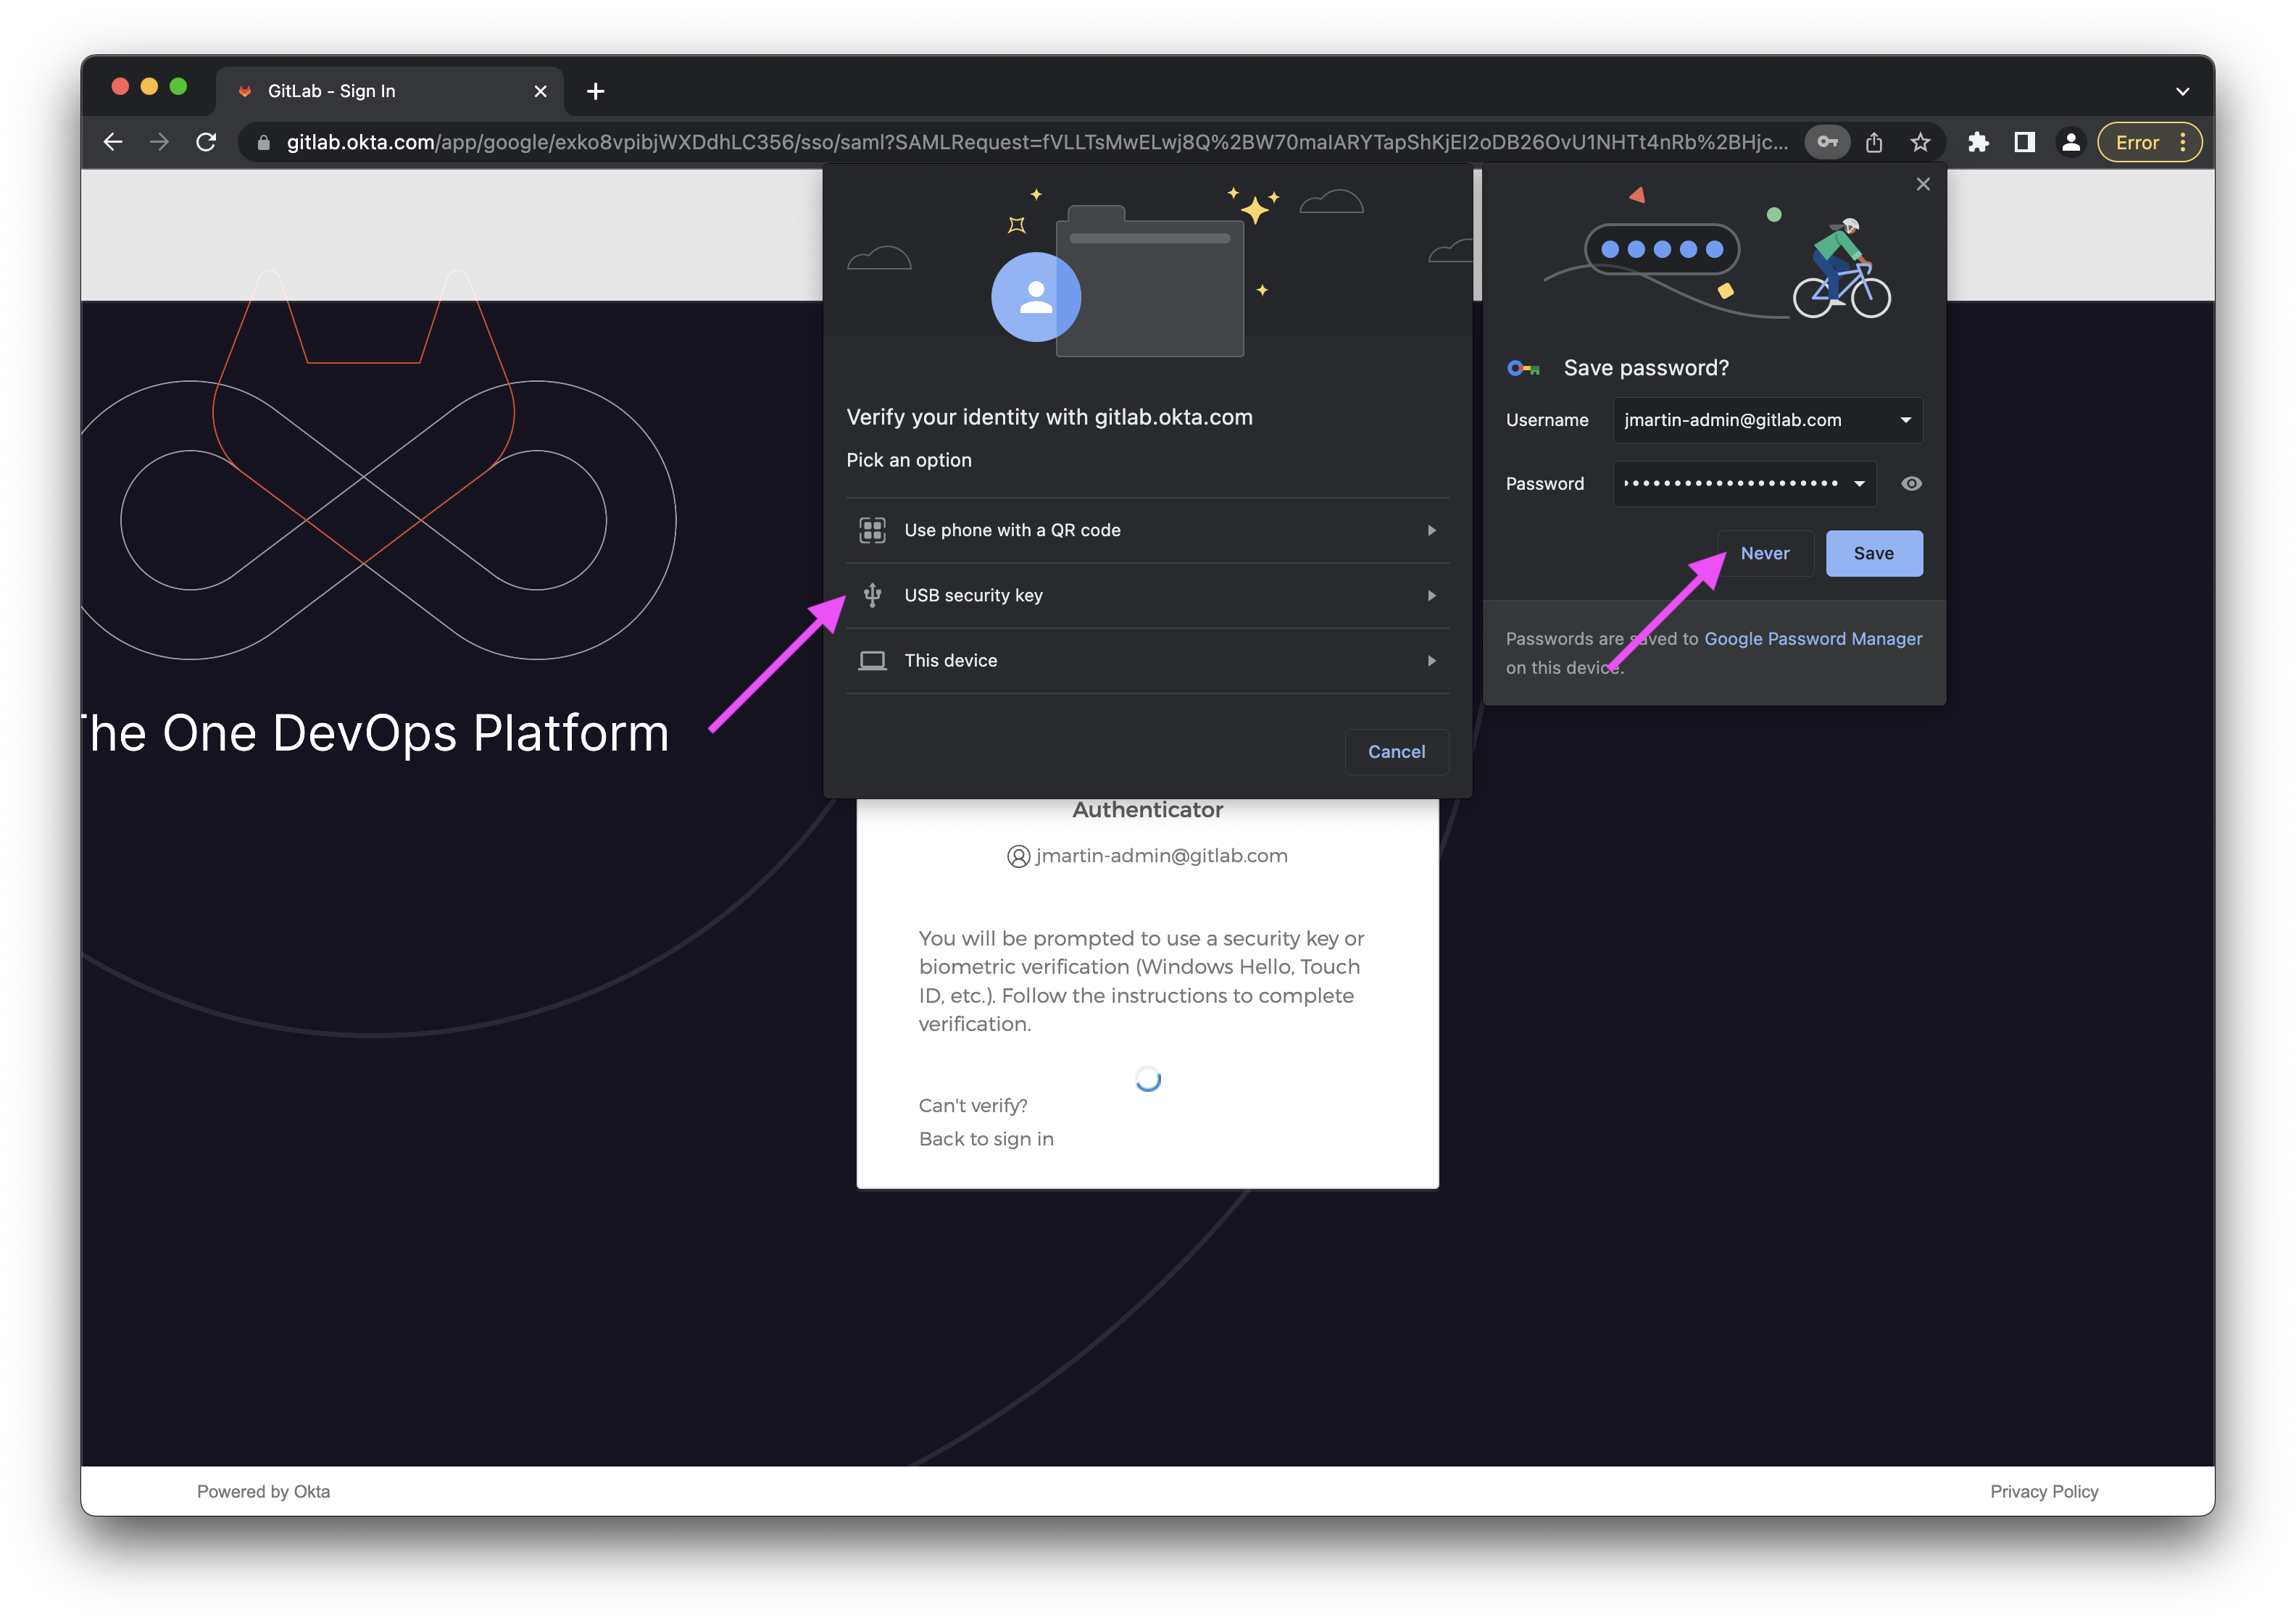
- You will be prompted to
Set up security methods. - Click the Set up button for
Security Key or Biometric Authenticator.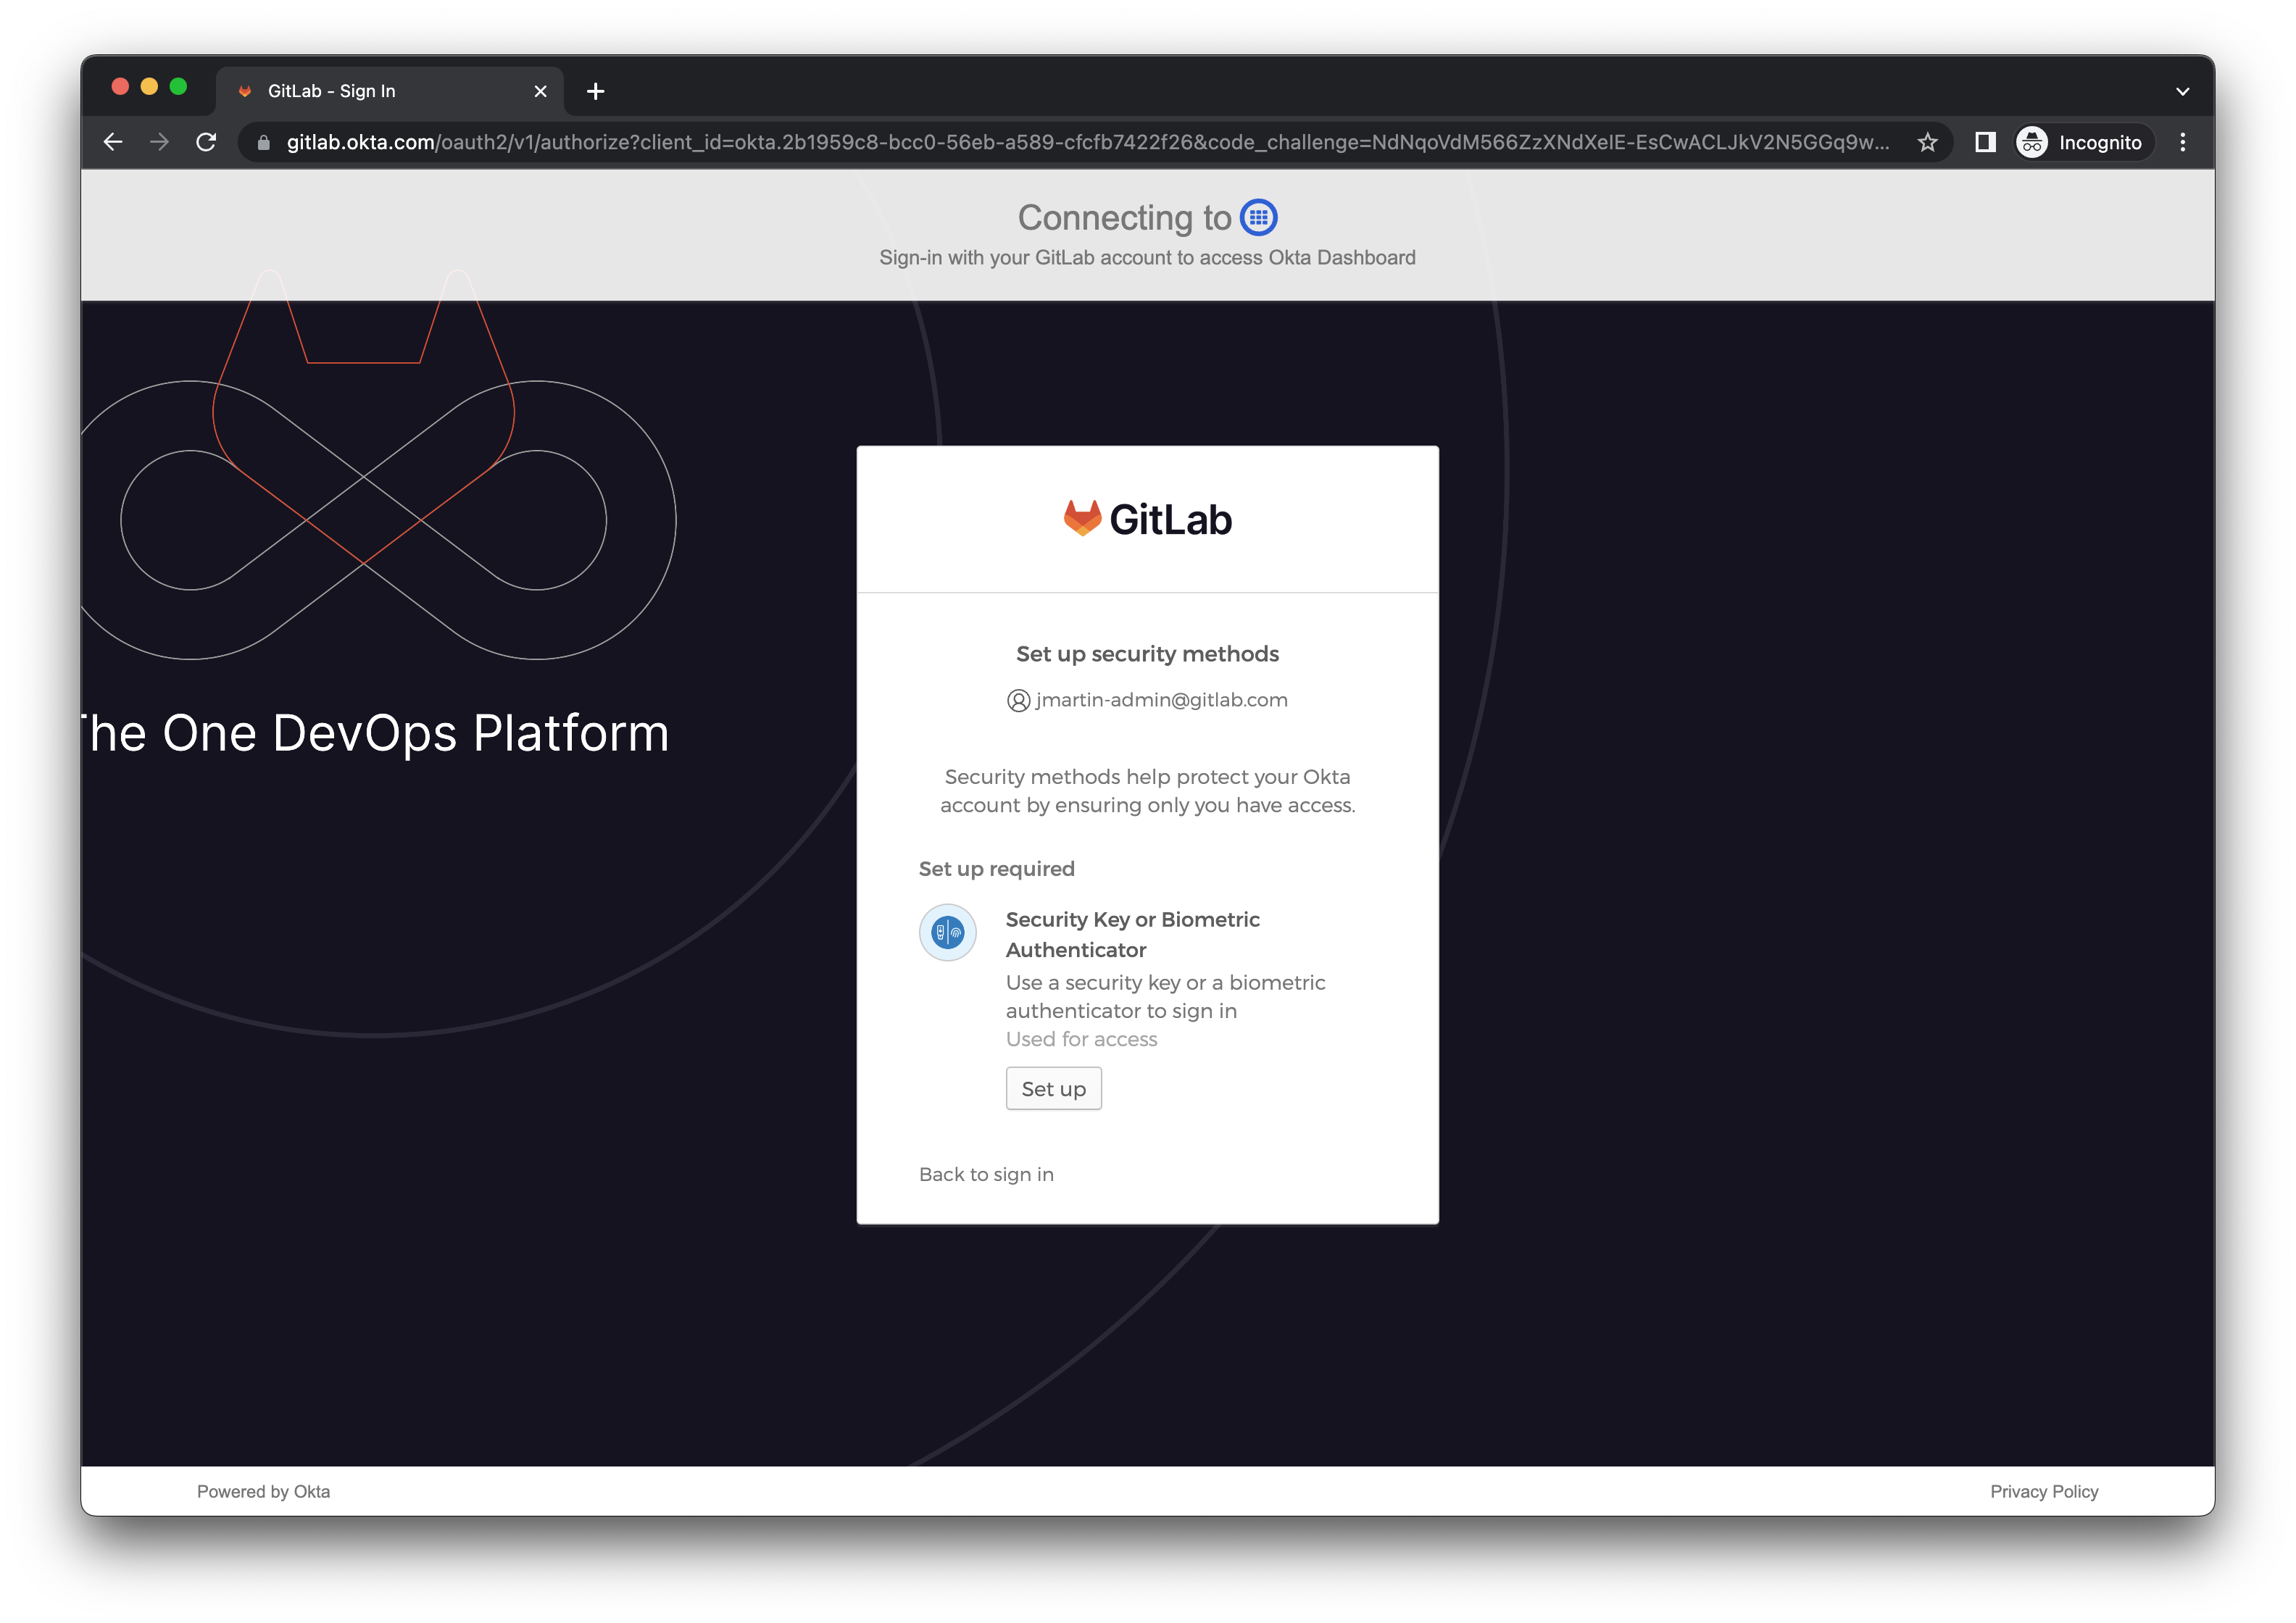
- On the popup prompt, select USB security key.
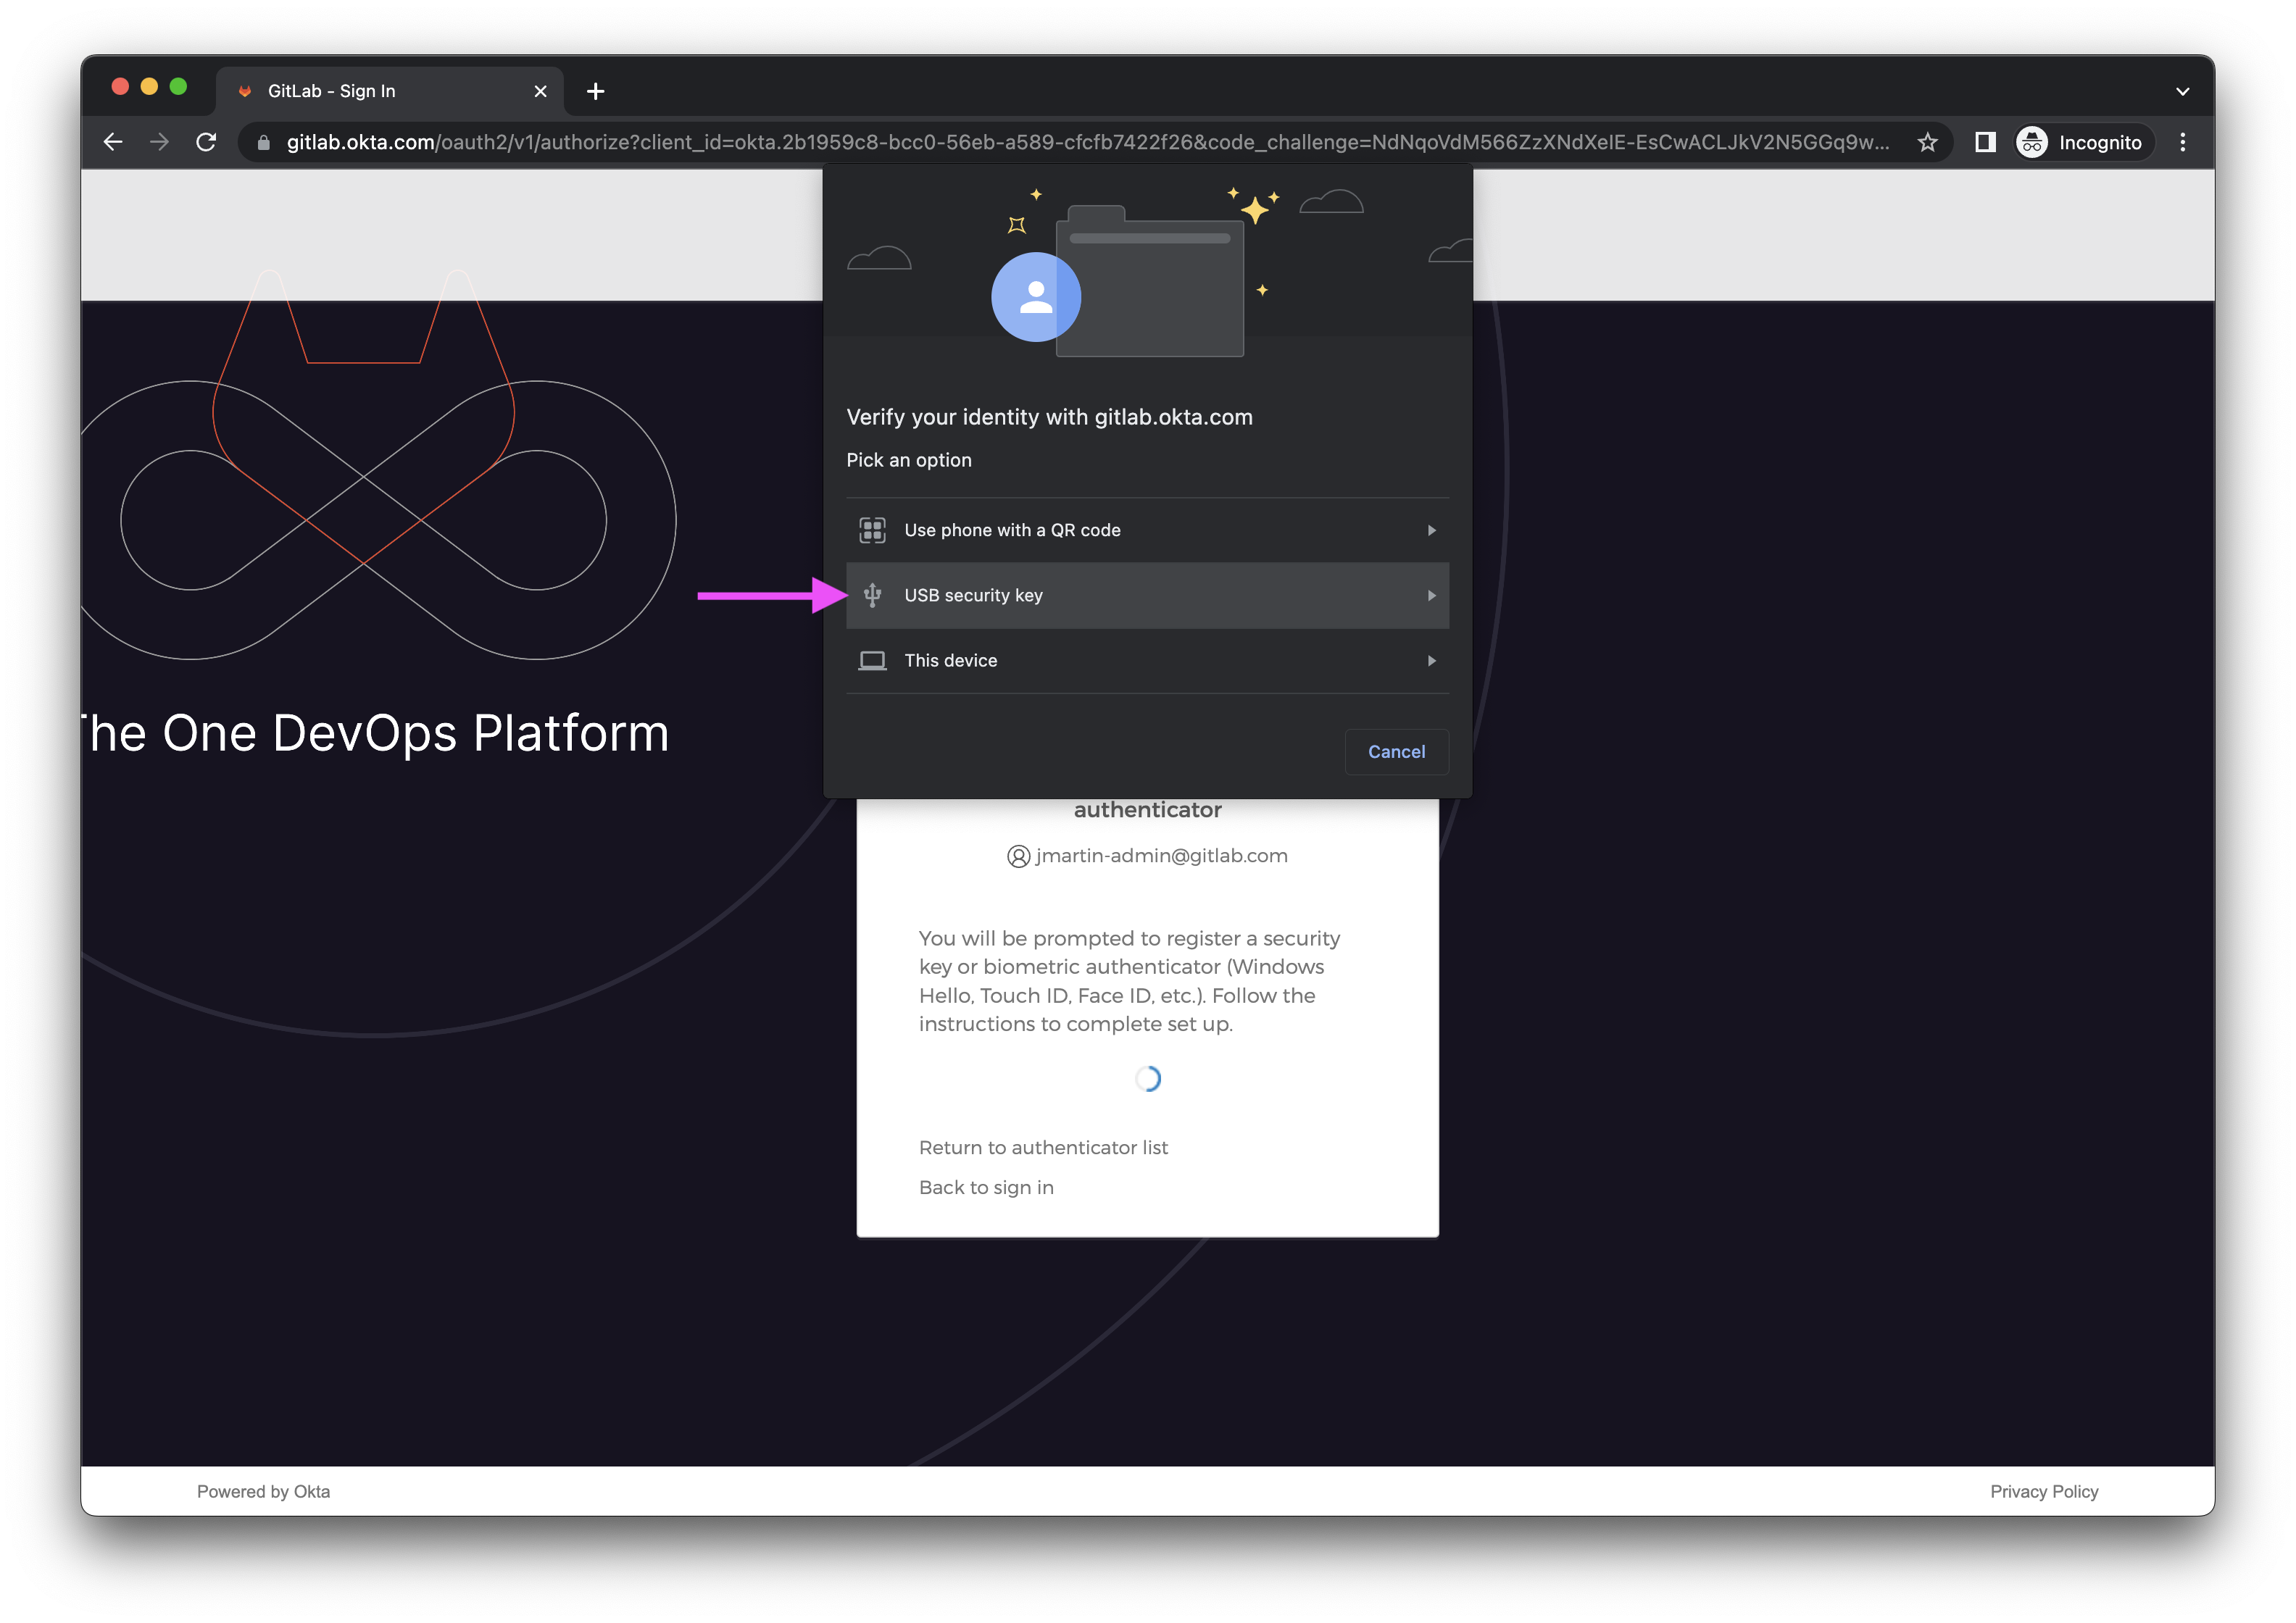
- Touch your YubiKey to activate MFA.
- You will be redirected to the Okta user dashboard for your new account.
Step 2: Google Account Activation
Task 2.1: Configure your Google Account Profile Picture
Laptop Transfer? You can skip this task.
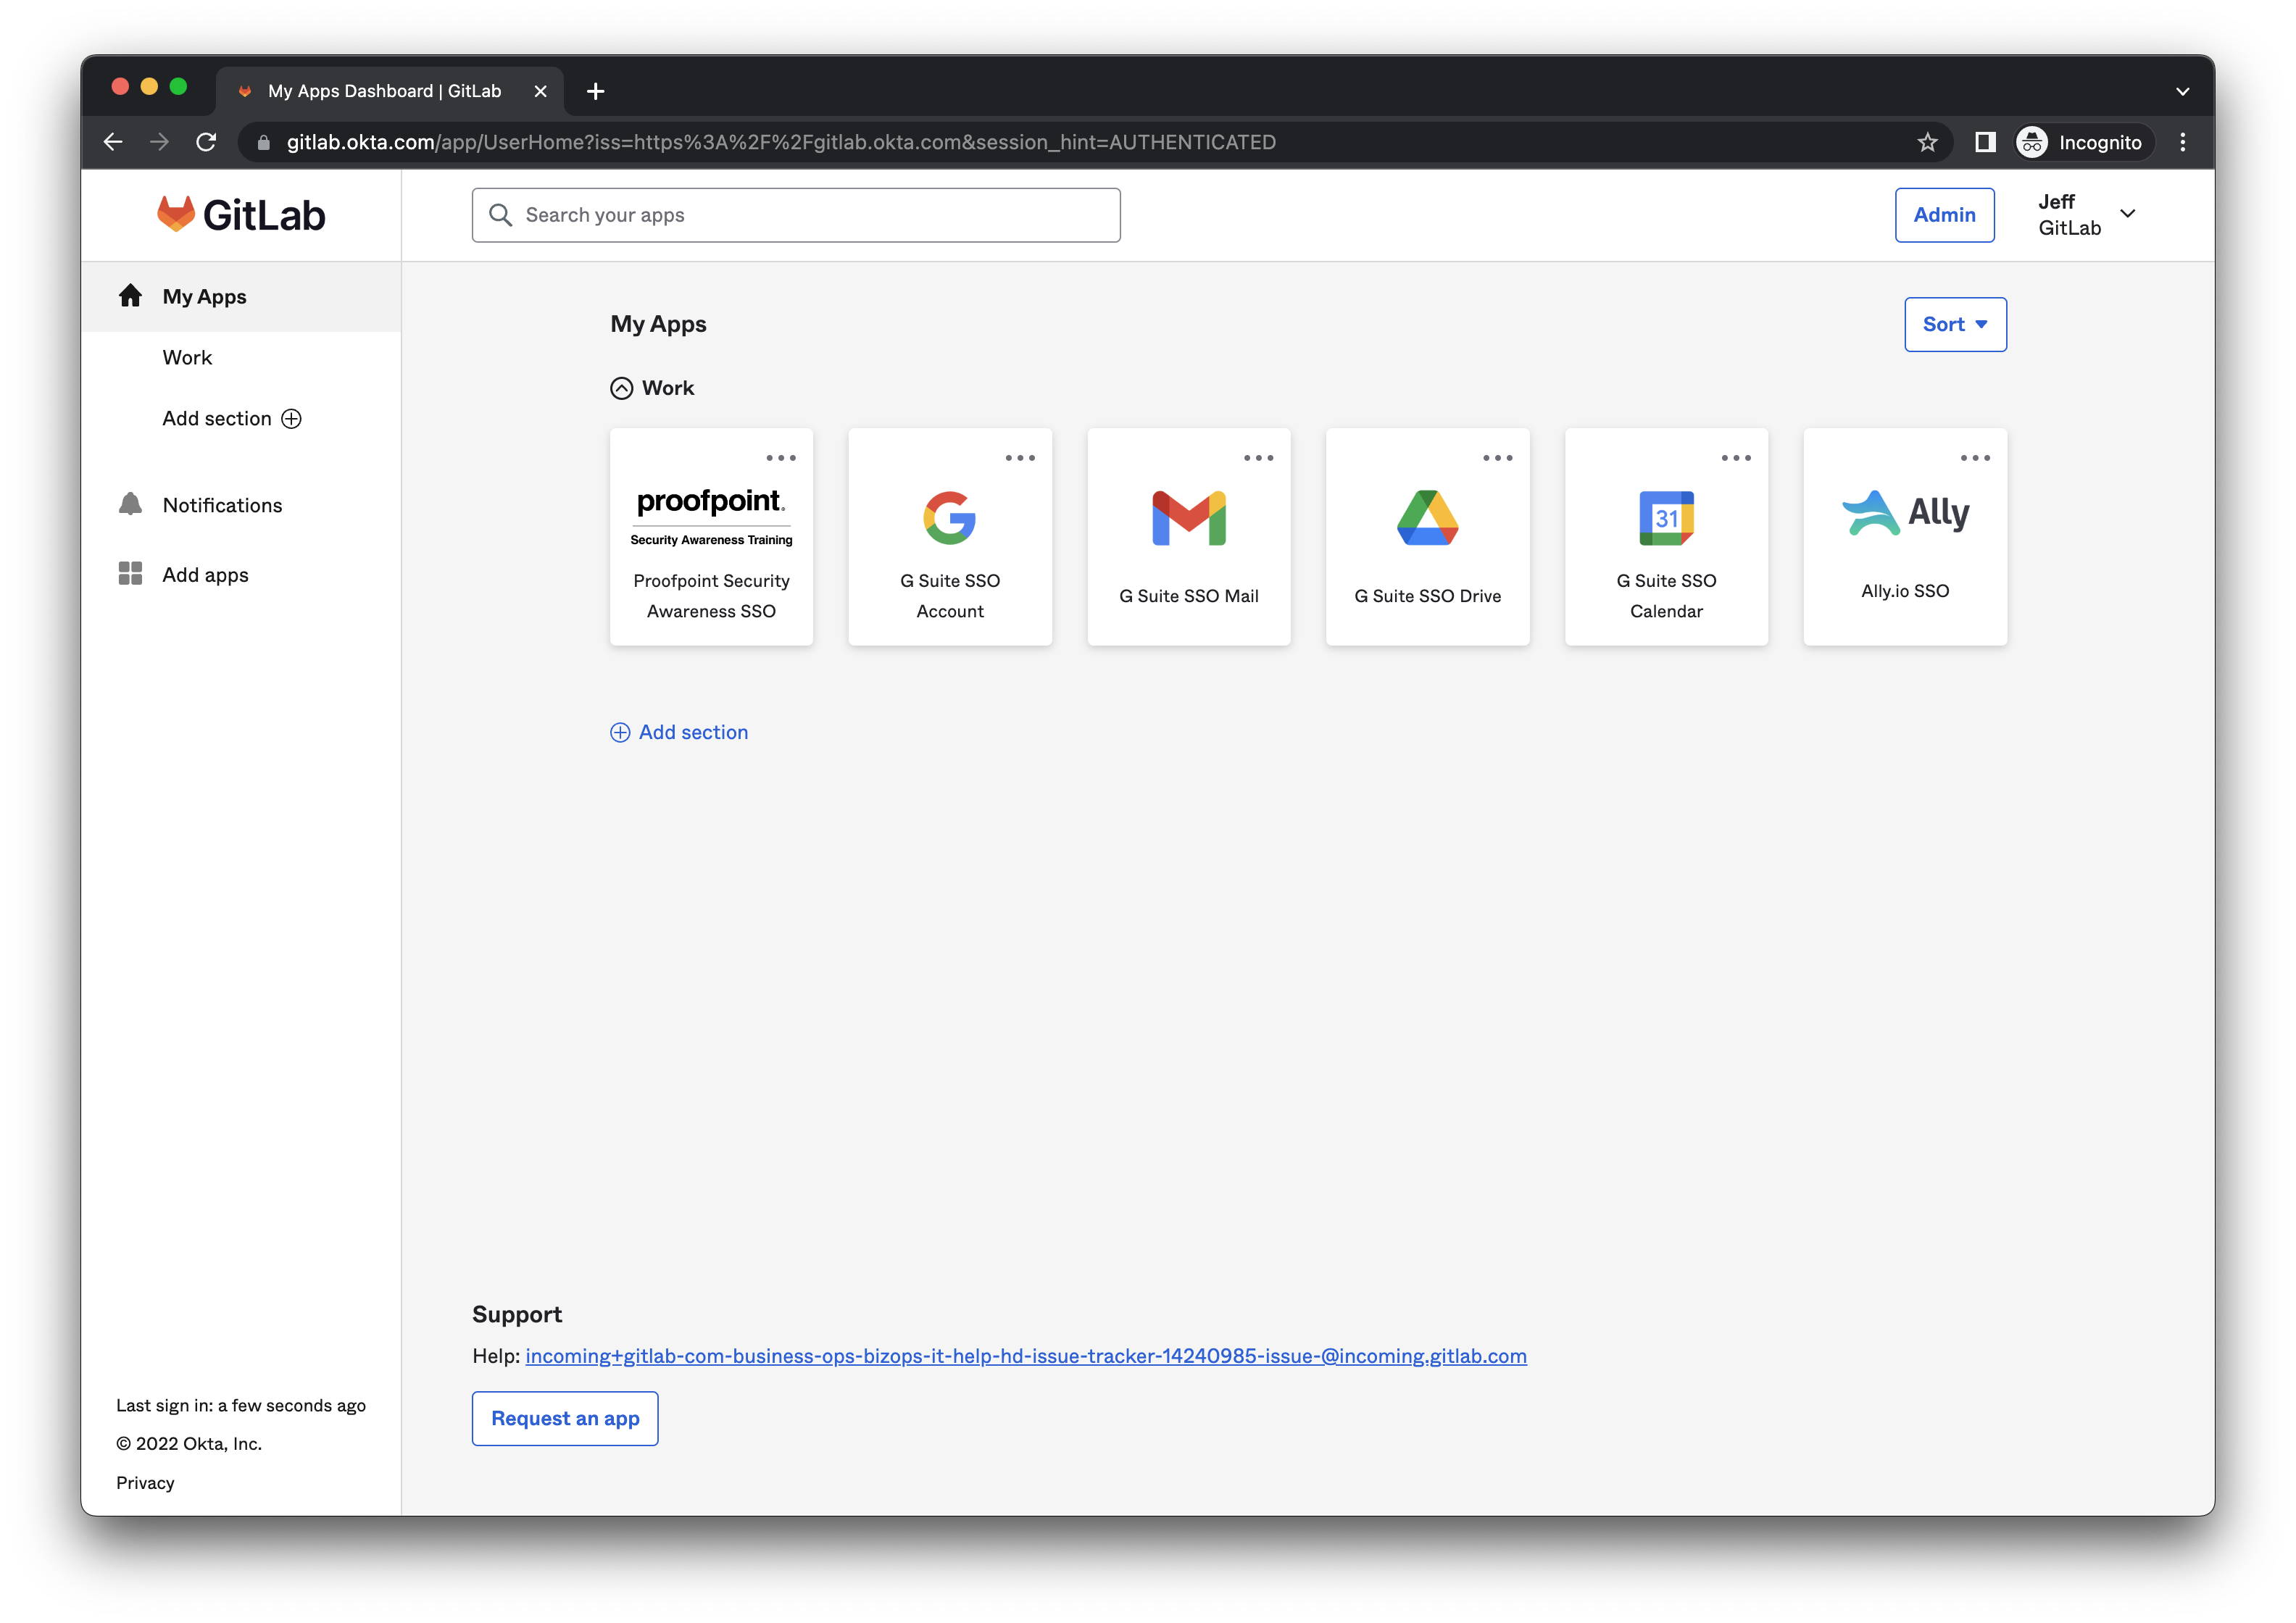
- On the Okta user dashboard for your new account, click the
G Suite SSO Accounttile. - On the
Welcome to your new accountscreen with the terms and conditions, click the I understand button.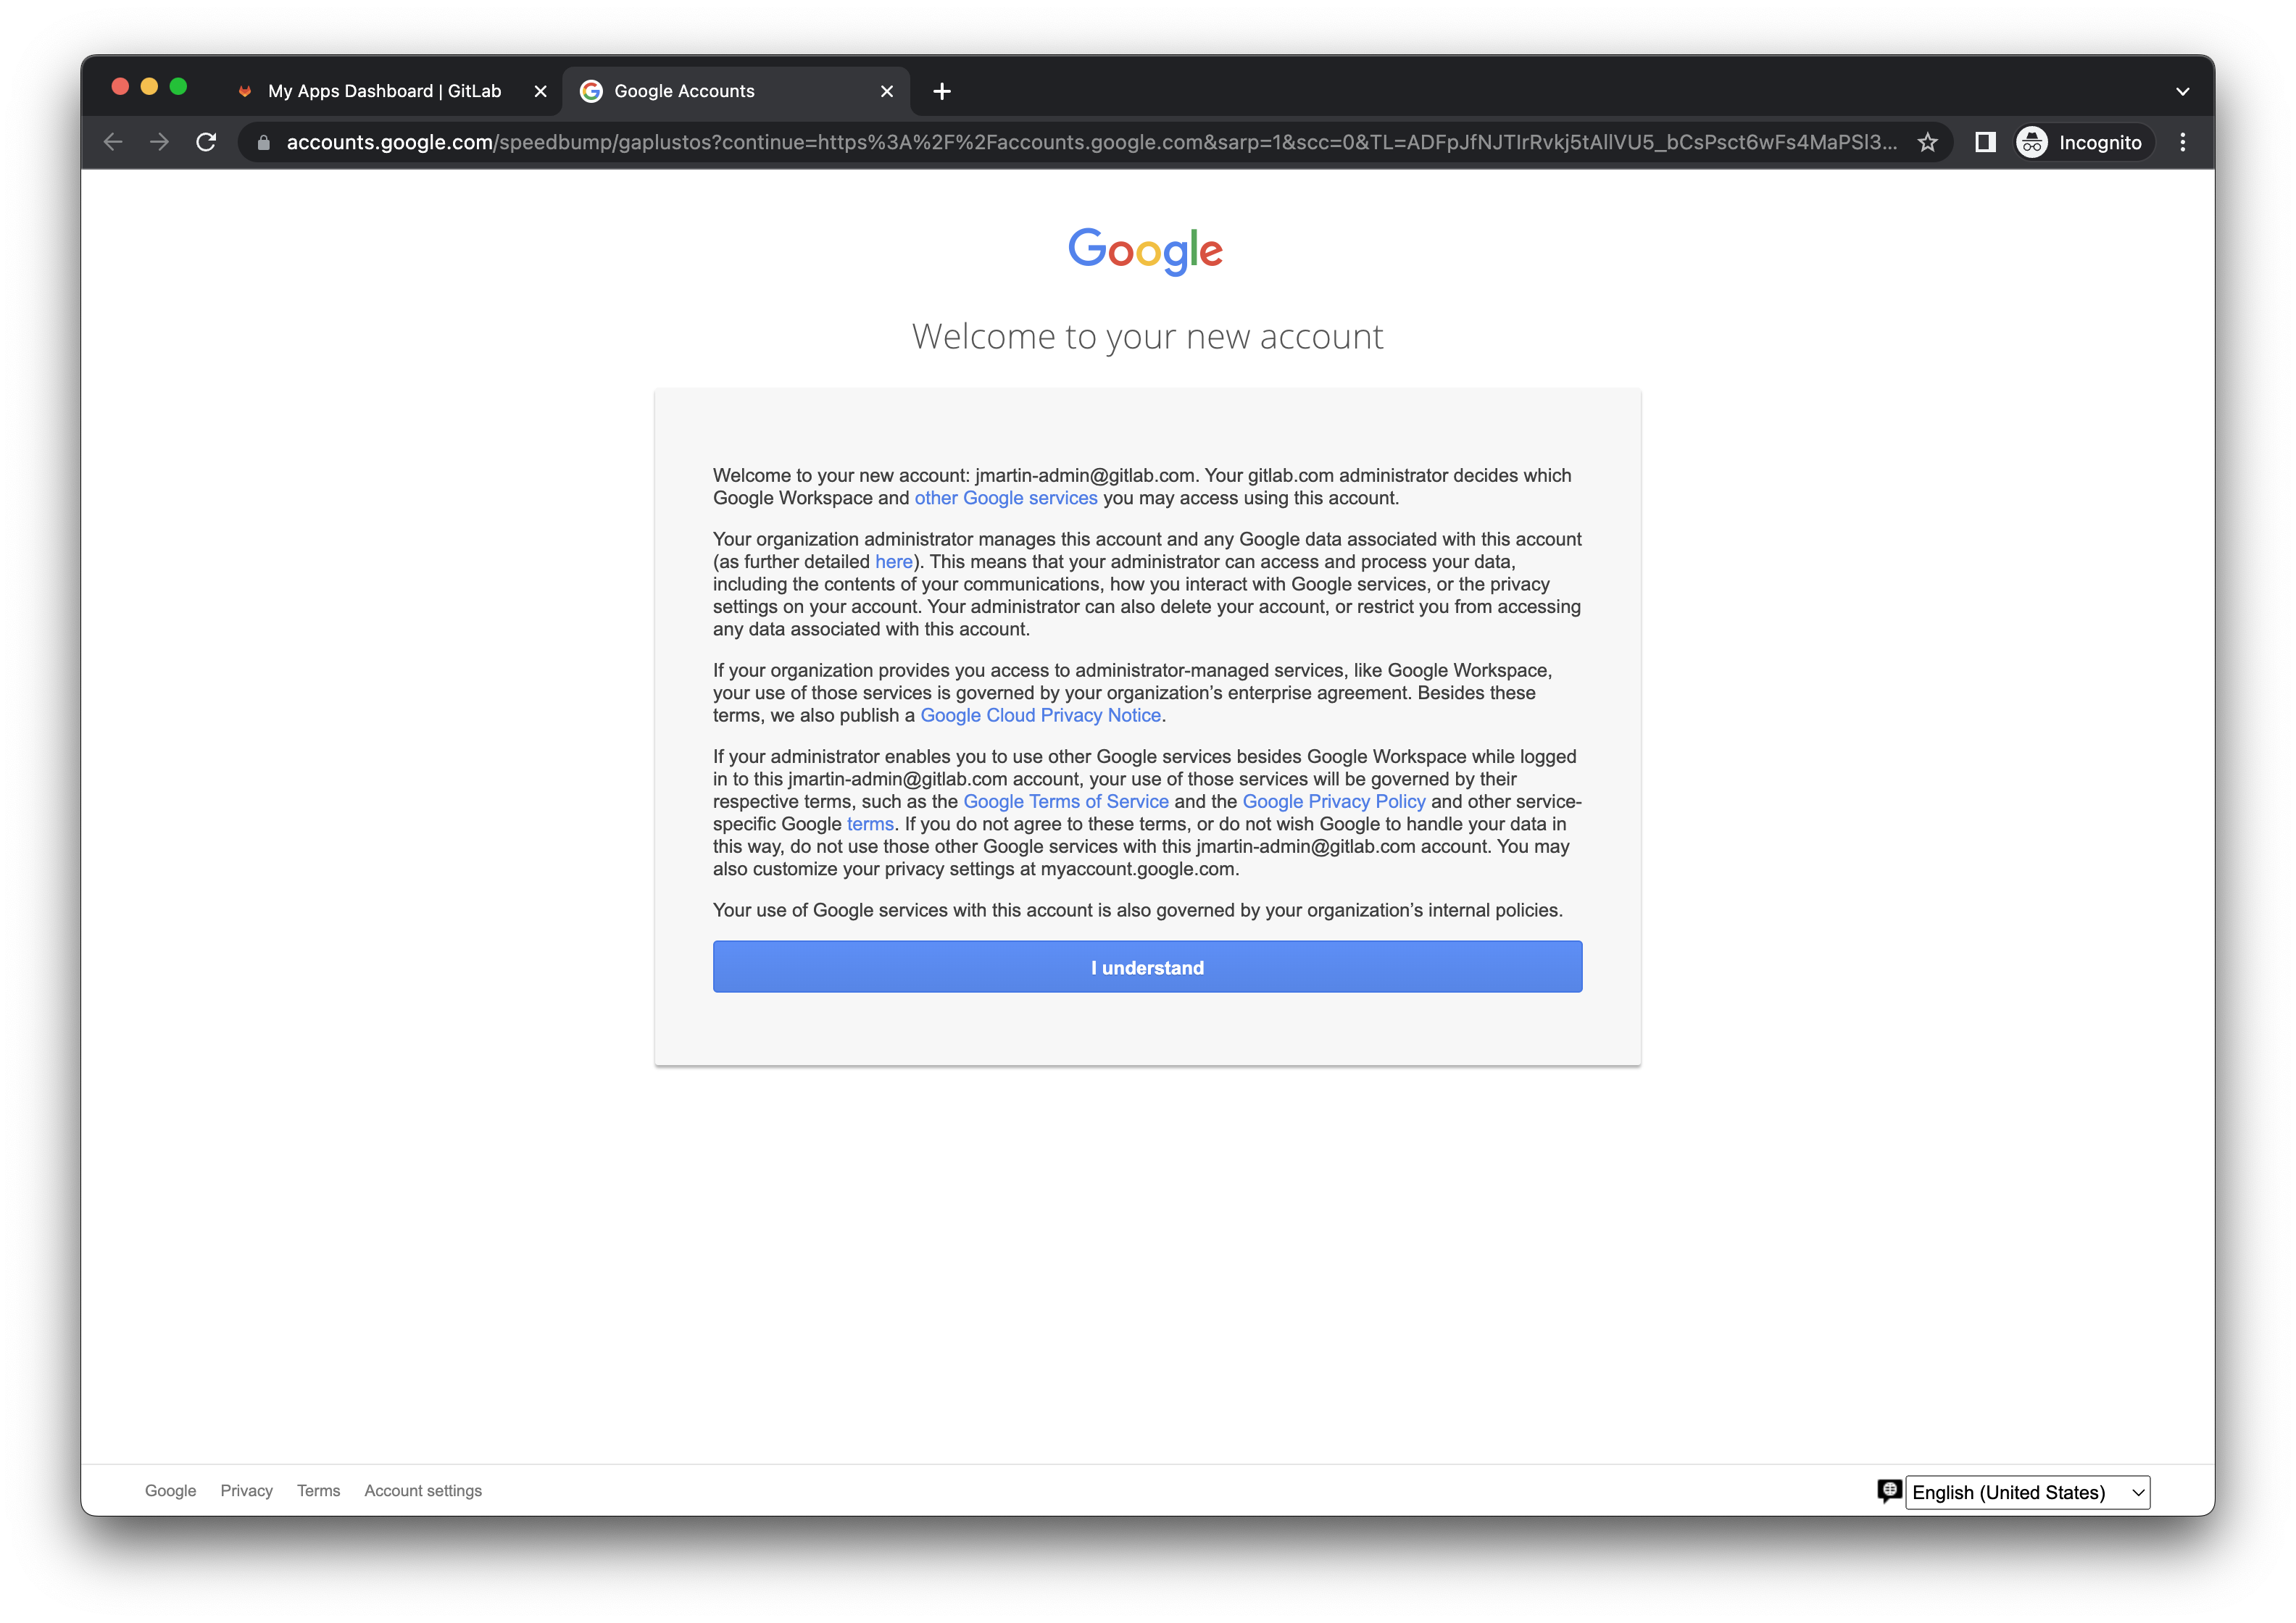
- You will be redirected to the Google Account homepage.
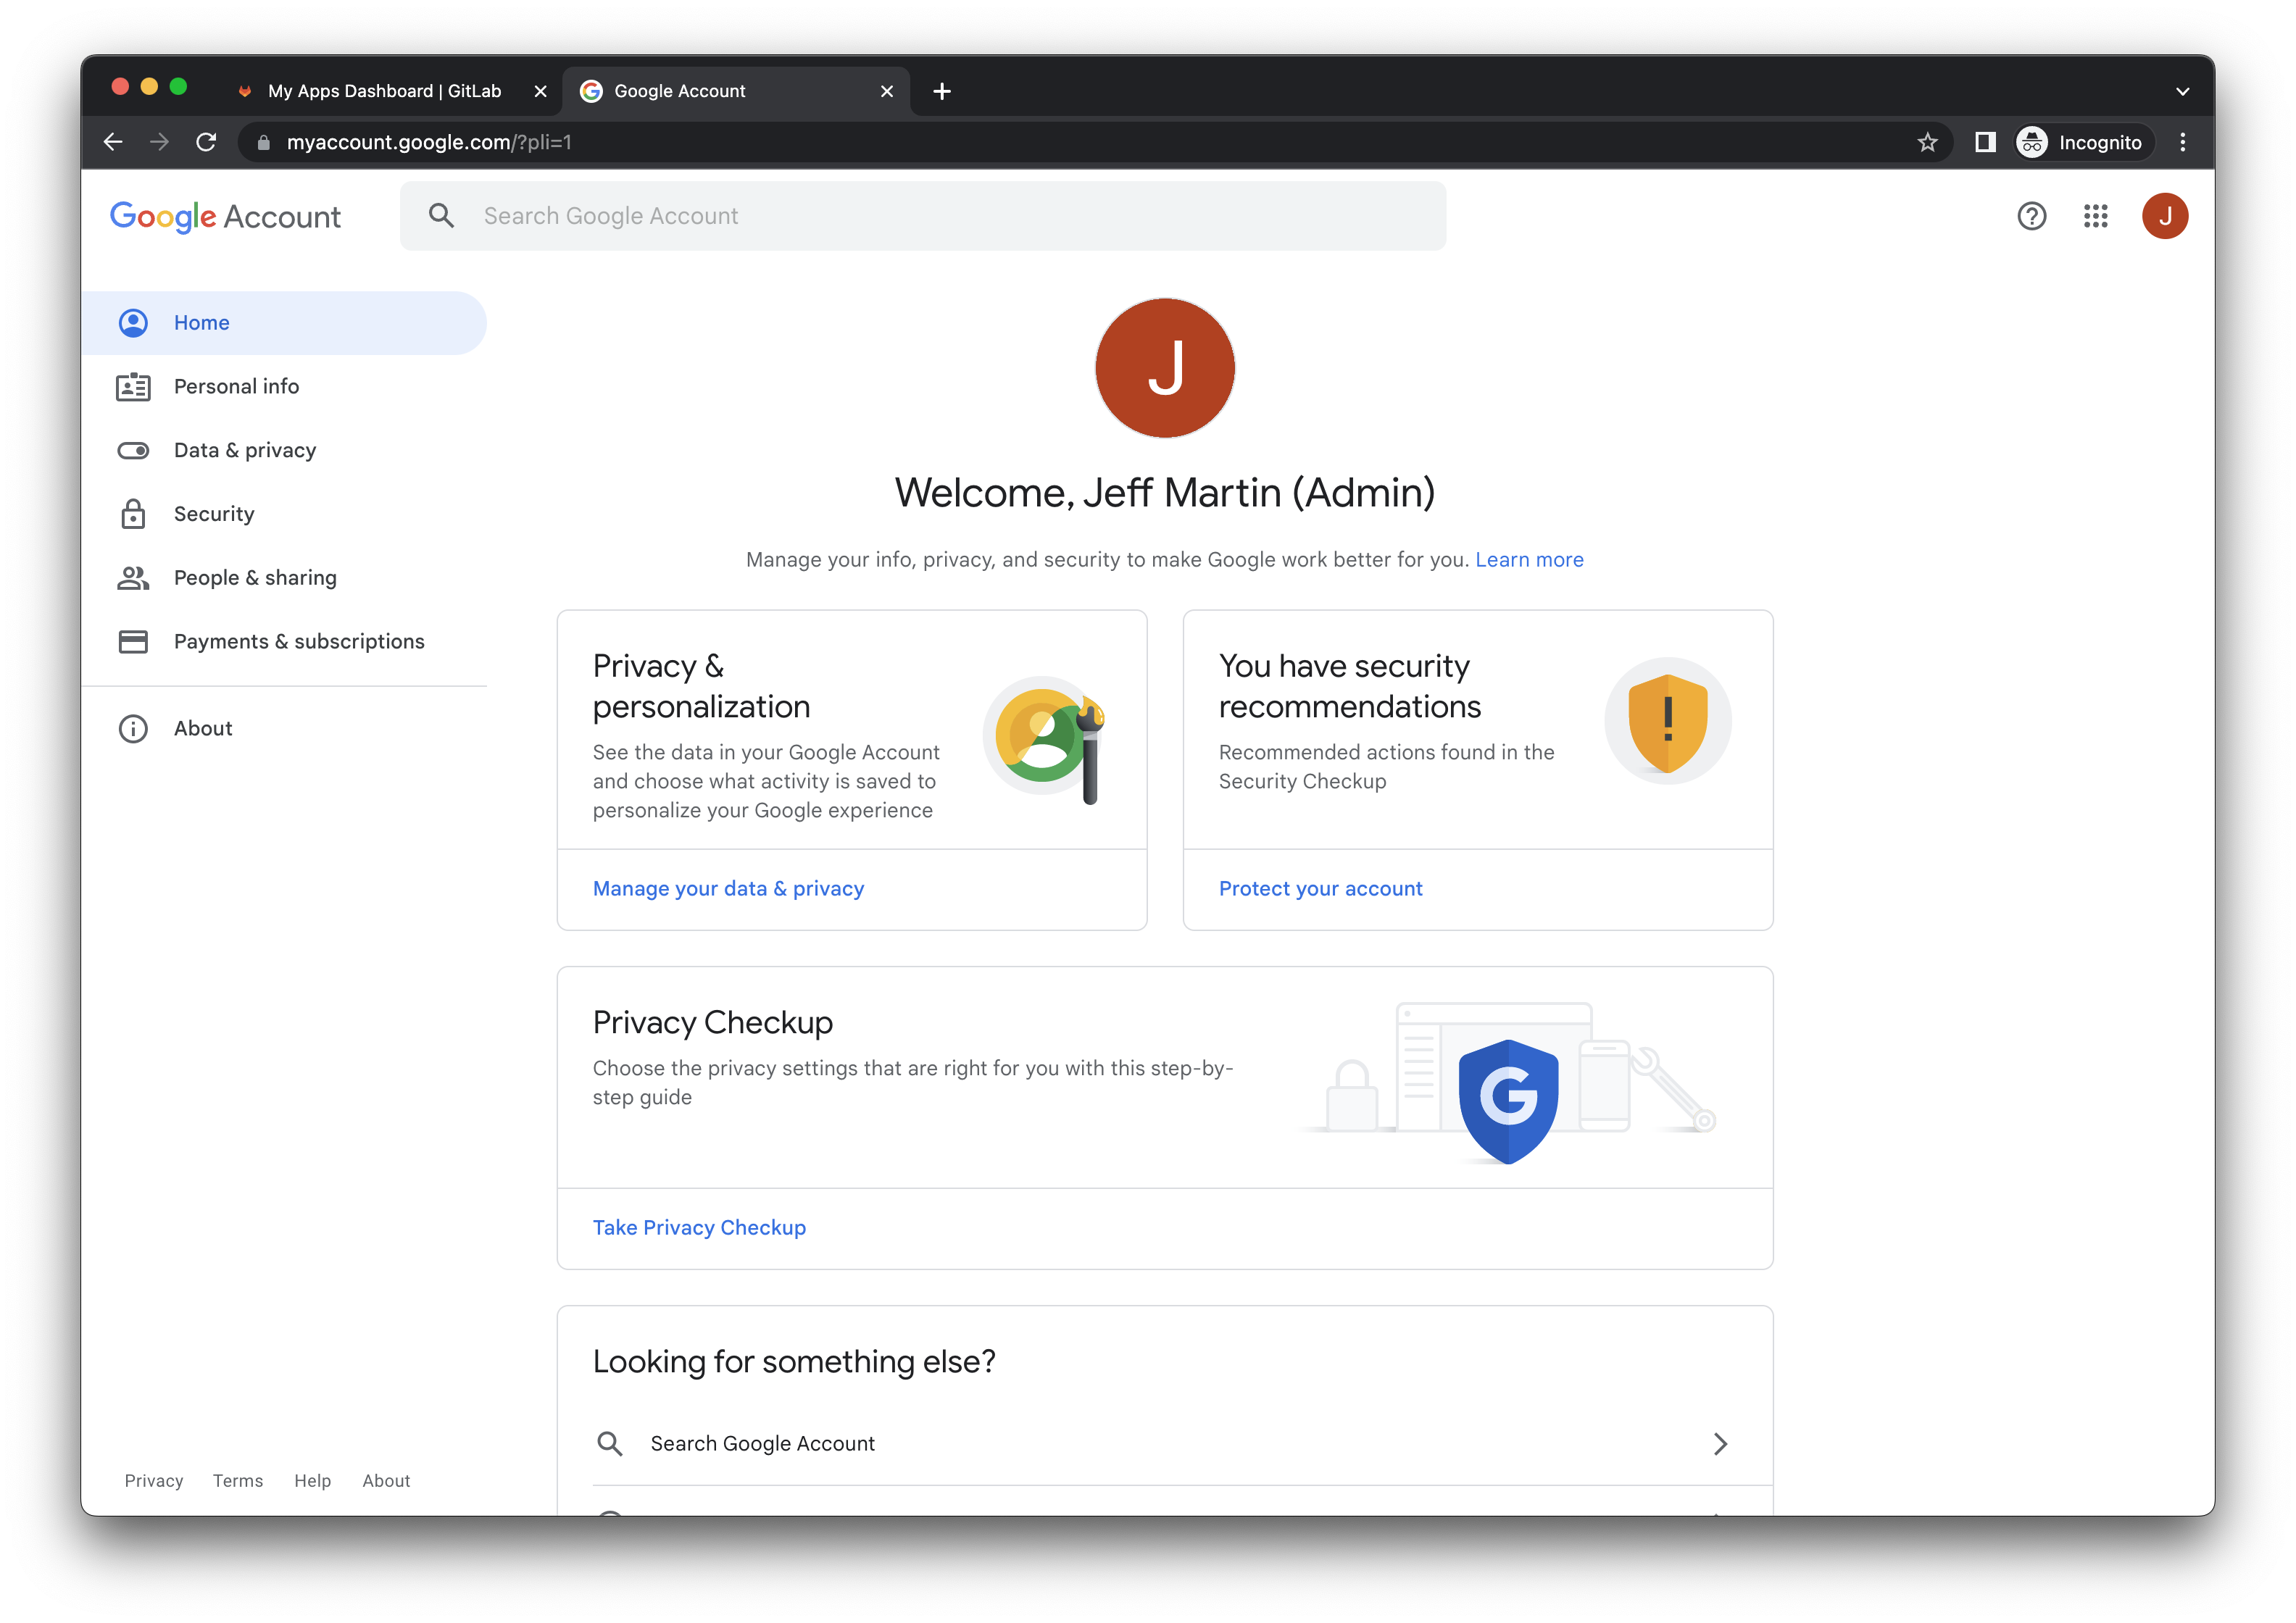
- Click the Personal Info link in the left navigation.
- Click the Photo icon to upload an avatar. If you don’t have a picture readily available, navigate to
https://gitlab.com/{username}and right click on your avatar and choose Save image as to save it to your desktop.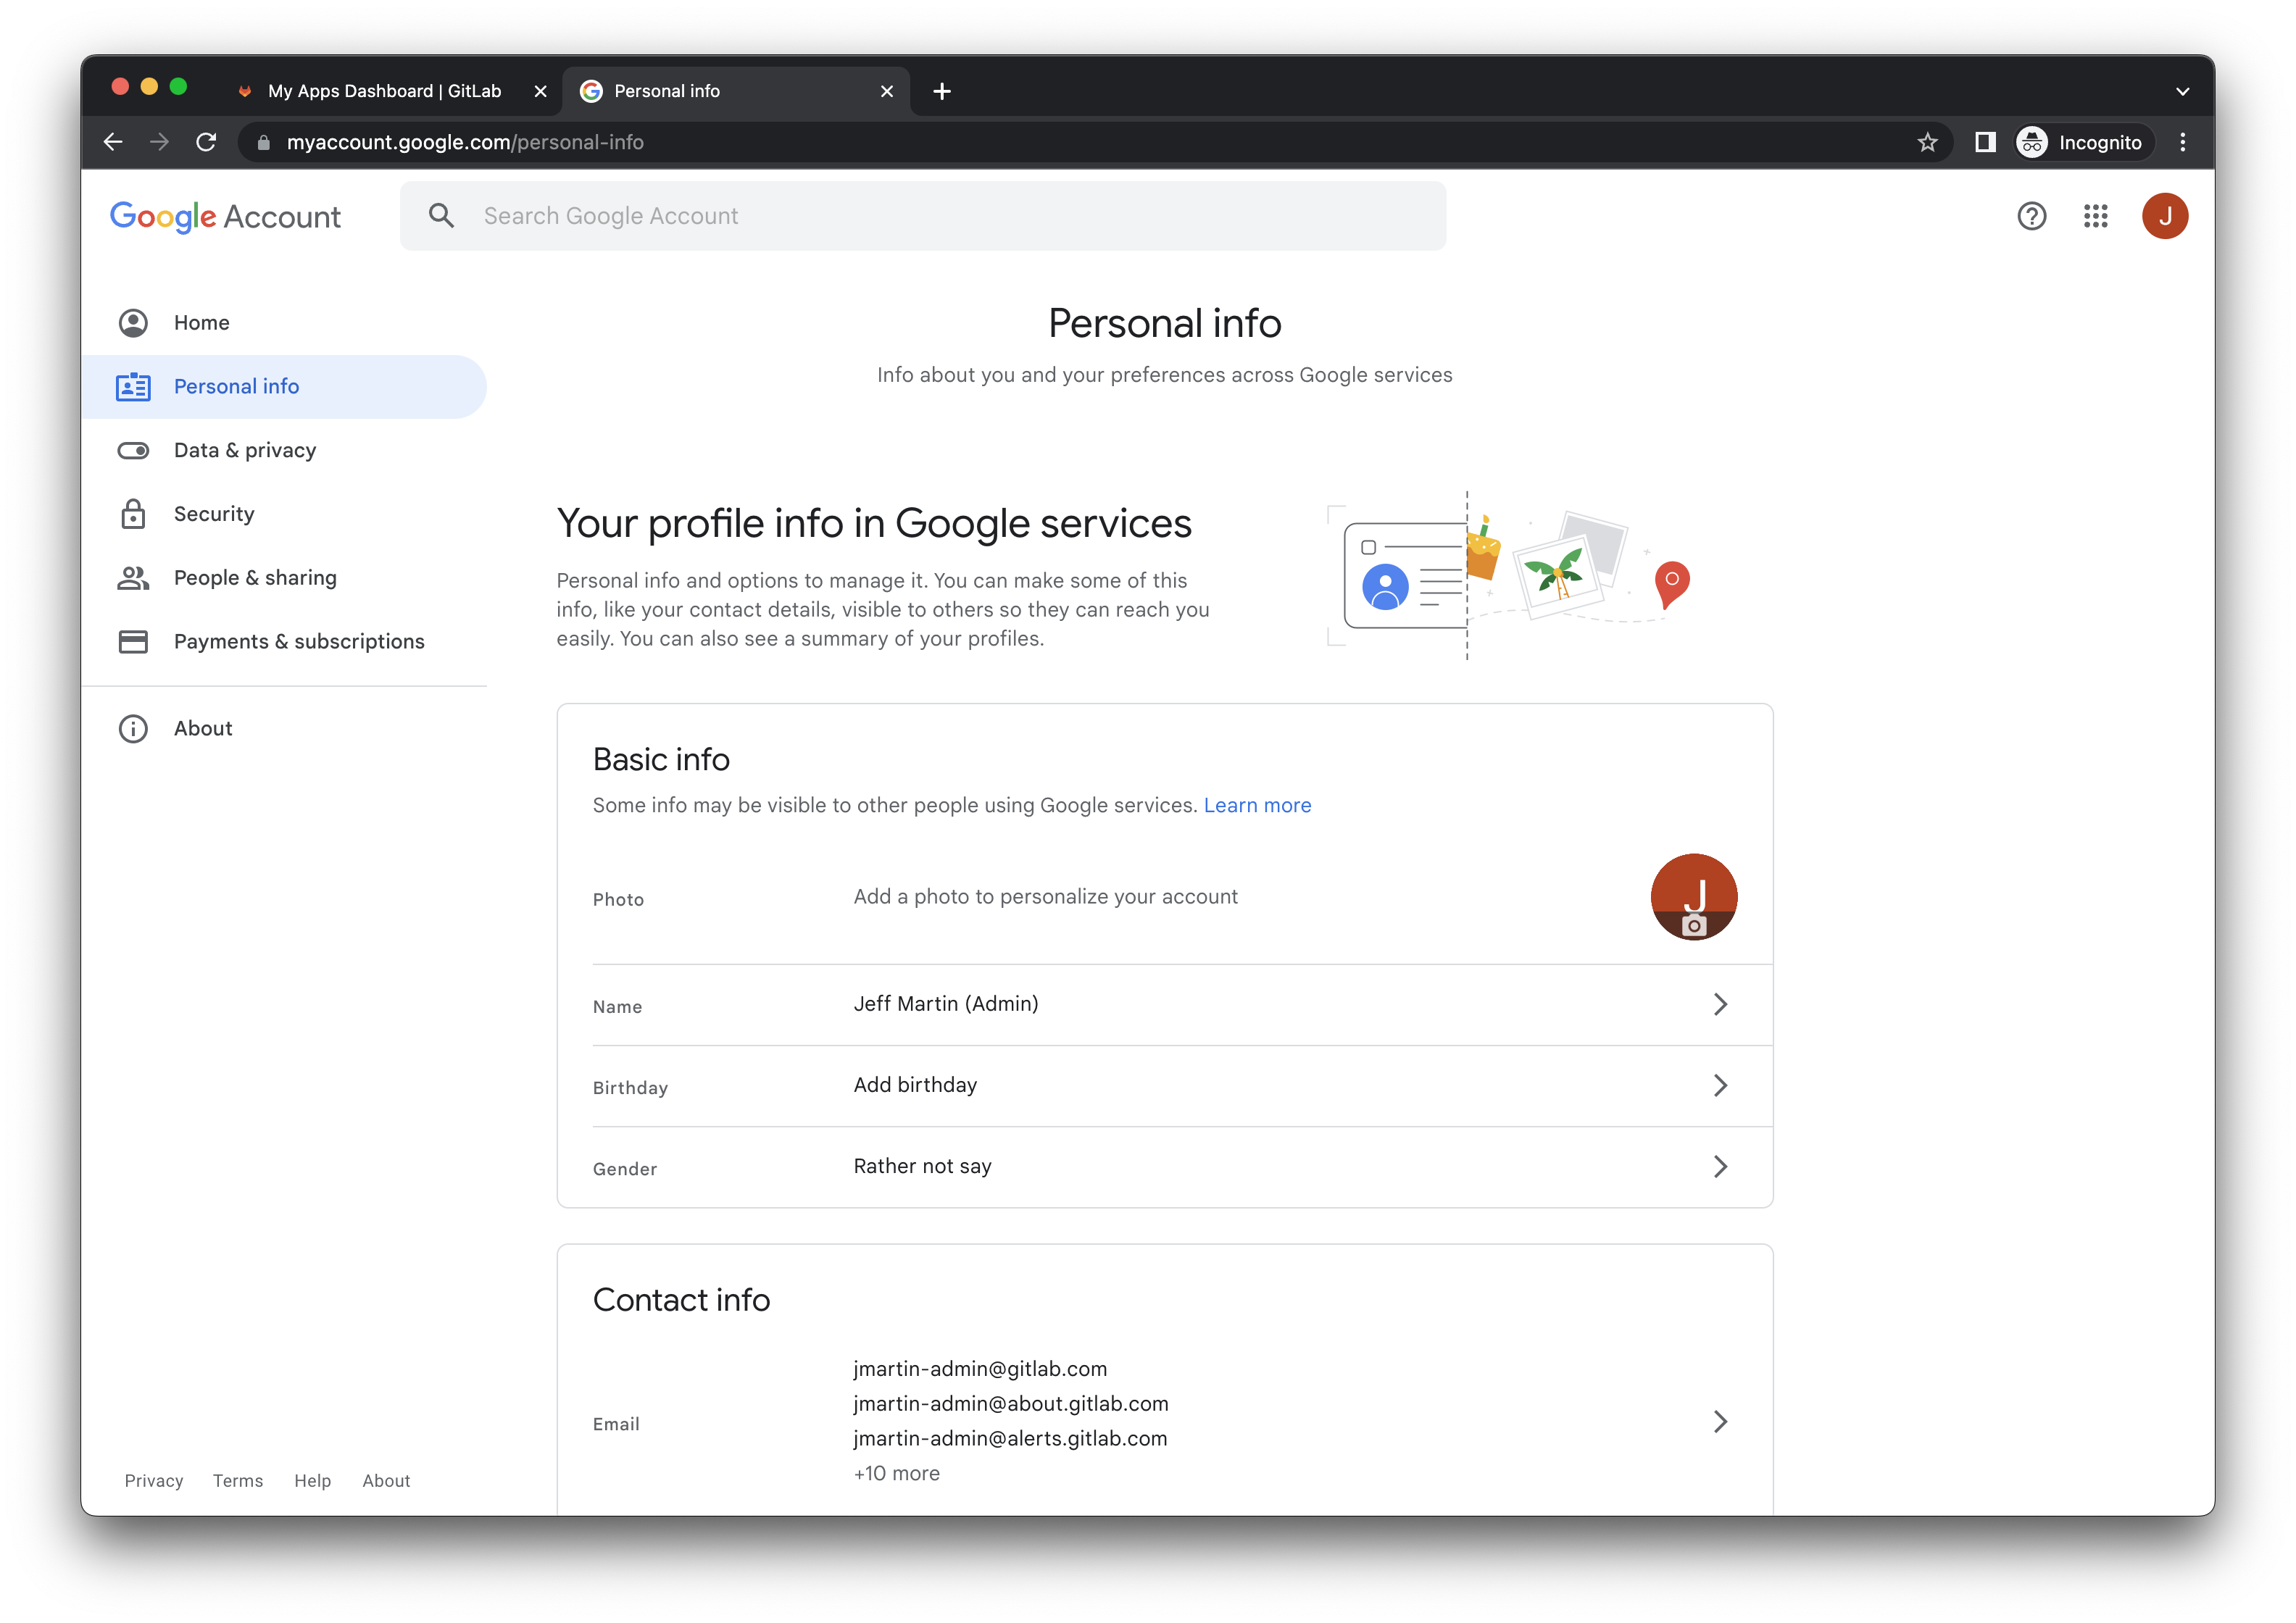
Task 2.2: Configure Google Account 2FA
Laptop Transfer? You can skip this task if you are using the same YubiKey from your old laptop.
- Click the Security link in the left navigation.
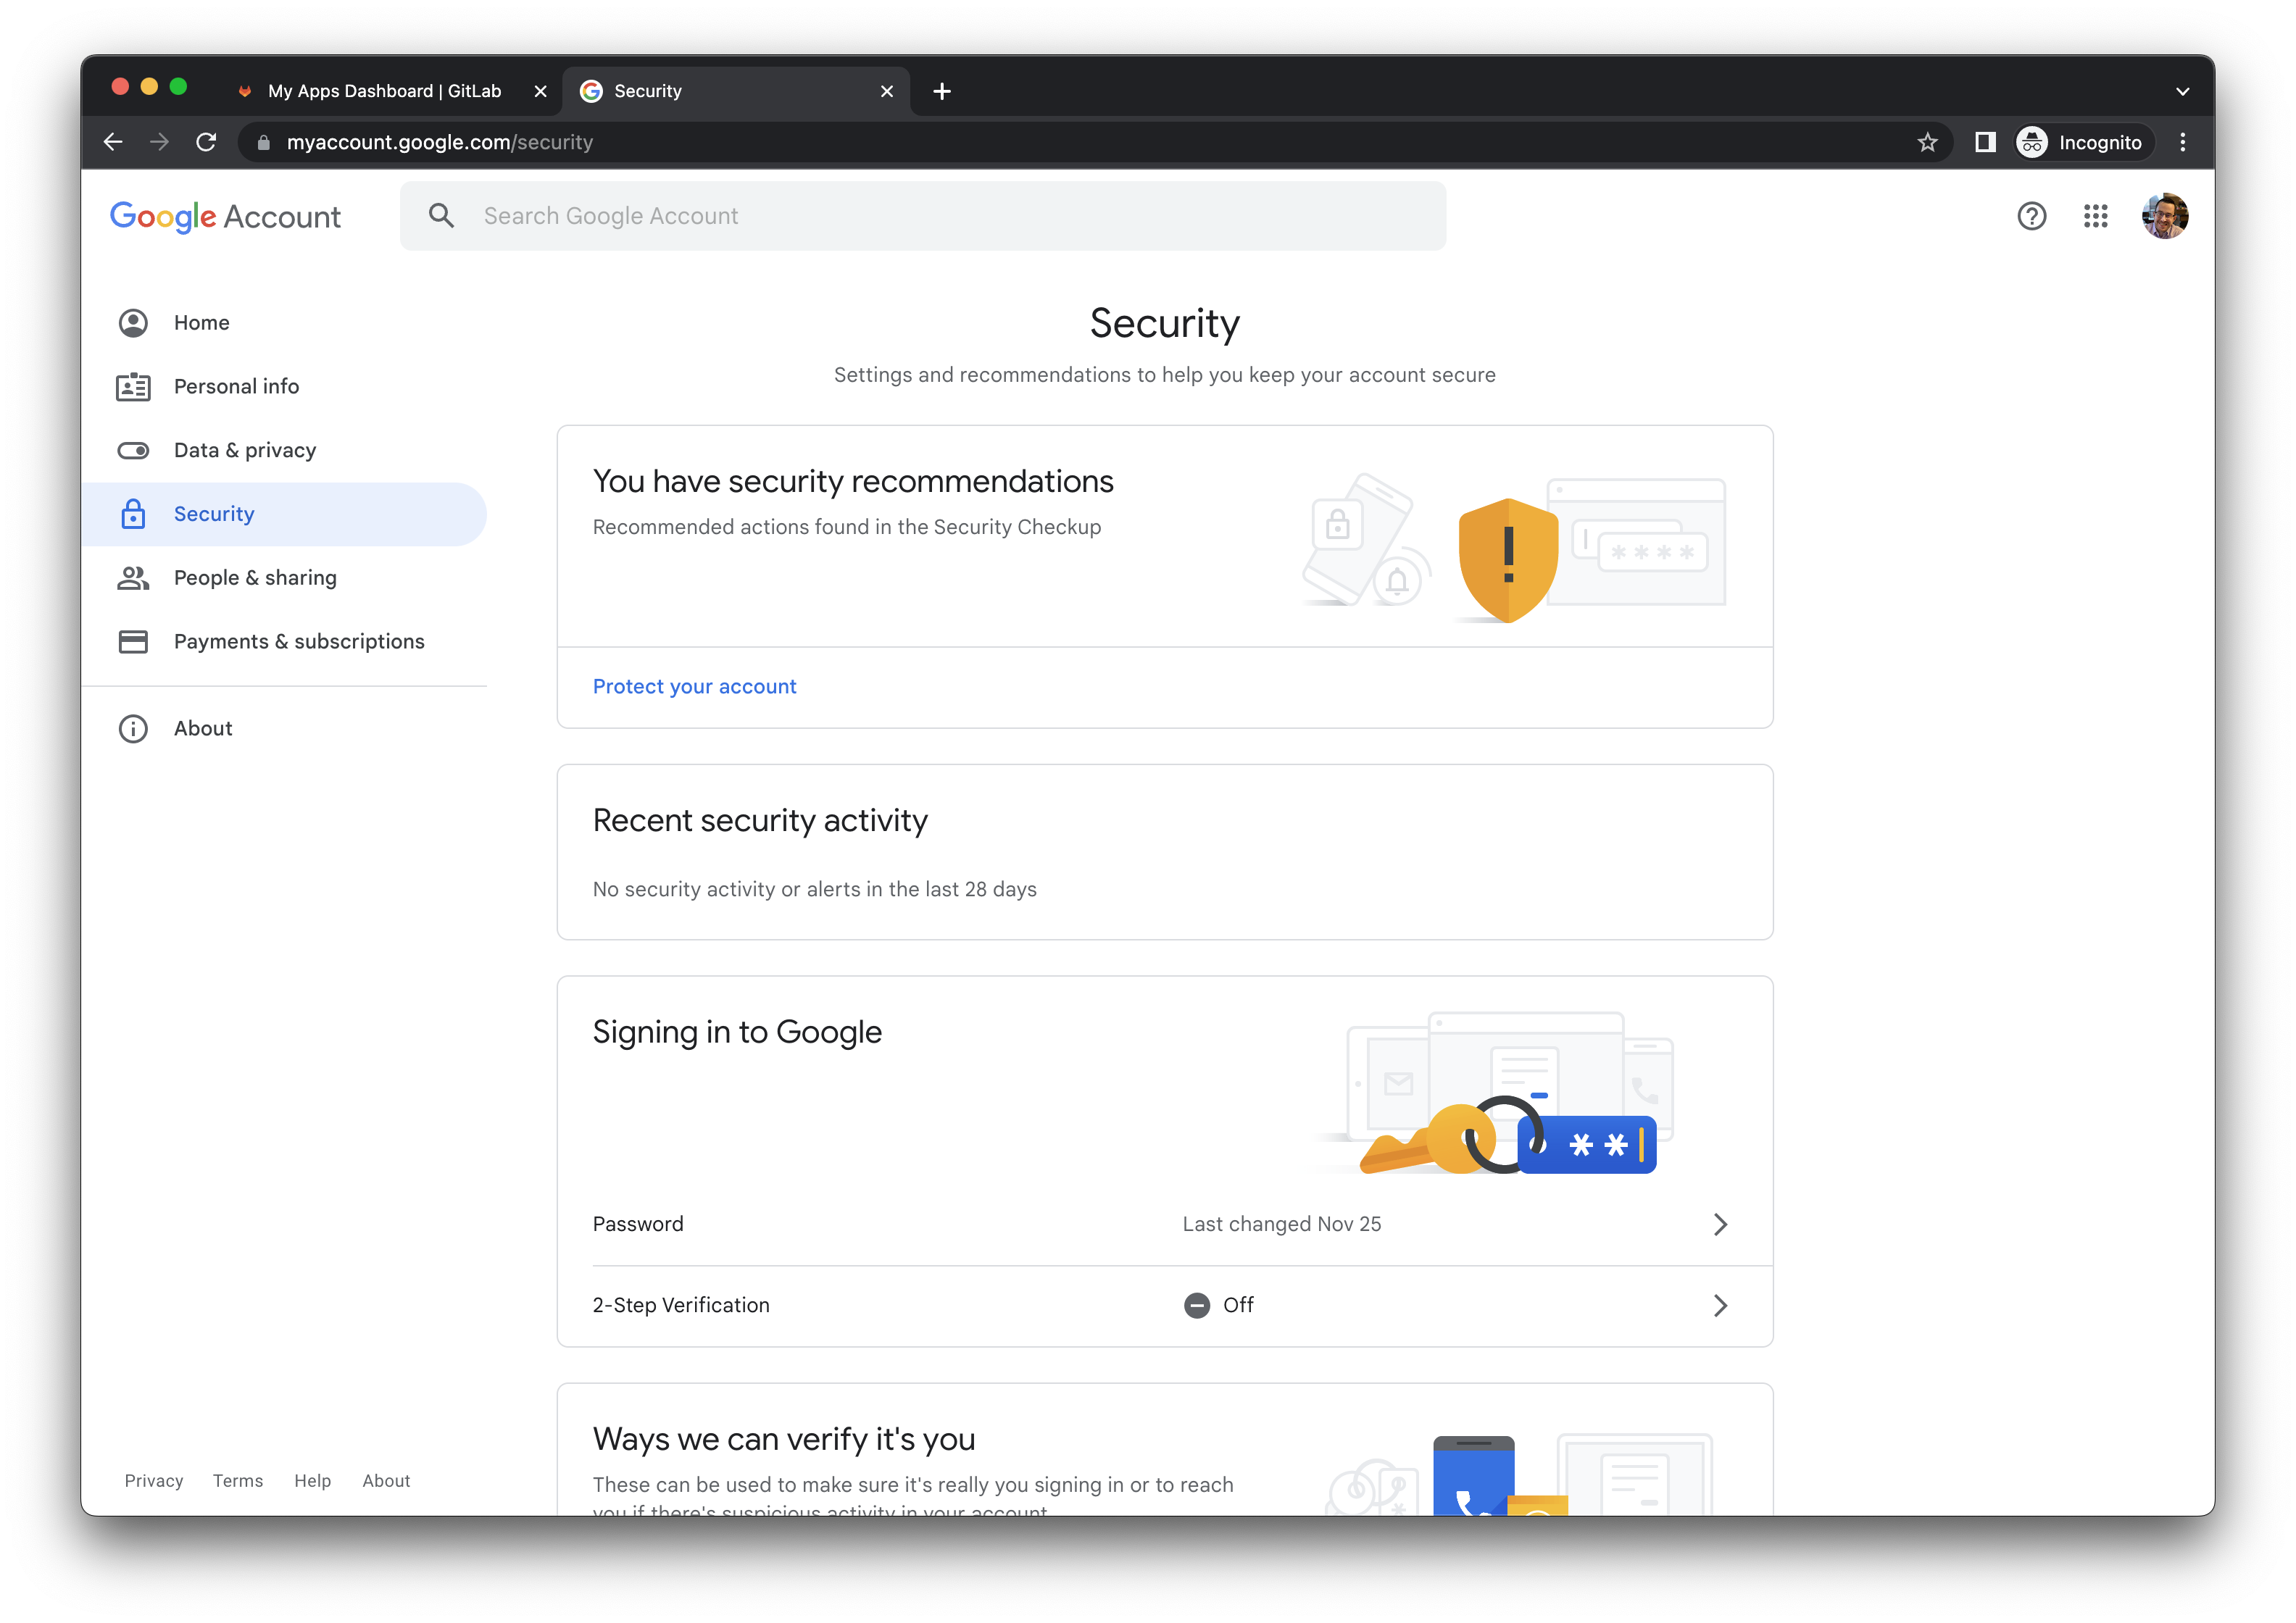
- In the
Signing in to Googlesection, click the 2-Step Verification row. - In the prompt, click the GET STARTED button.
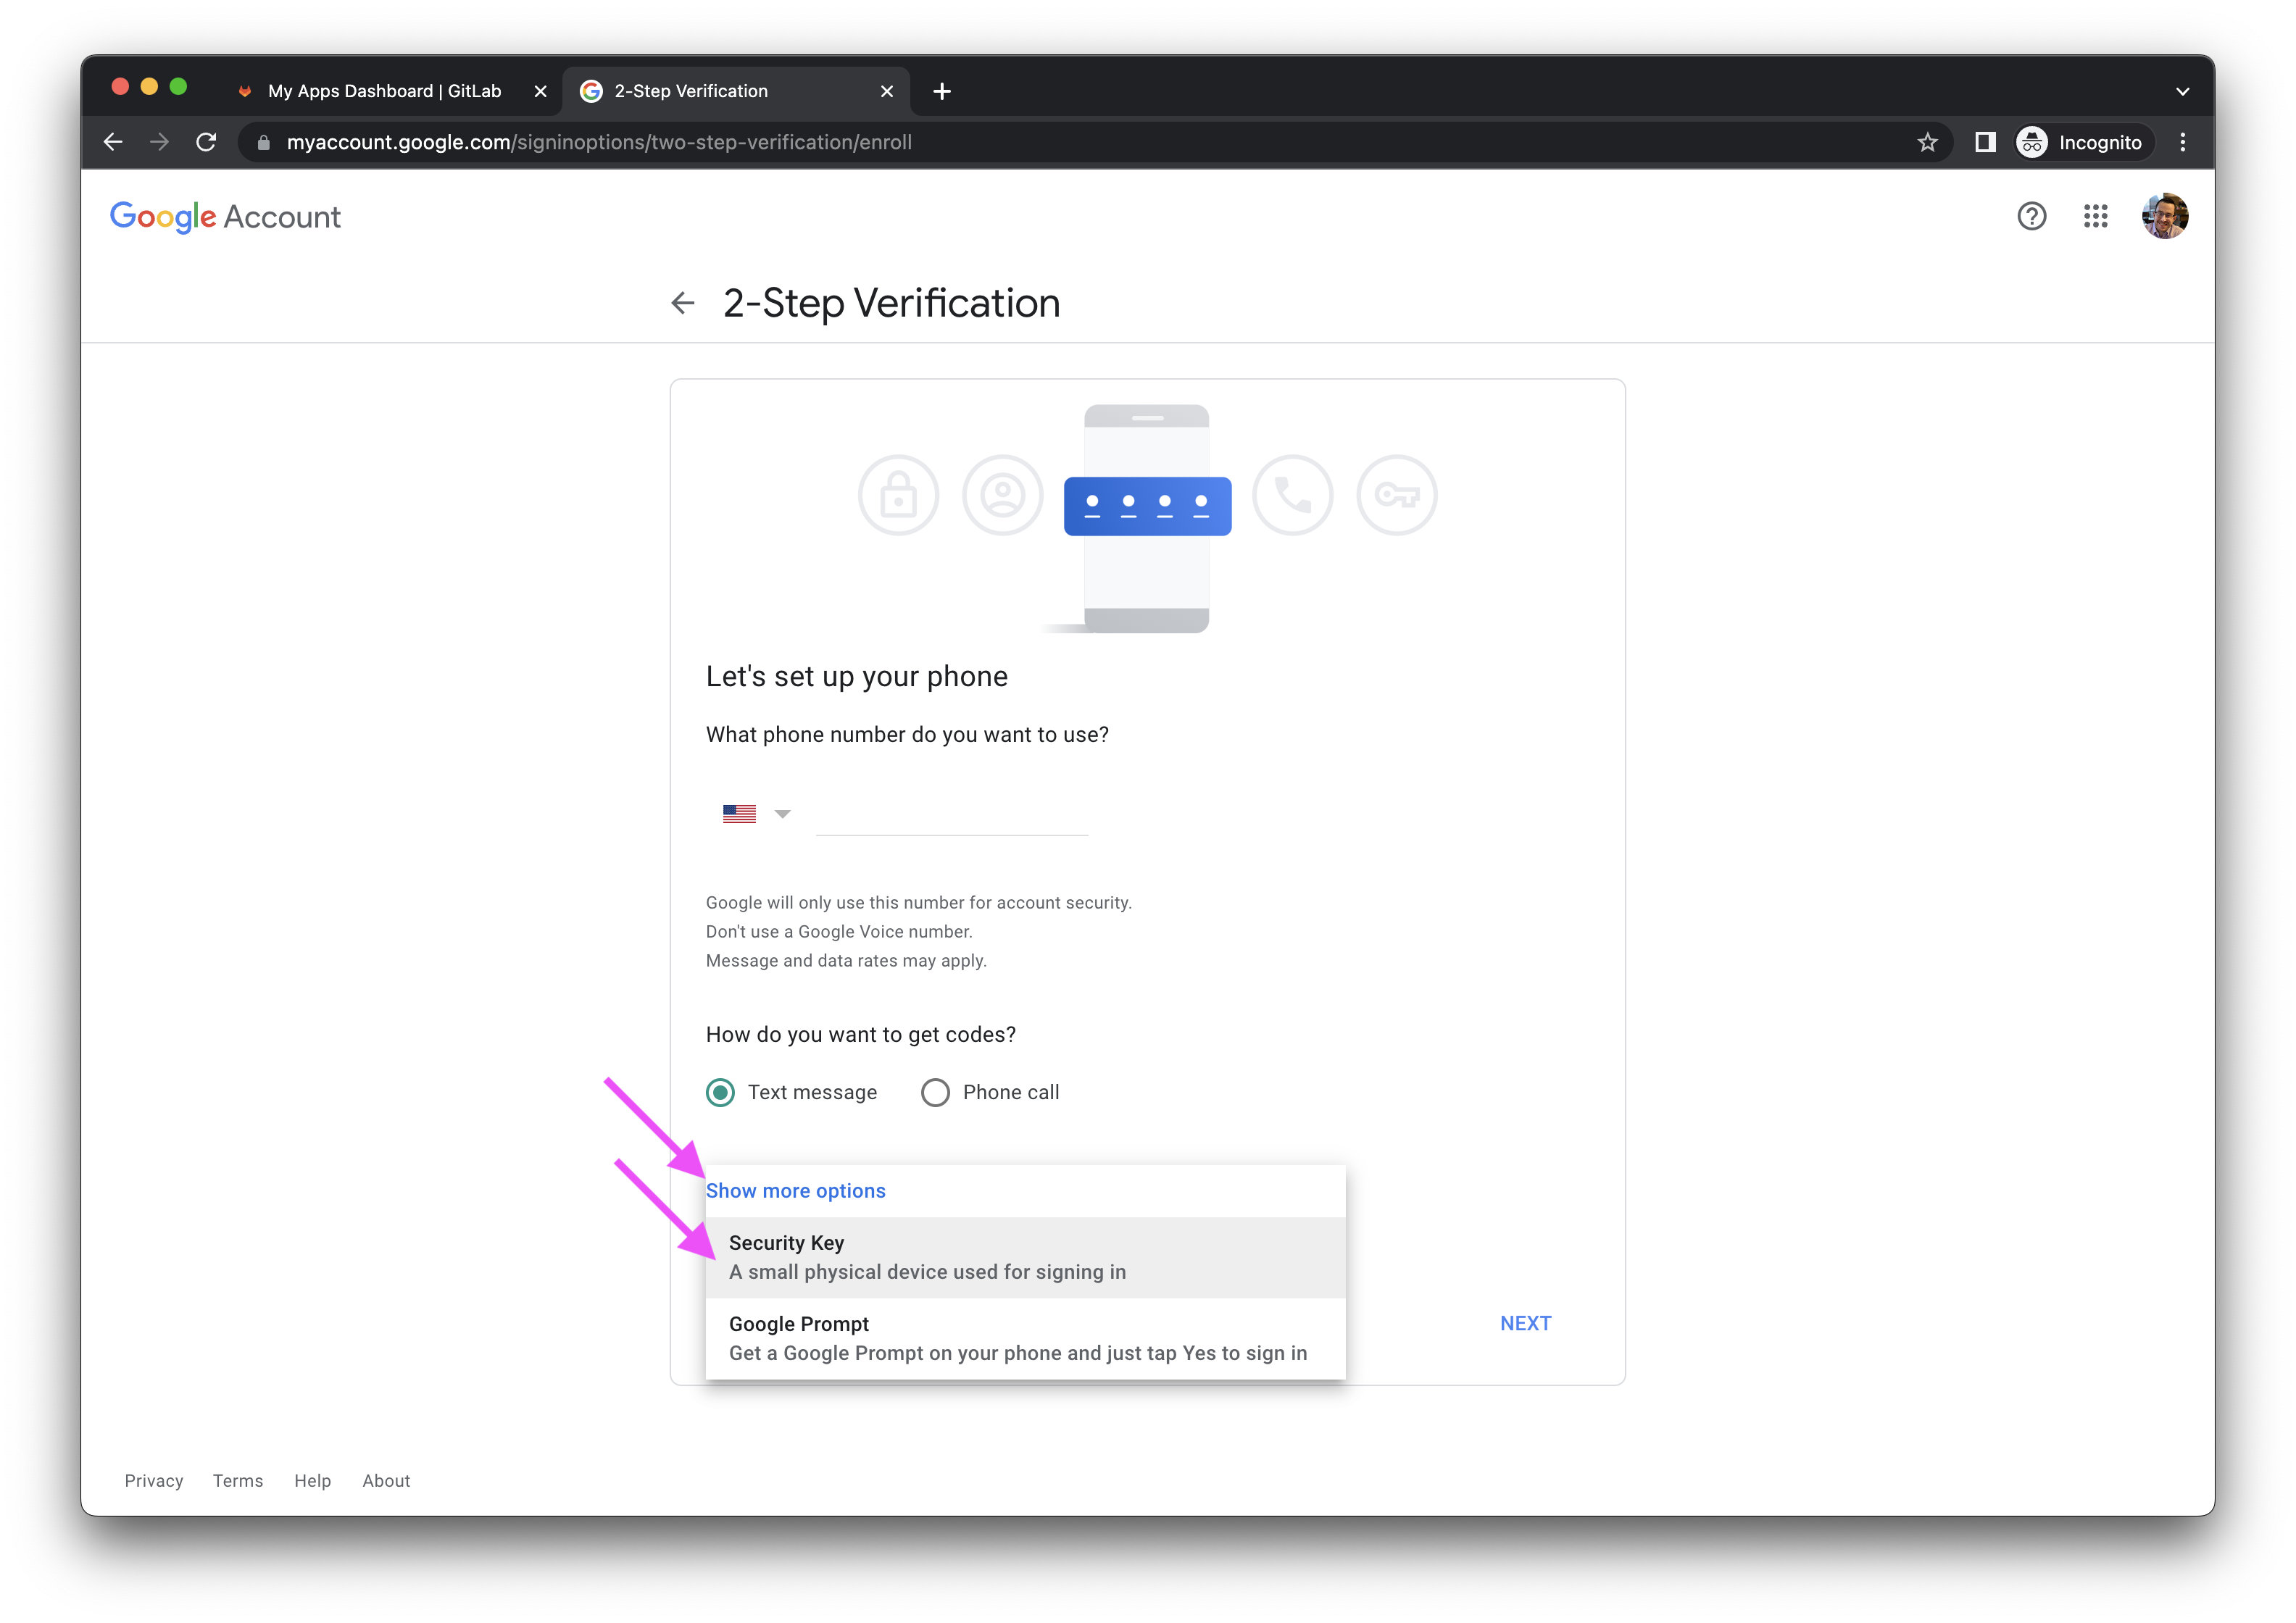
- Ignore the phone number instructions and click the Show more options link in the bottom left corner, then click Security Key.
- When prompted for
Have your security key?, click the NEXT button. You can ignore the instructions forMake sure your key is with you, but not connected to your device. You can leave your YubiKey inserted.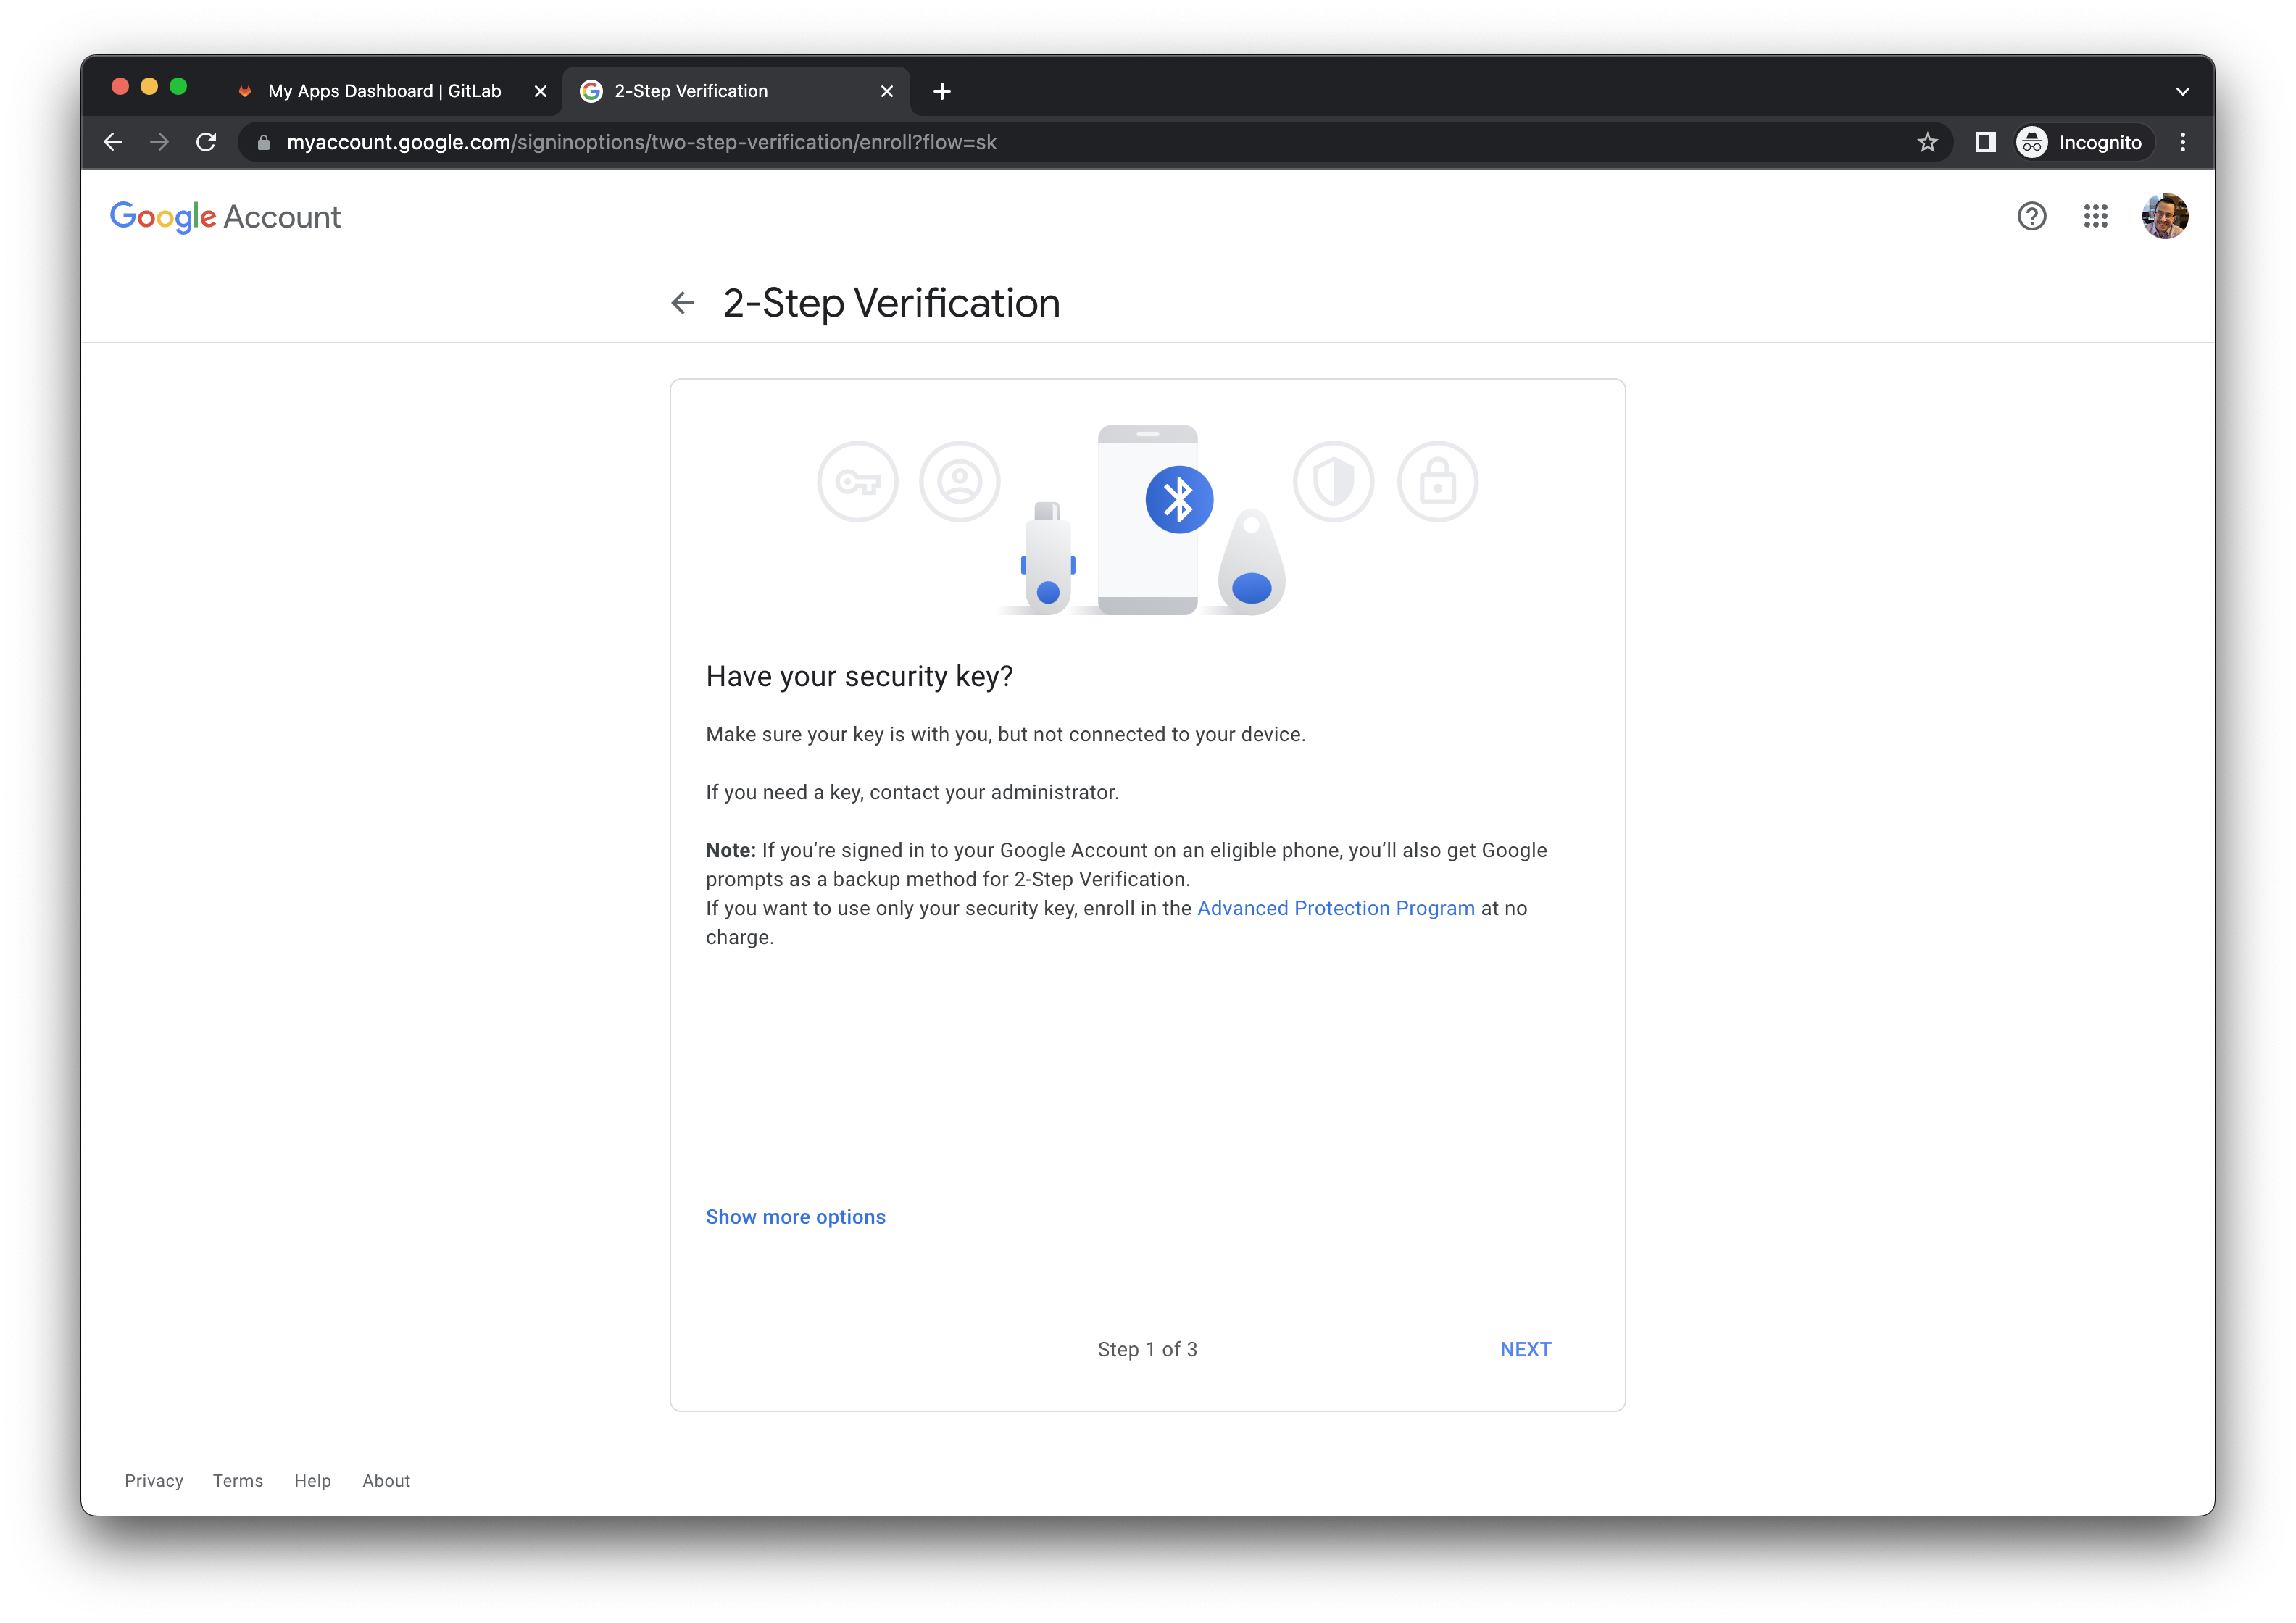
- When prompted, touch your YubiKey.
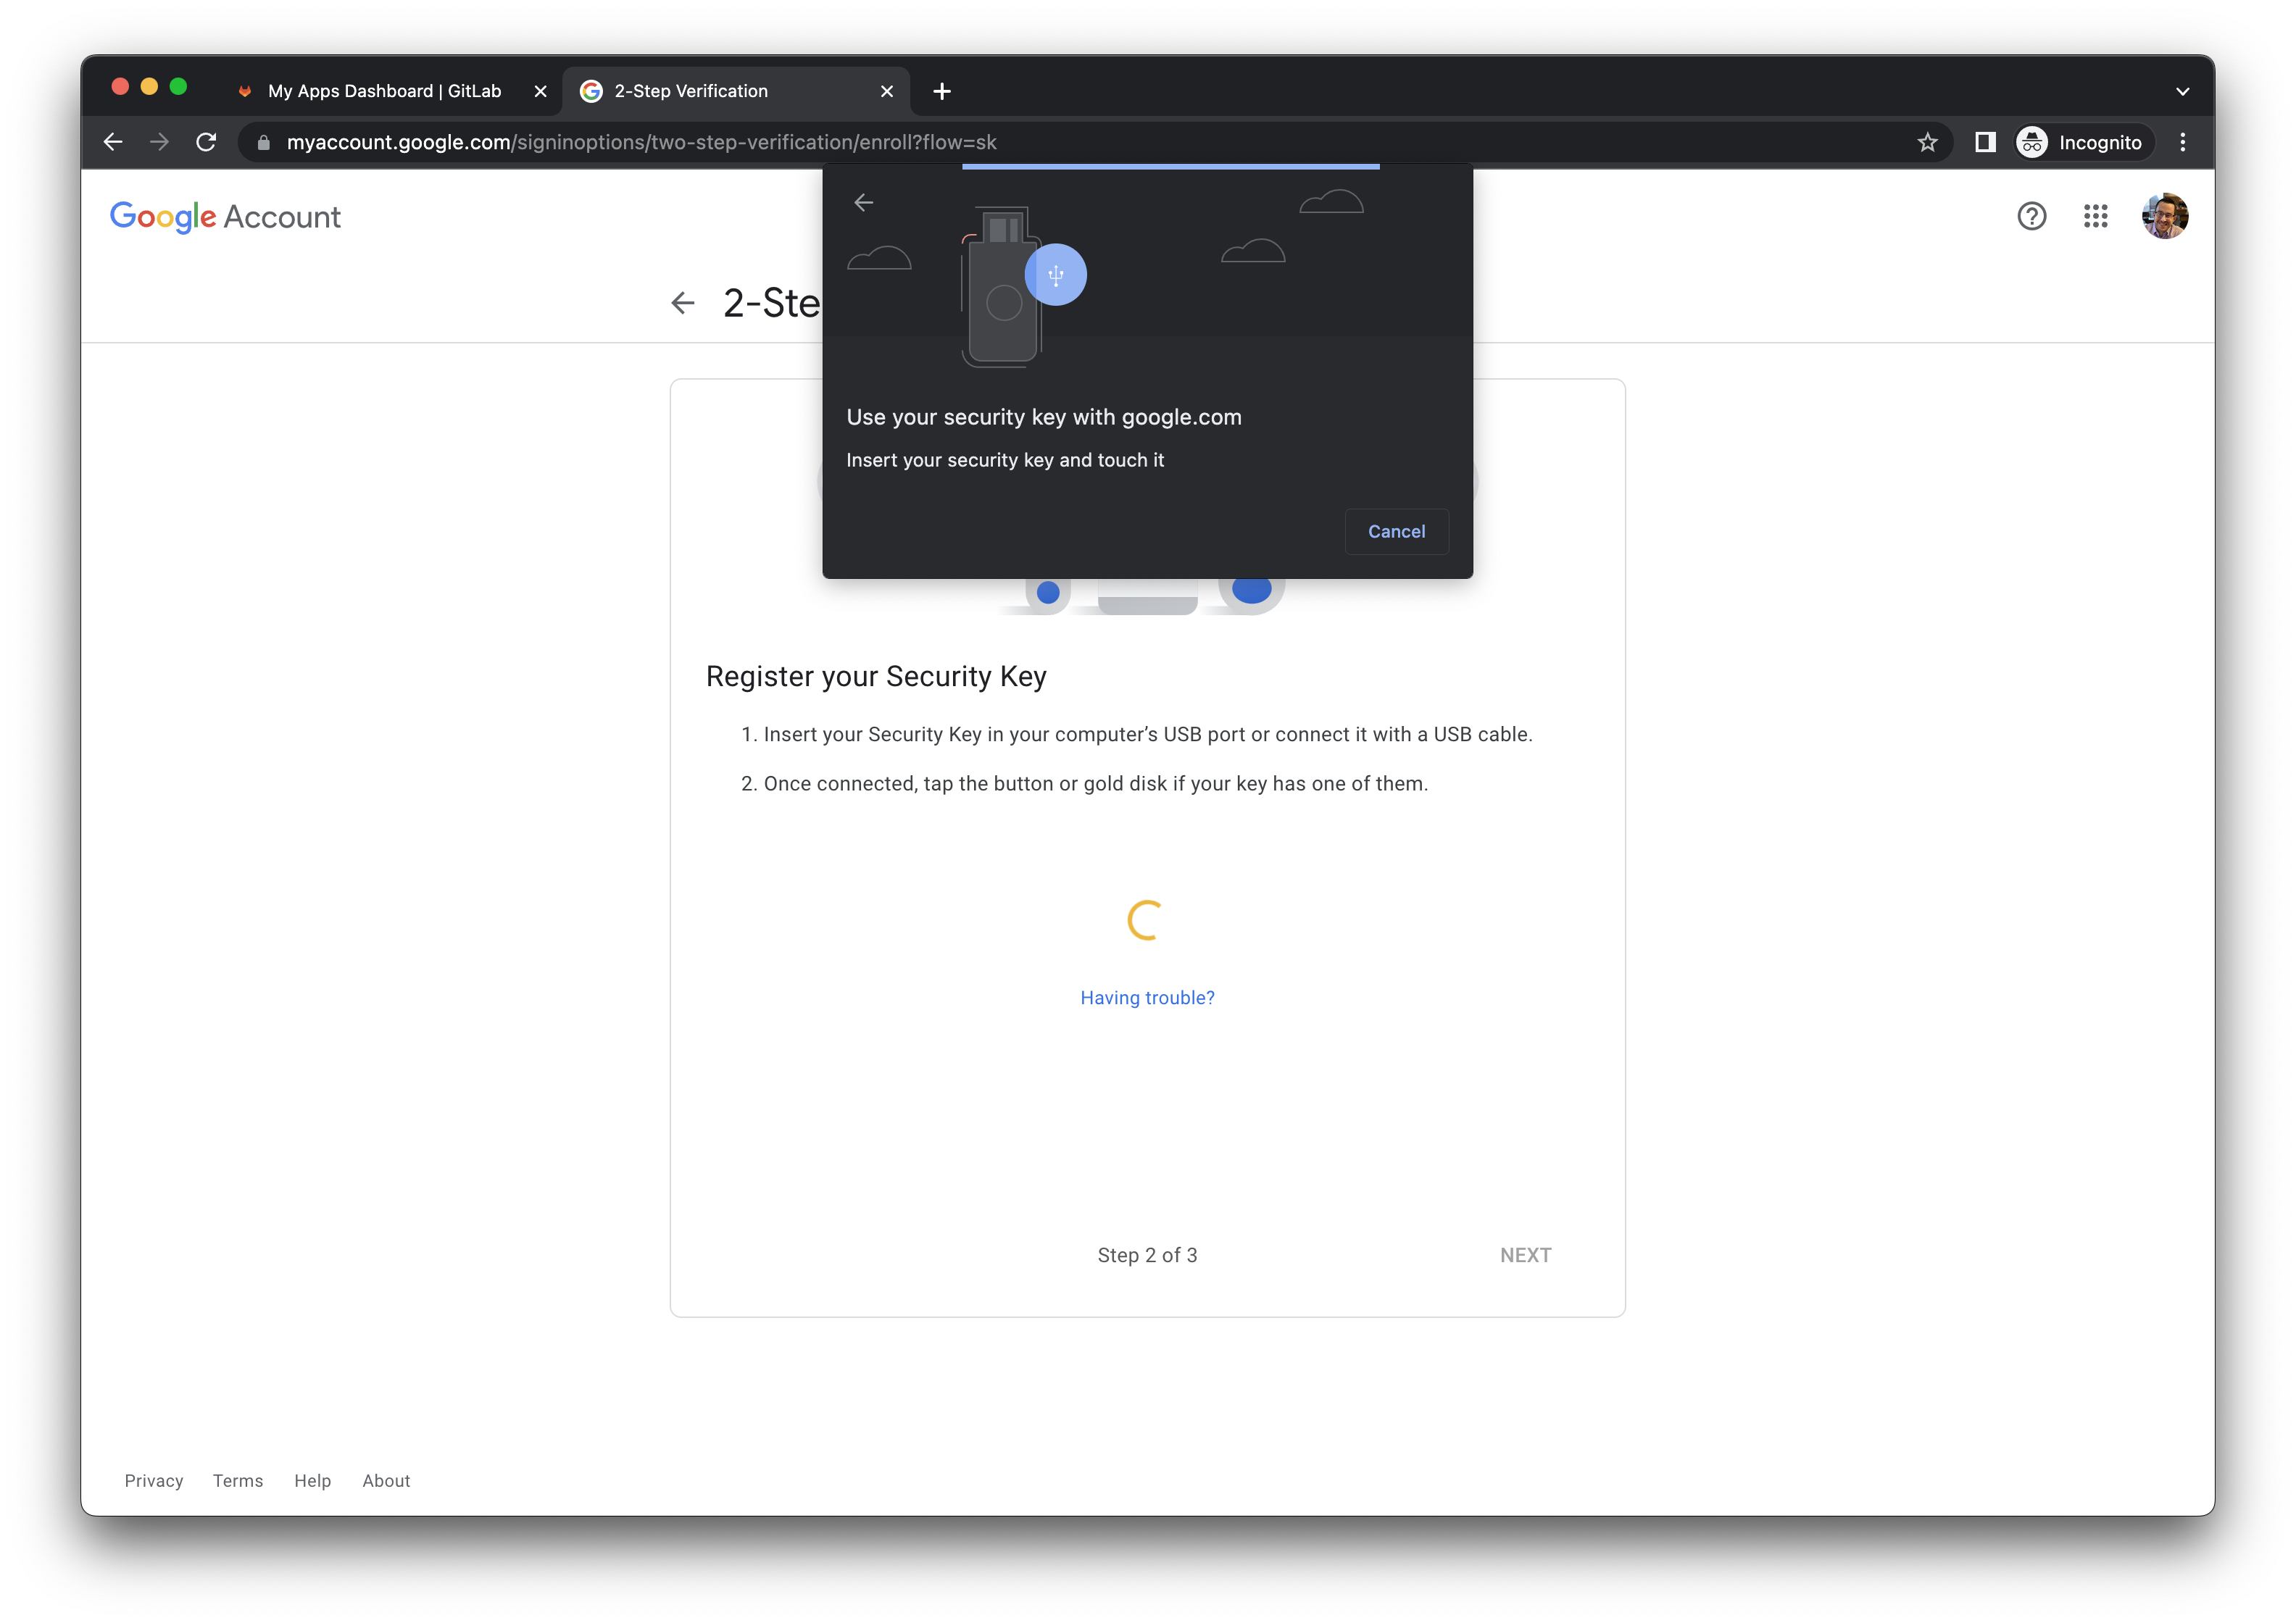
- After your Security Key has been registered, you will be prompted to assign a name to the YubiKey. This is at your discretion, however the model number is a best practice (ex.
YubiKey 5C FIPS).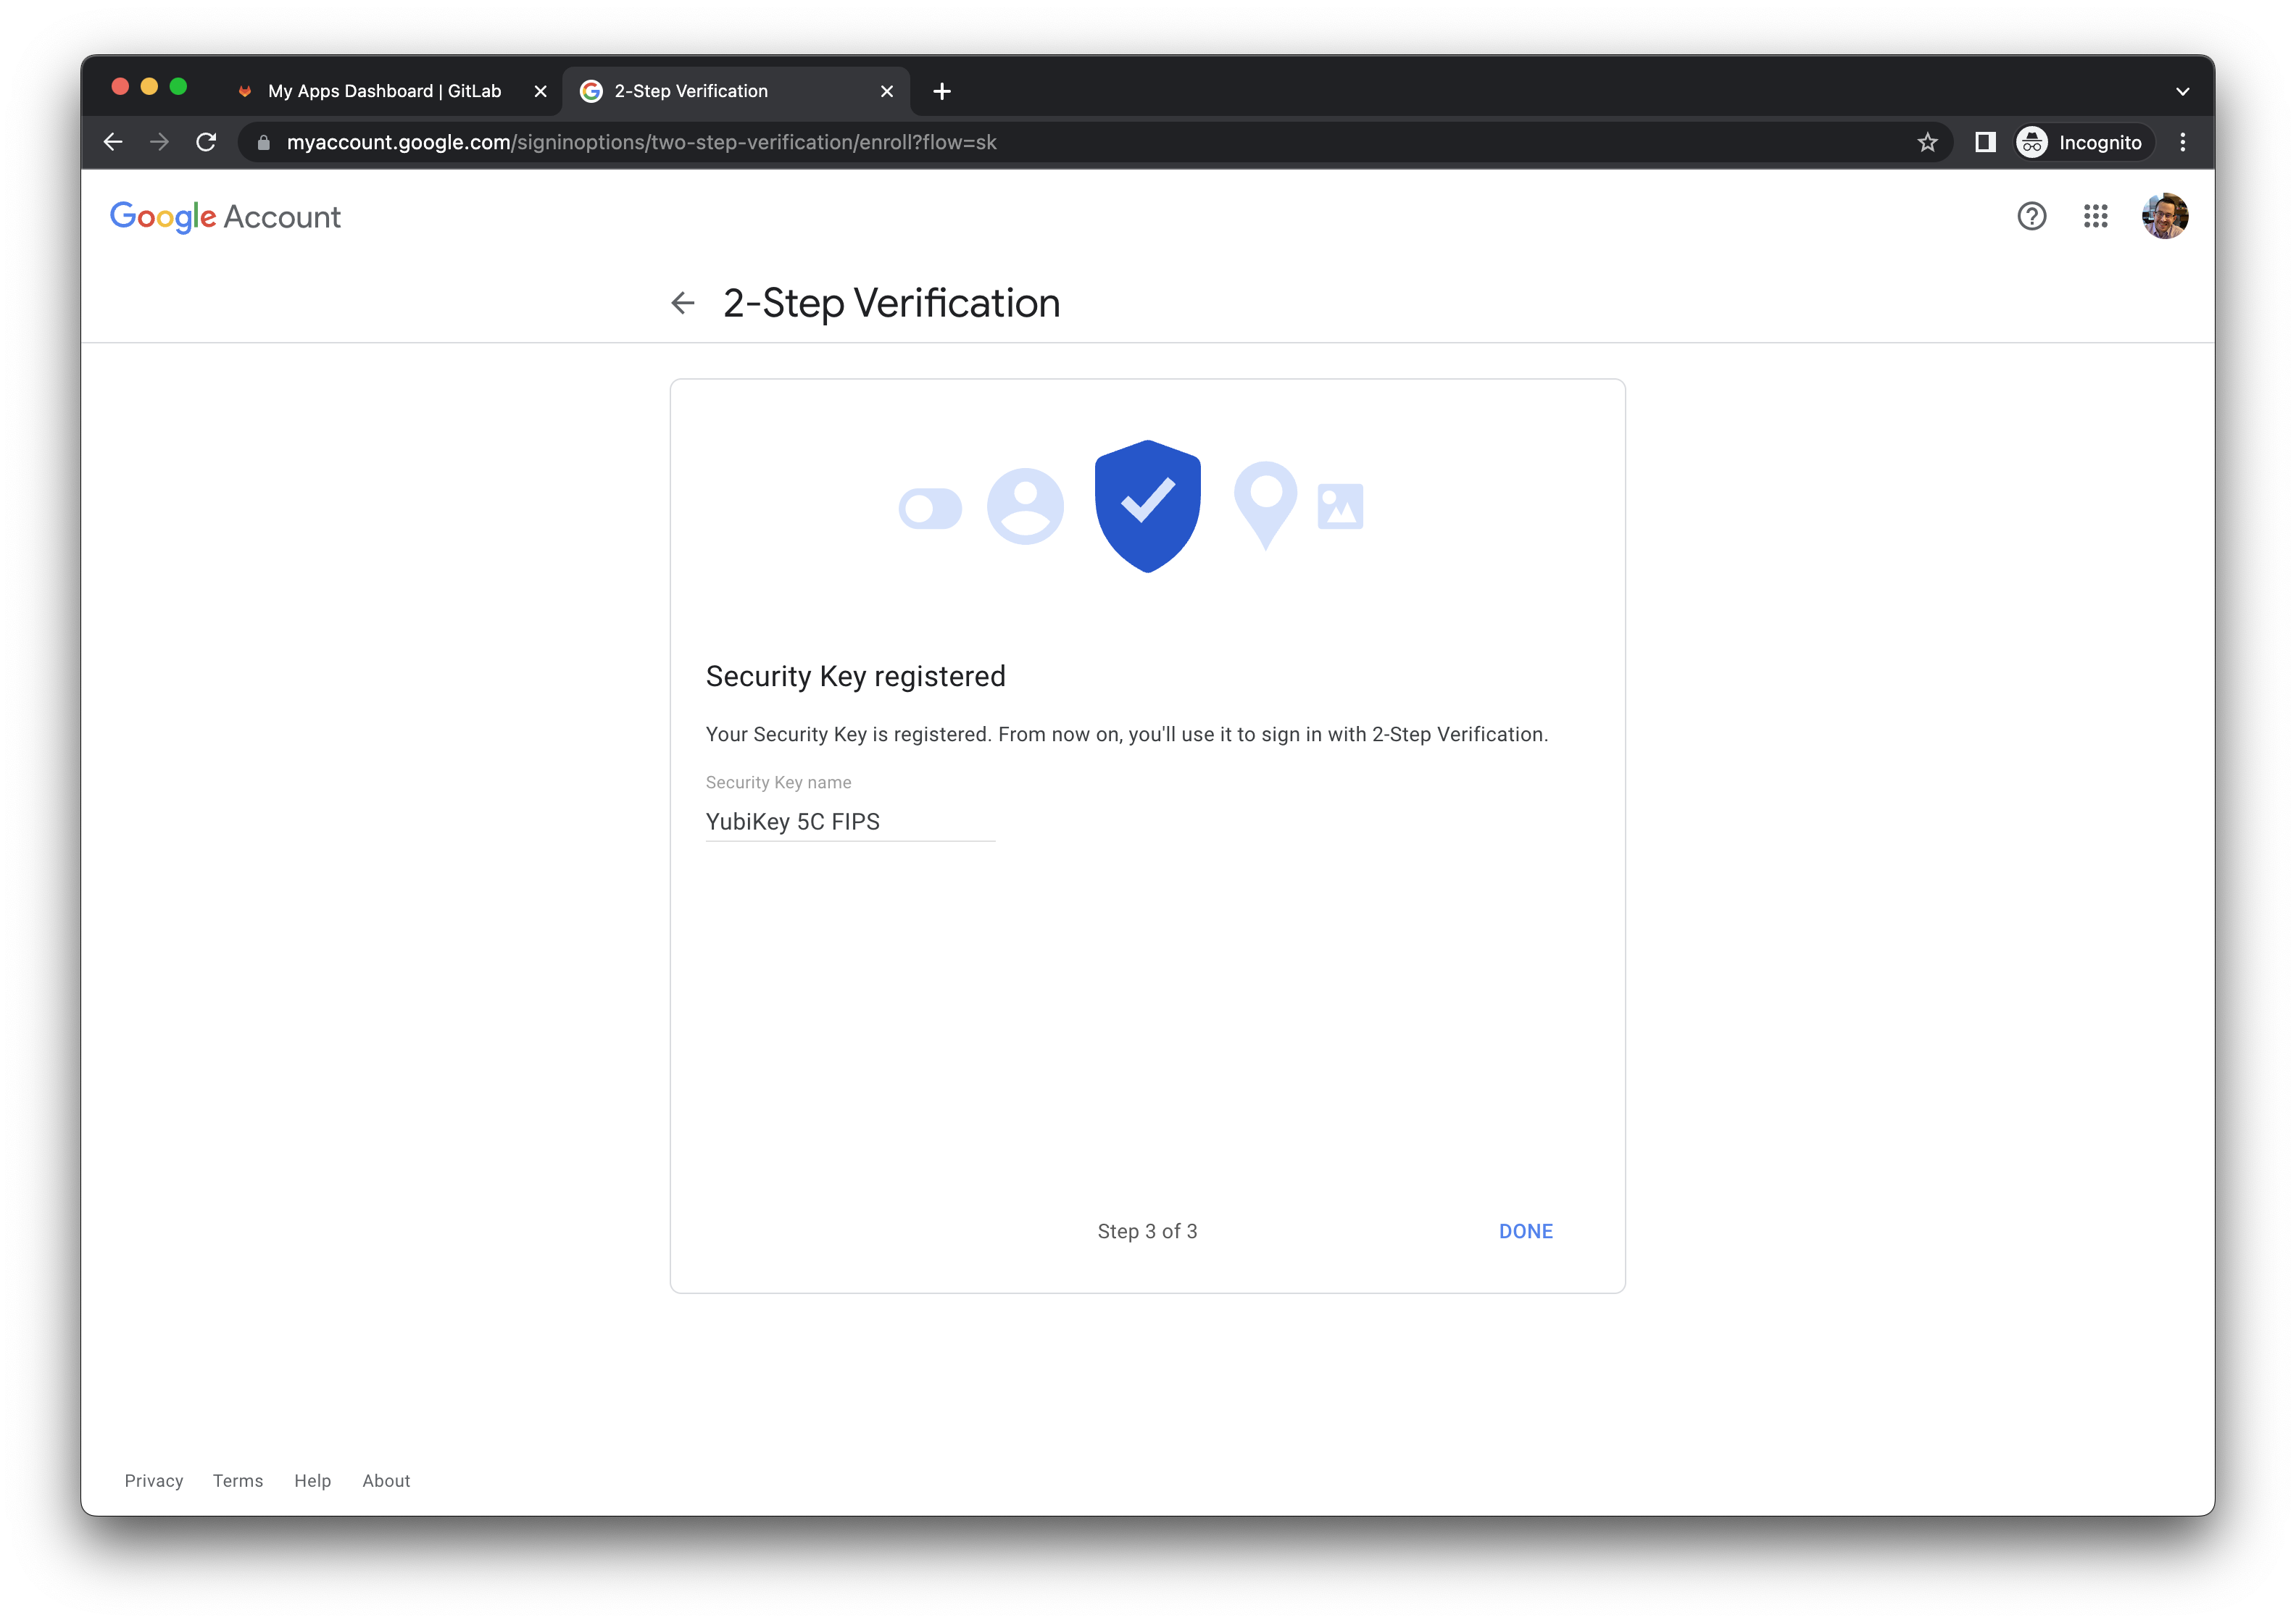
- After your key has been enrolled, your Google Account activation is complete.
- Close the incognito browser window.
Task 2.3: Create Google Chrome Profile
- Using your normal Google Chrome browser window (not in incognito mode), click on your avatar in the top right corner, then click the Add button below the
Other Profilessection.
- When prompted to
Set up your new Chrome profile, click the Sign in button.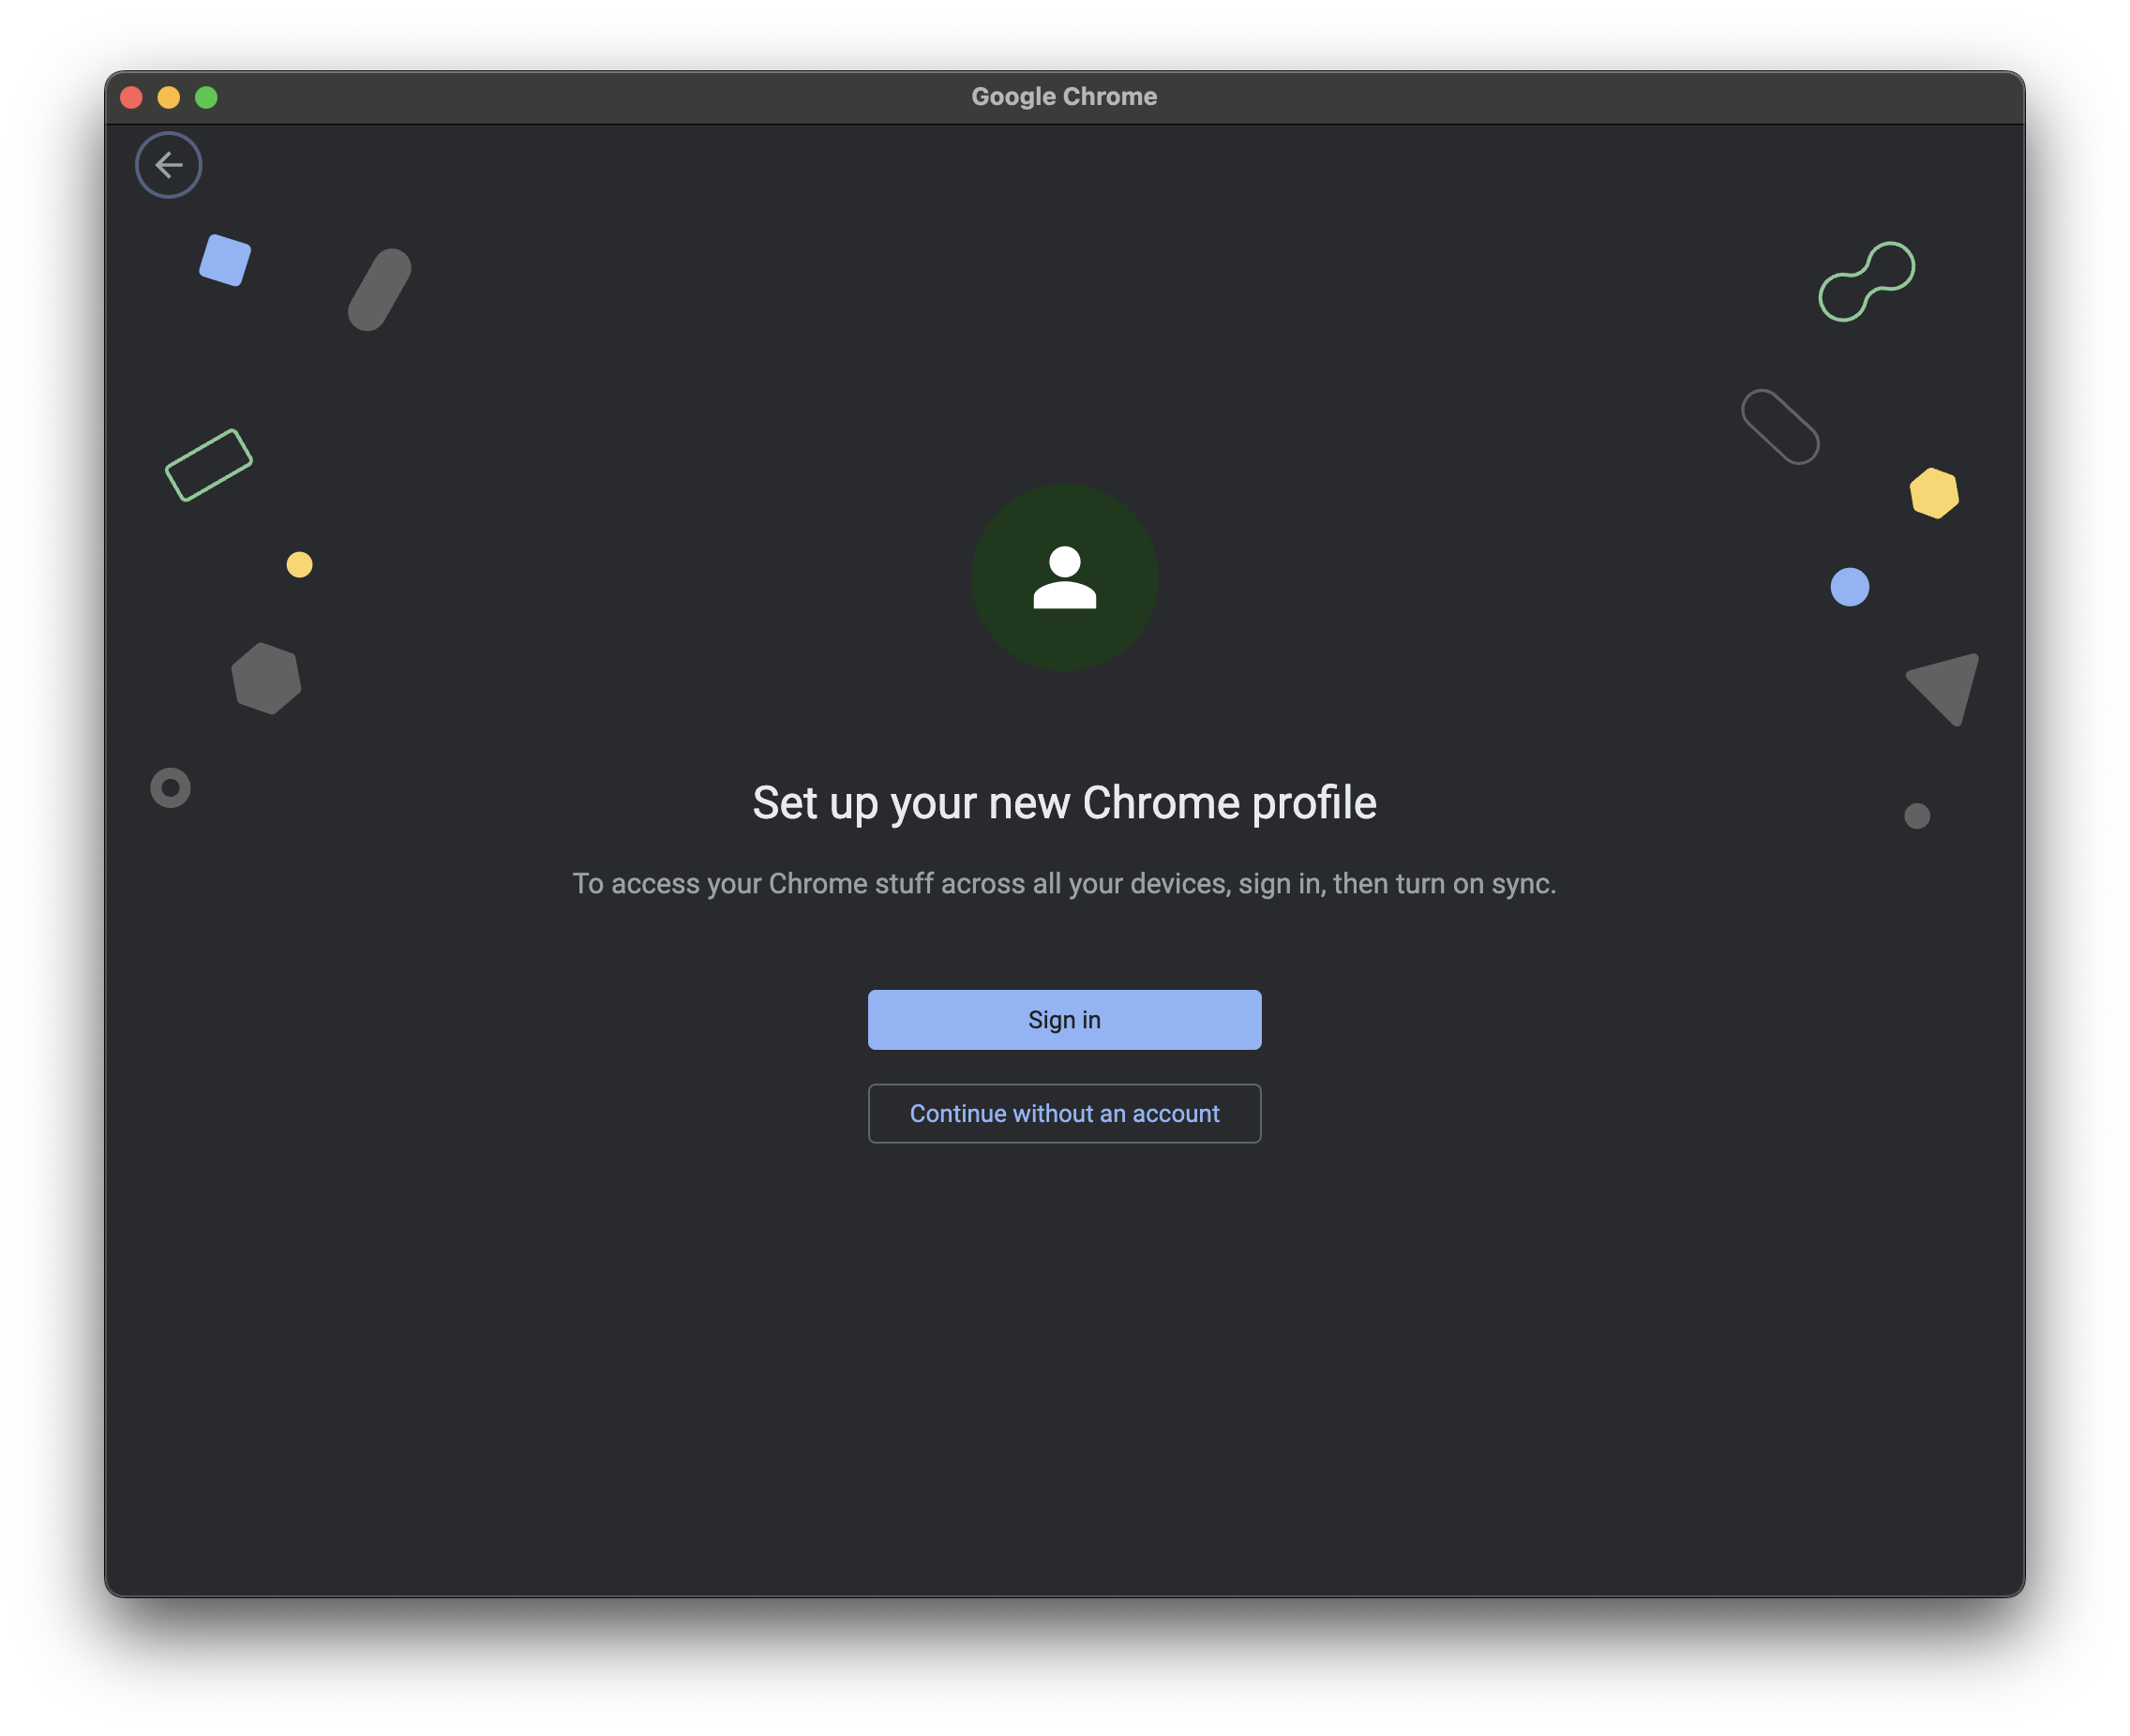
- When prompted to
Sign in to Chrome, enter your admin email address (ex.dmurphy-admin@gitlab.com).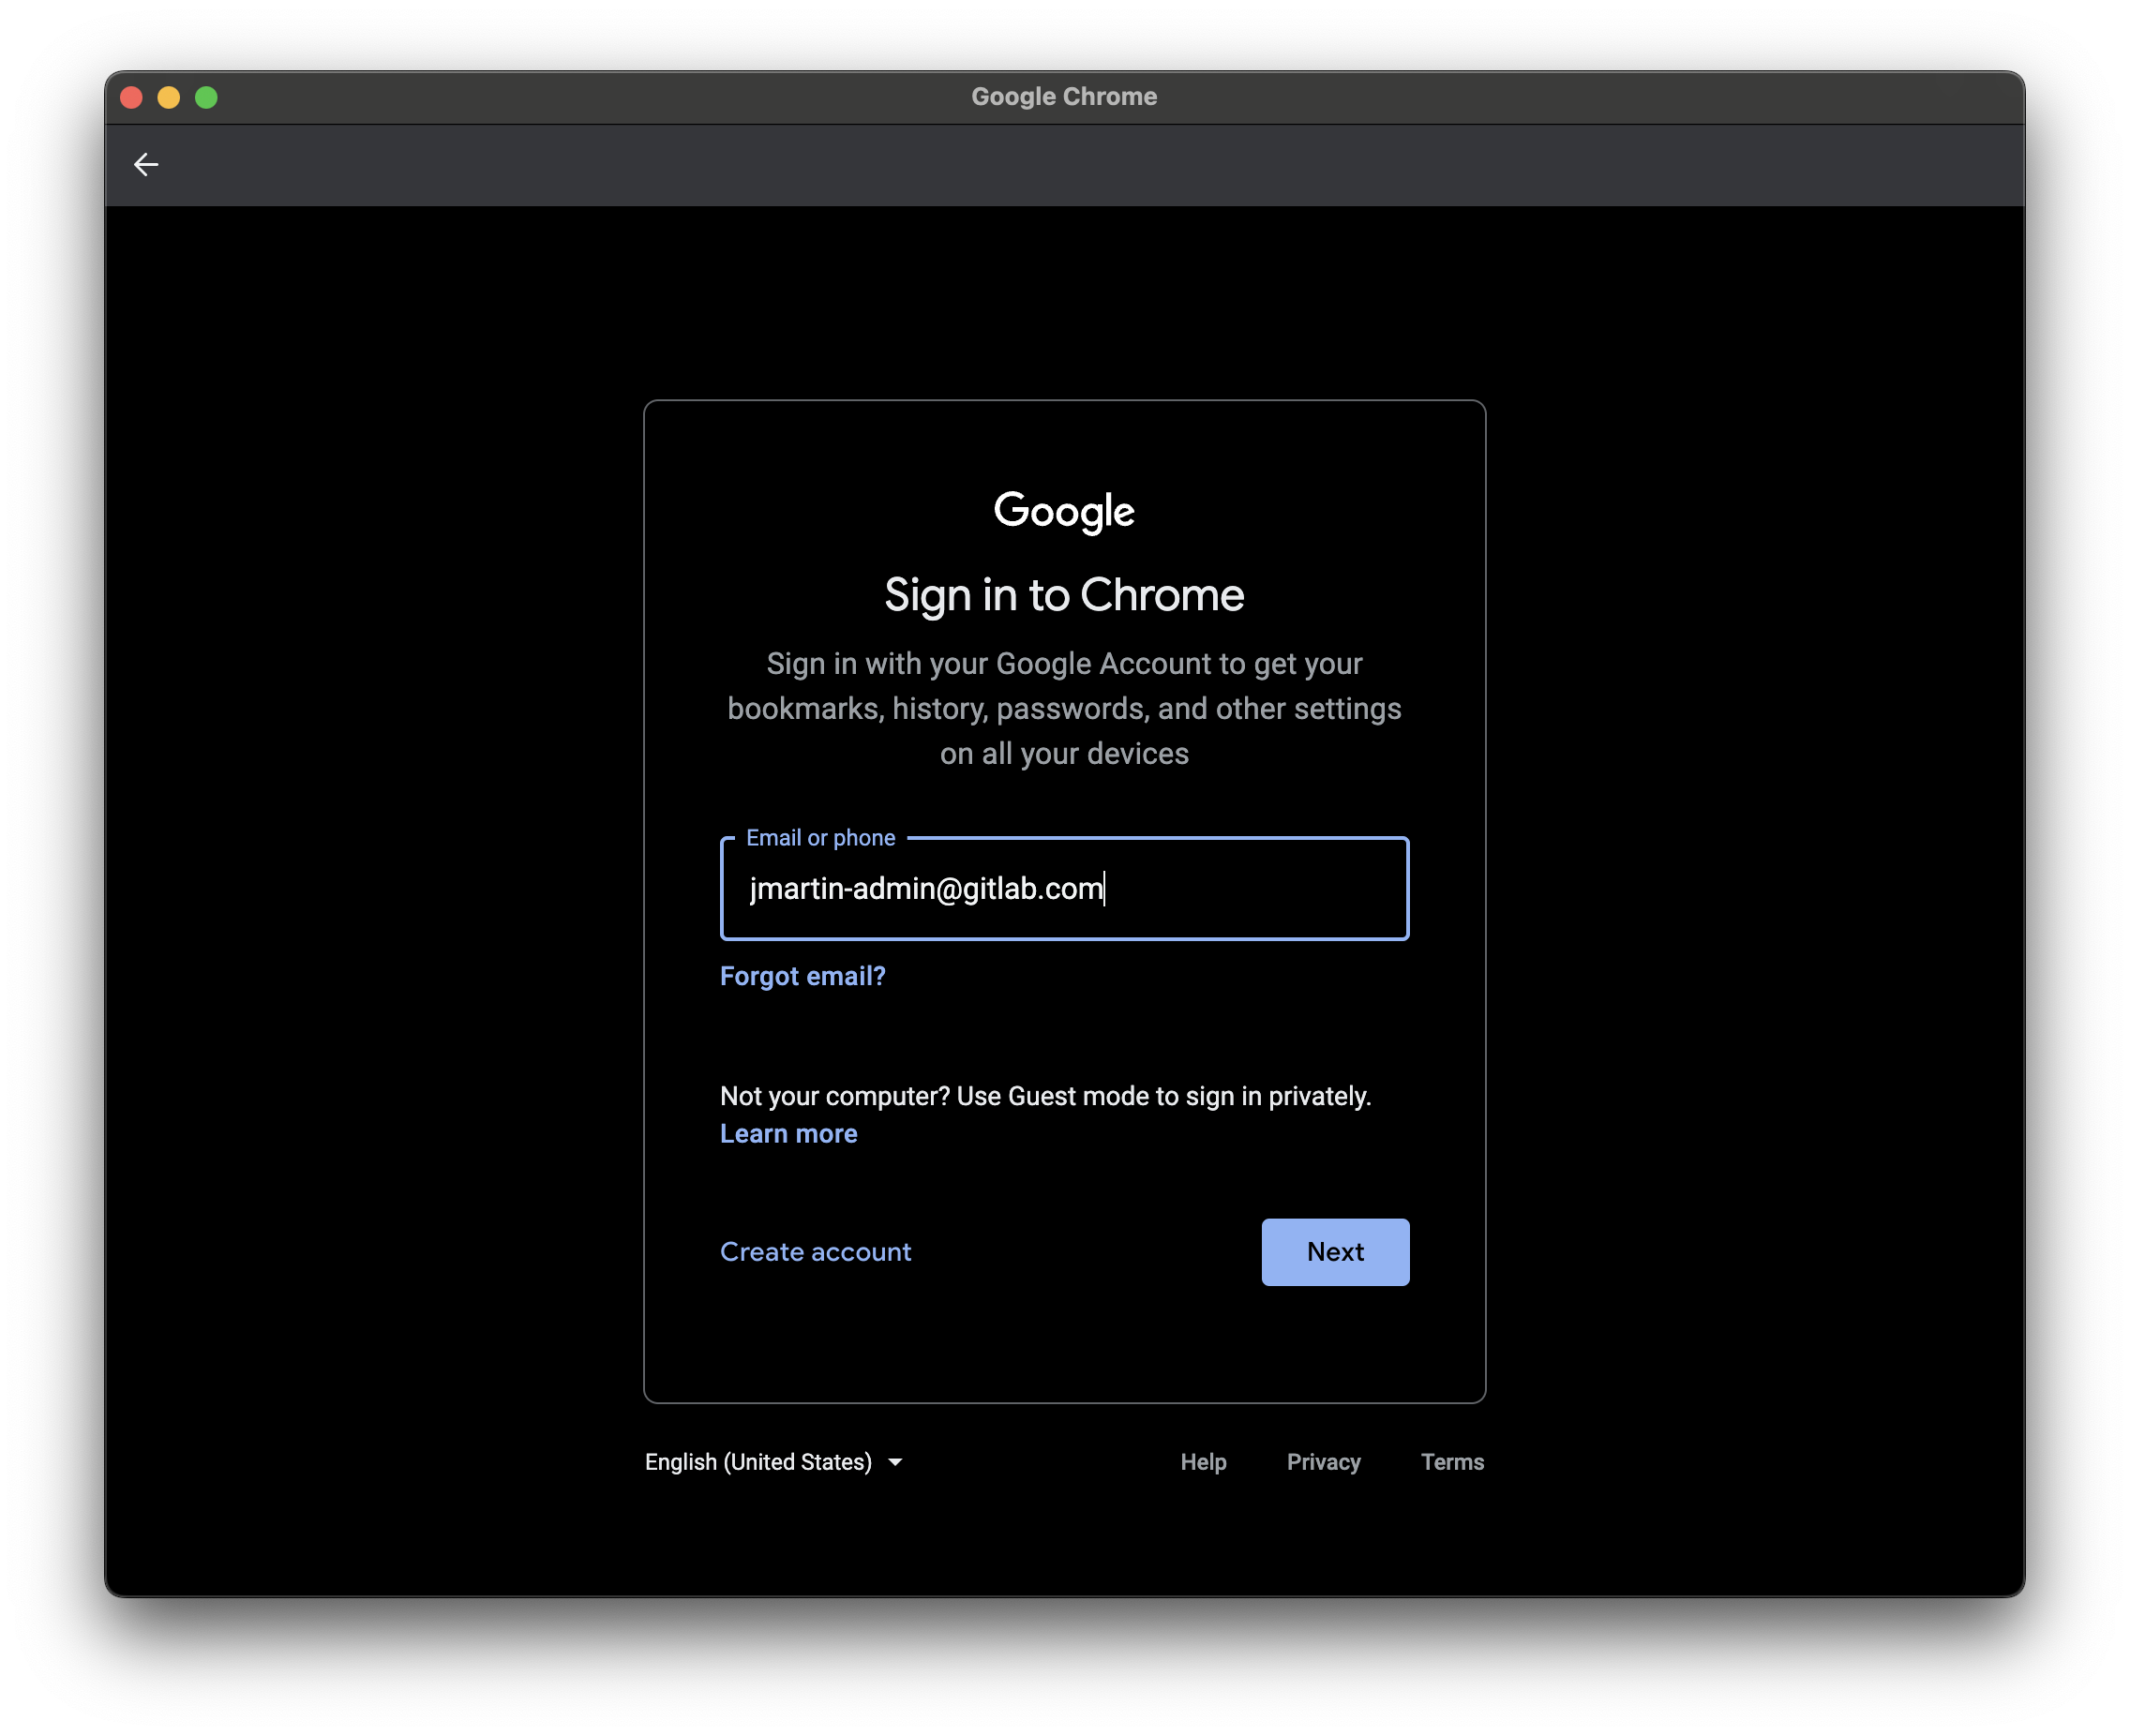
- You will be redirected to Okta to sign in with your
dmurphy-admin@gitlab.comcredentials. Copy the password from the 1Password record.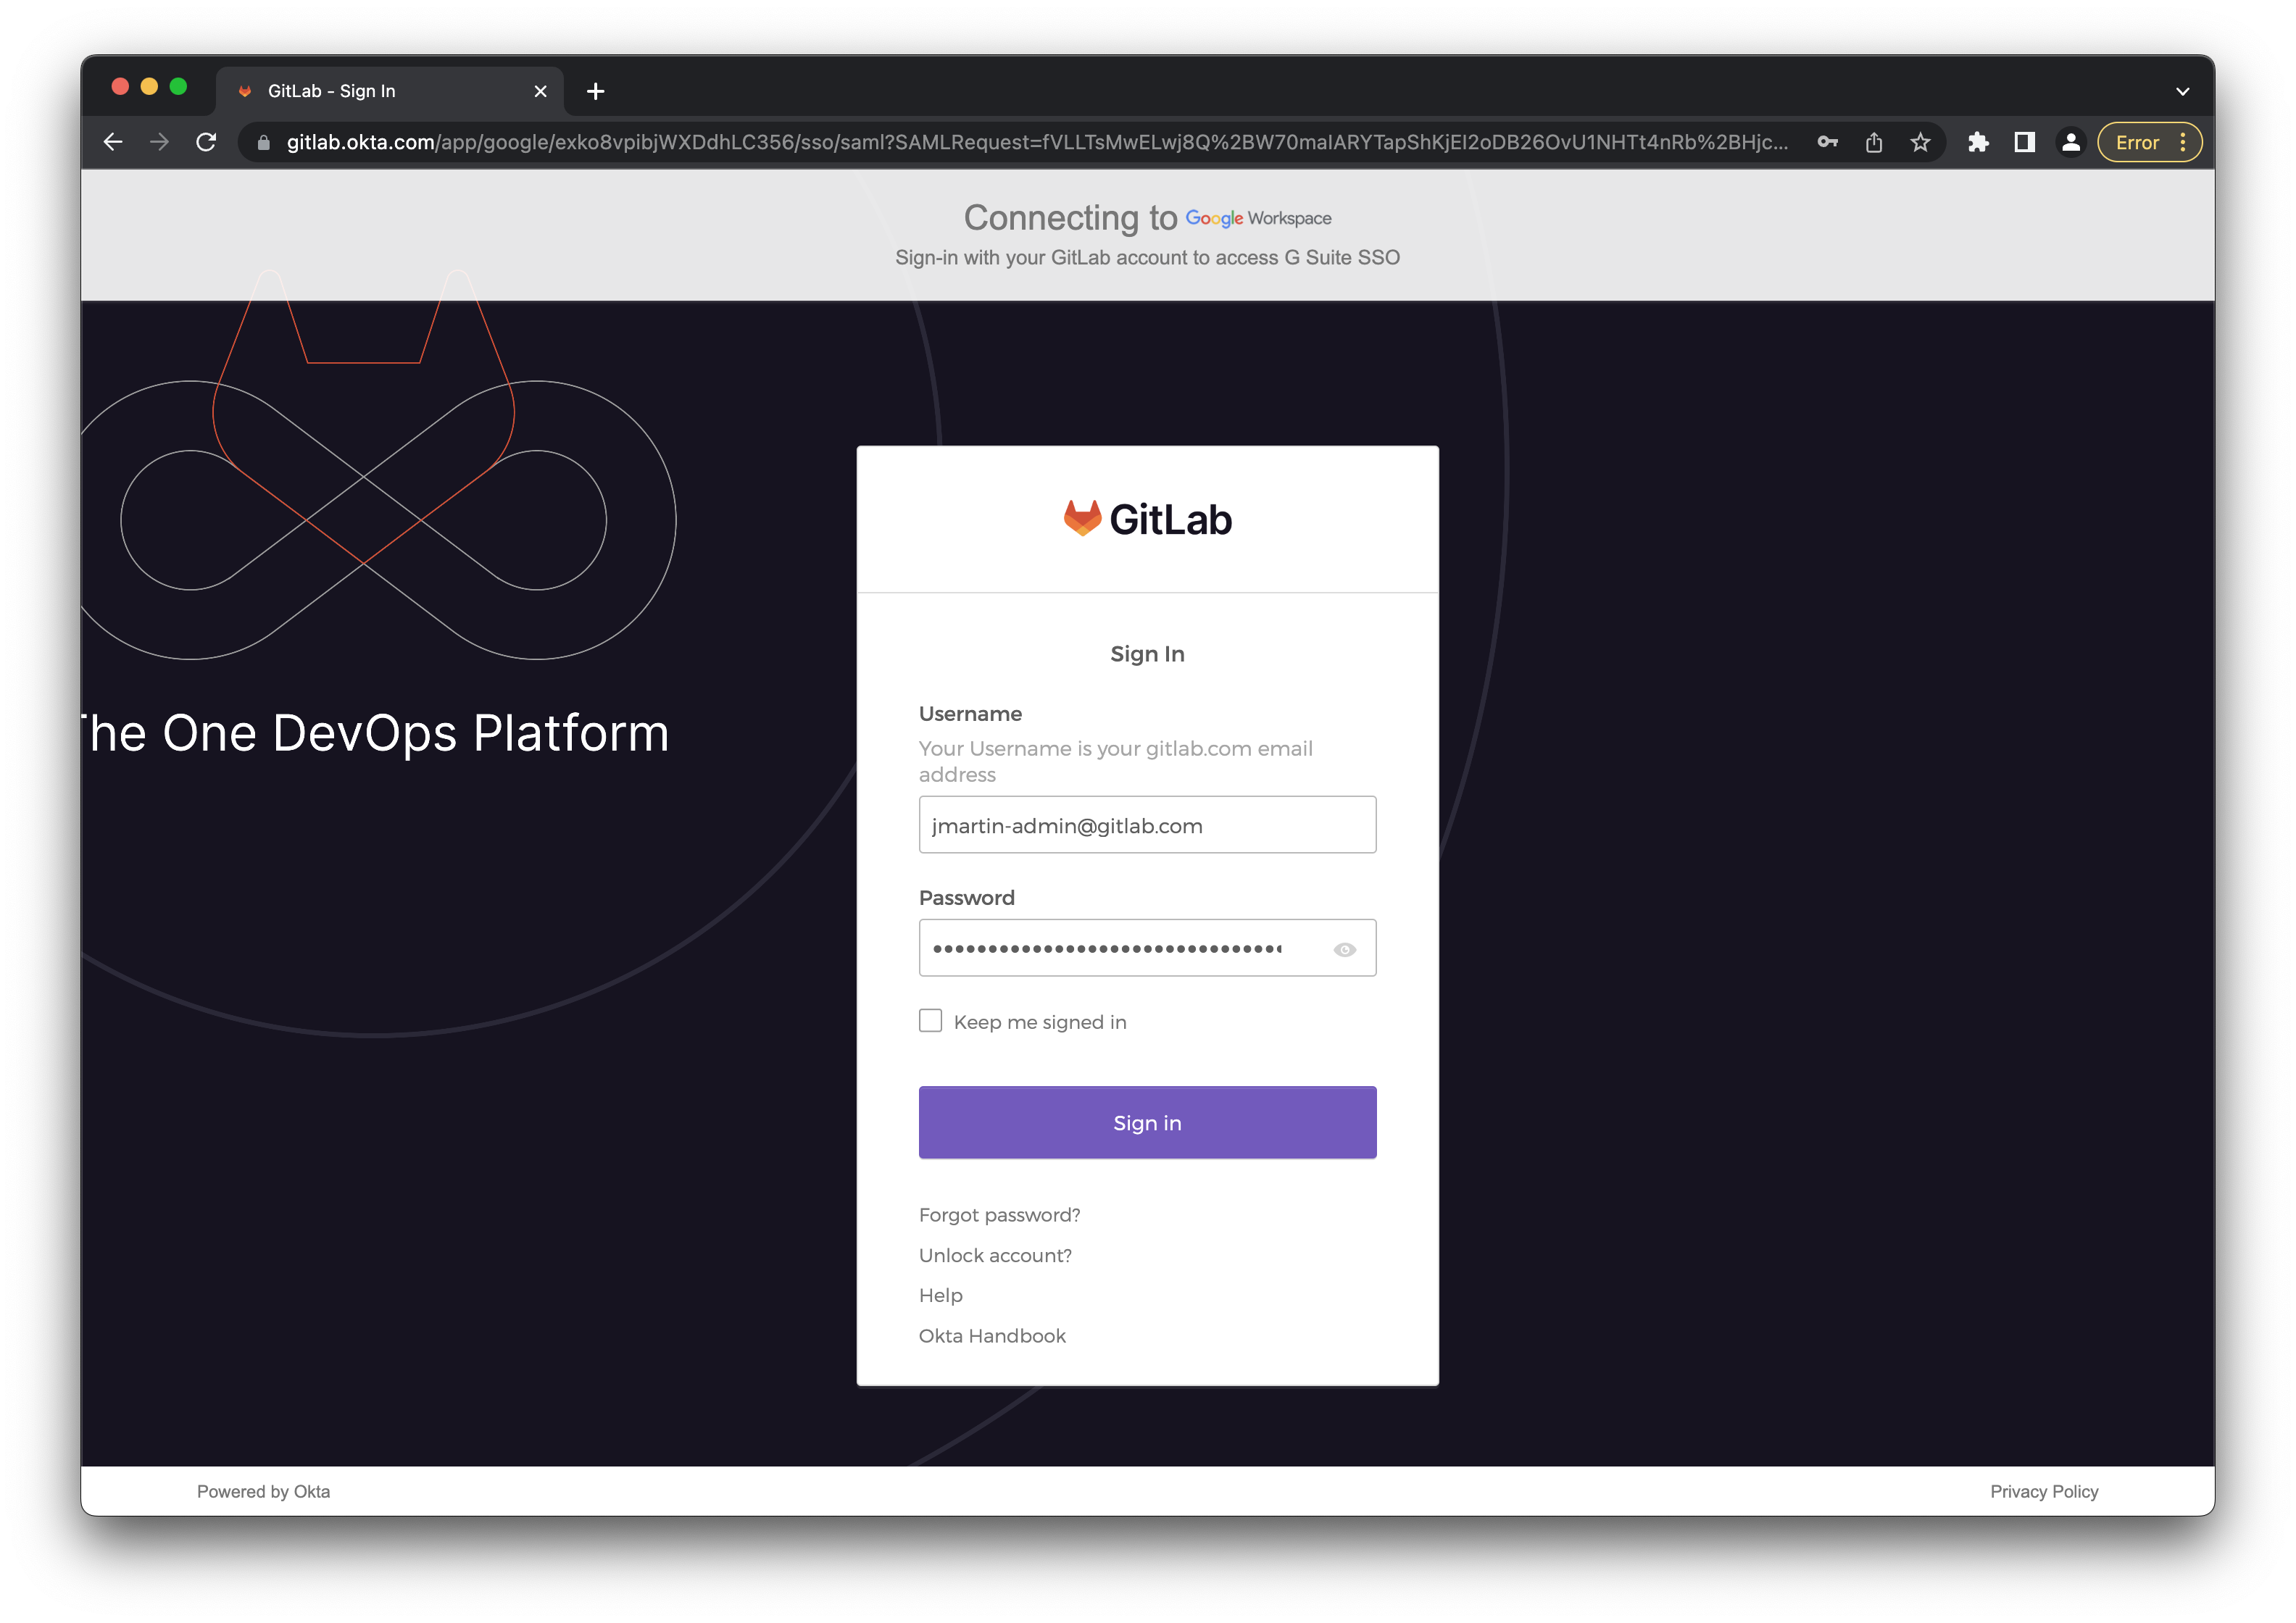
- Remember that we never save passwords in Chrome. You can click the Never button.
- When prompted to verify your identity, click the USB security key option.
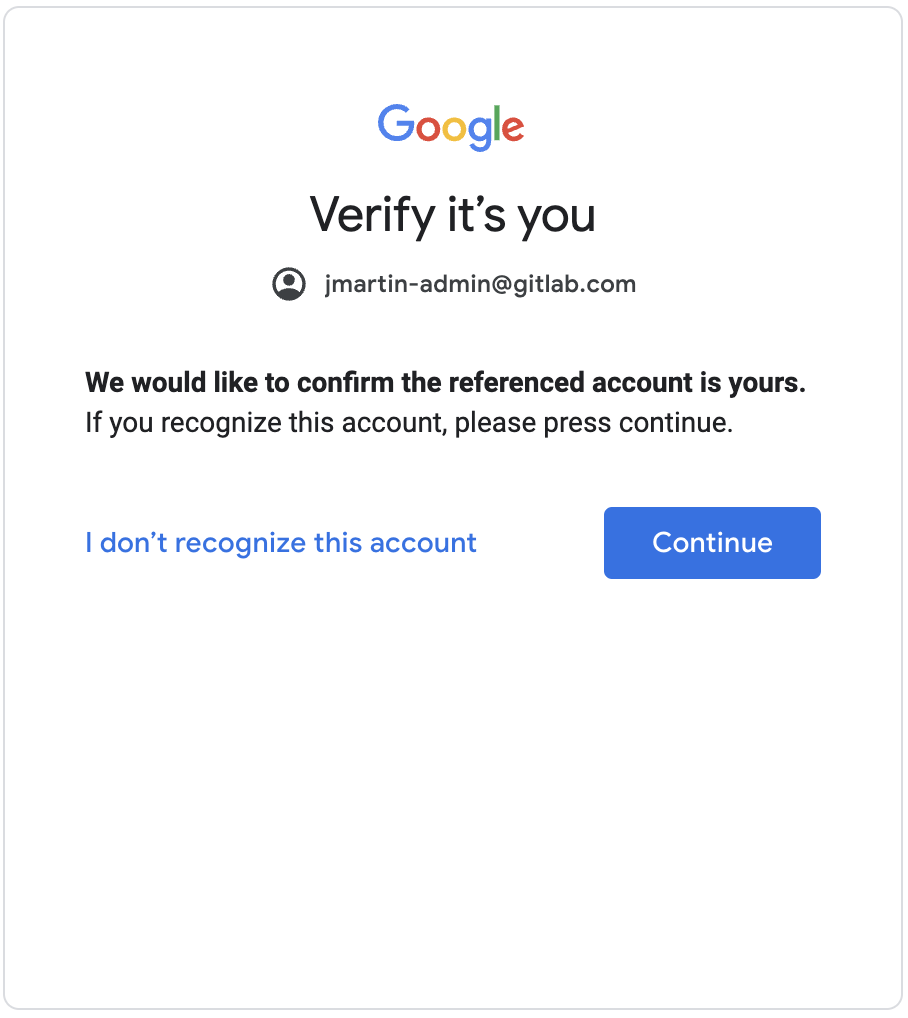
- You will be prompted by Google to verify it’s you. Click the Continue button.
- You will be prompted that
Your organization will manage this profile. Click the Continue button.
- When prompted to
Turn on sync?, click the Settings button.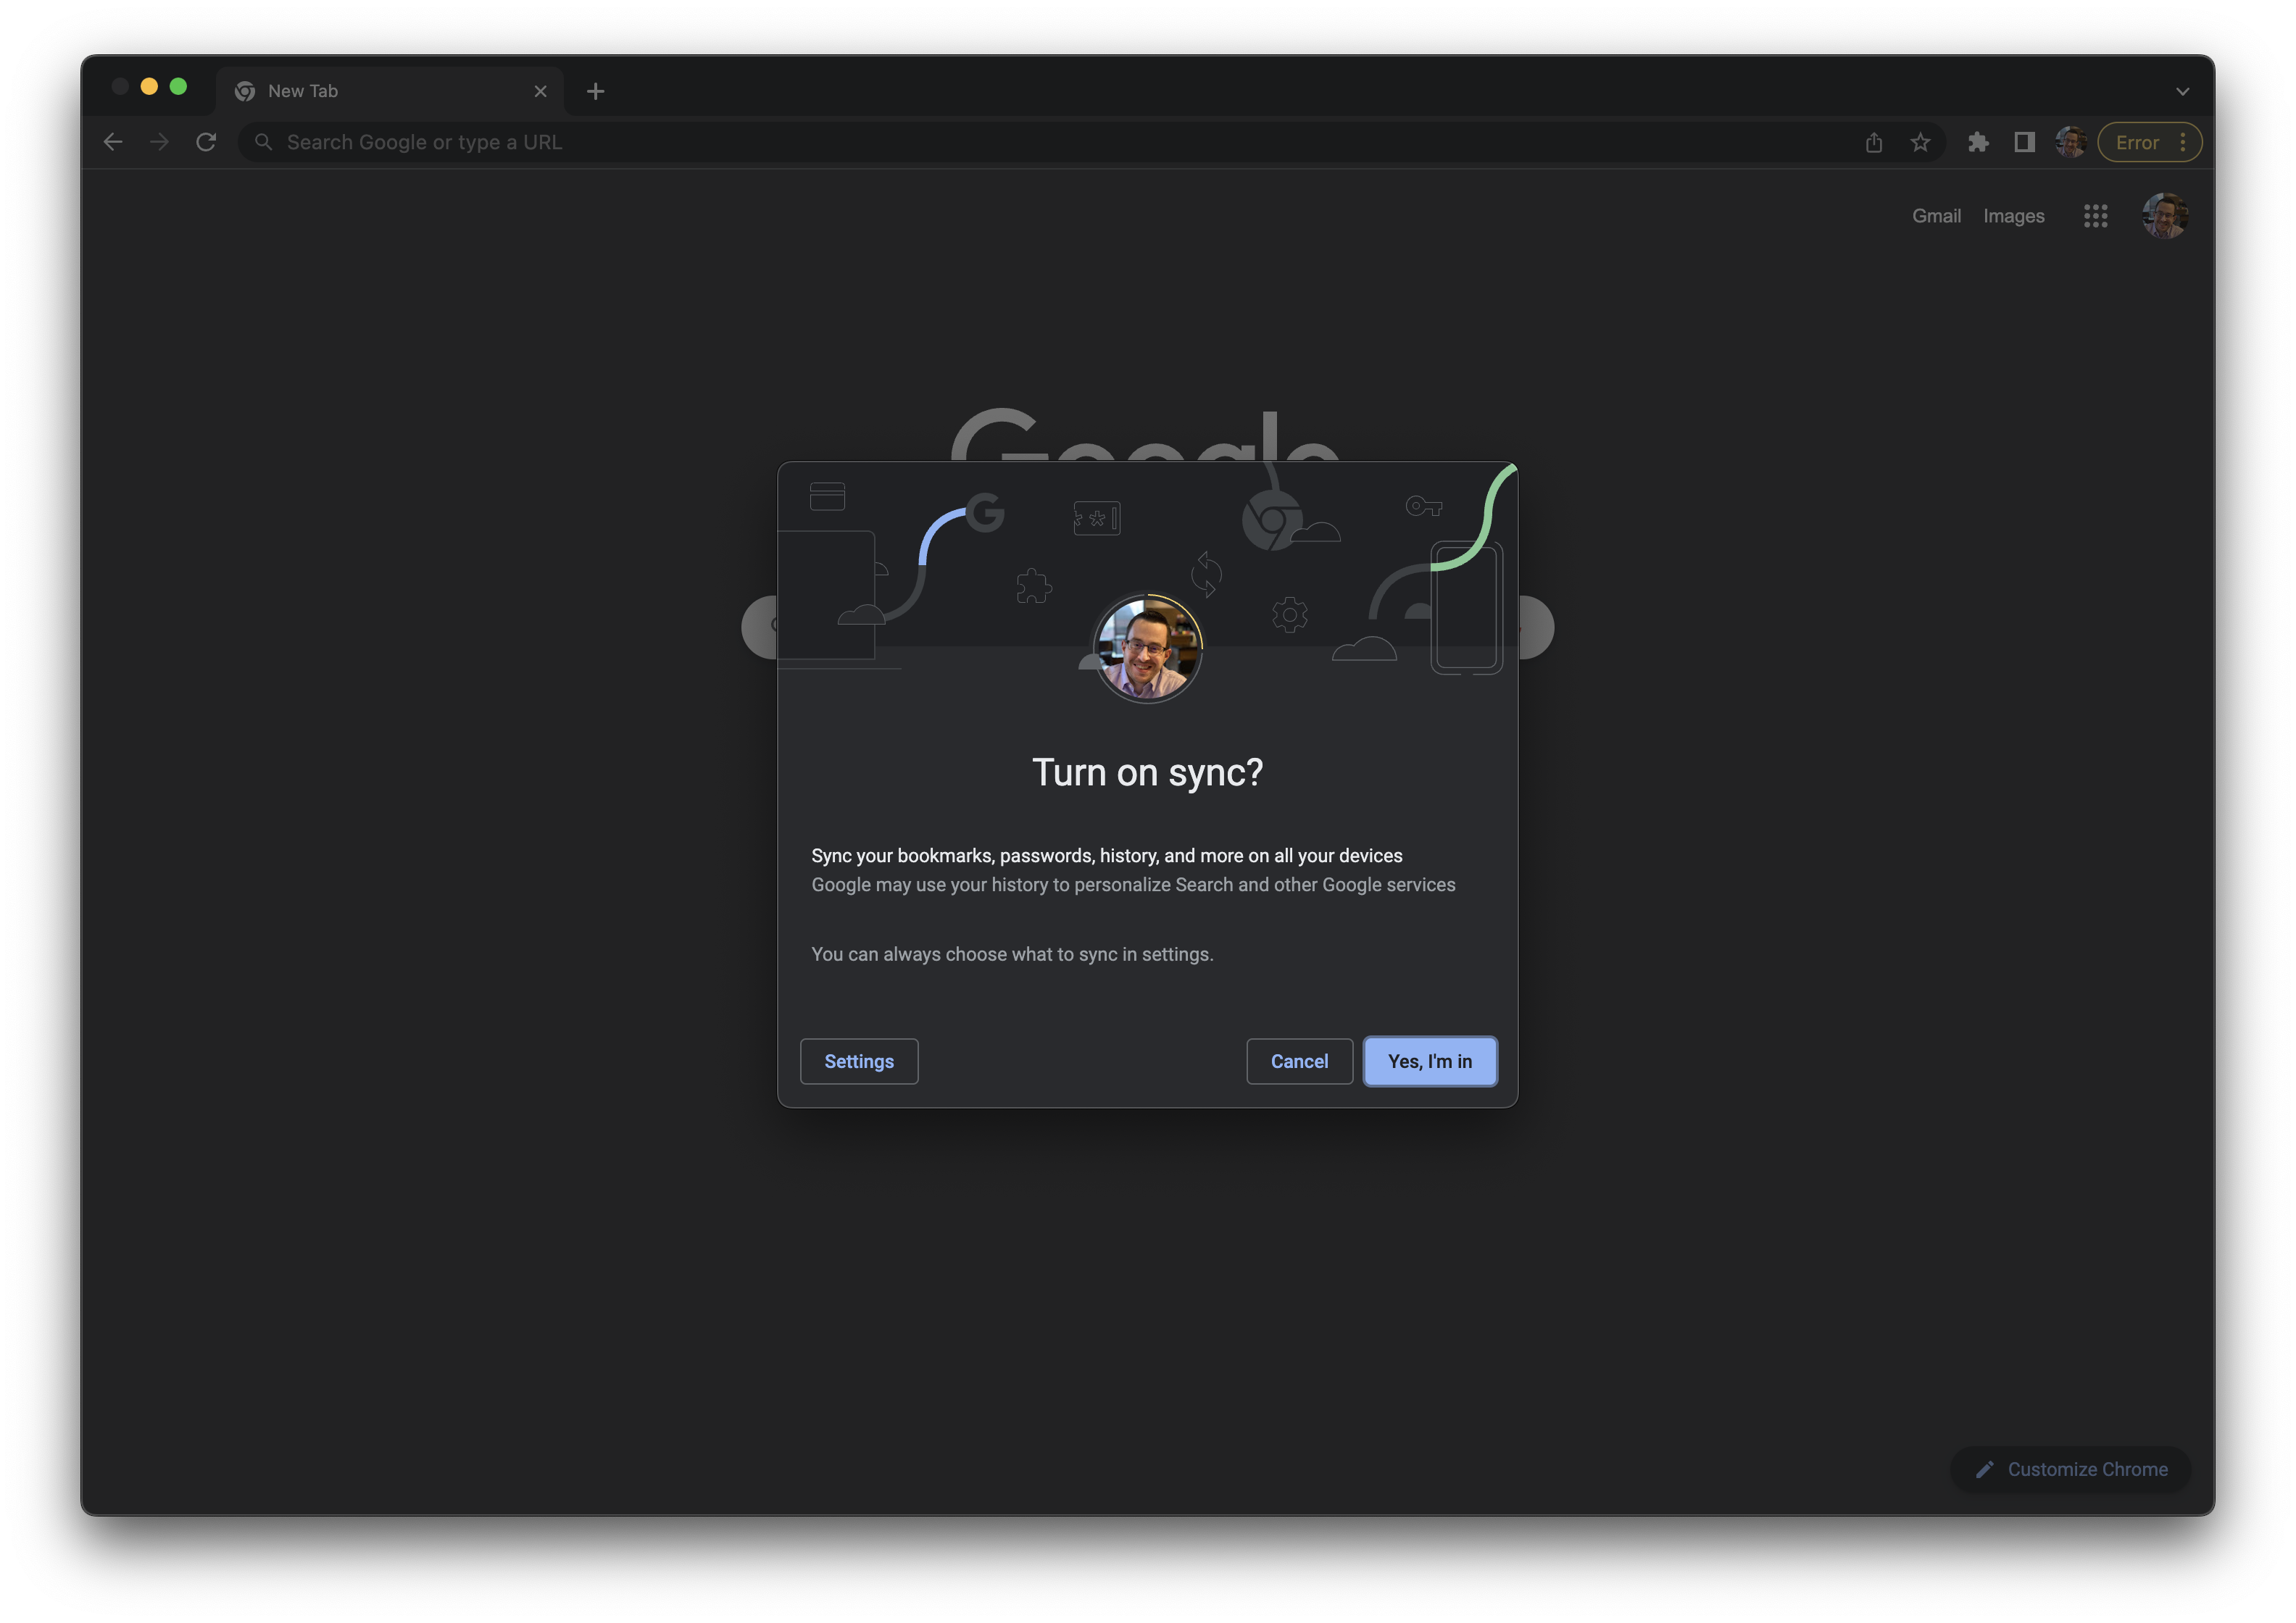
- Click the Manage what you sync section.
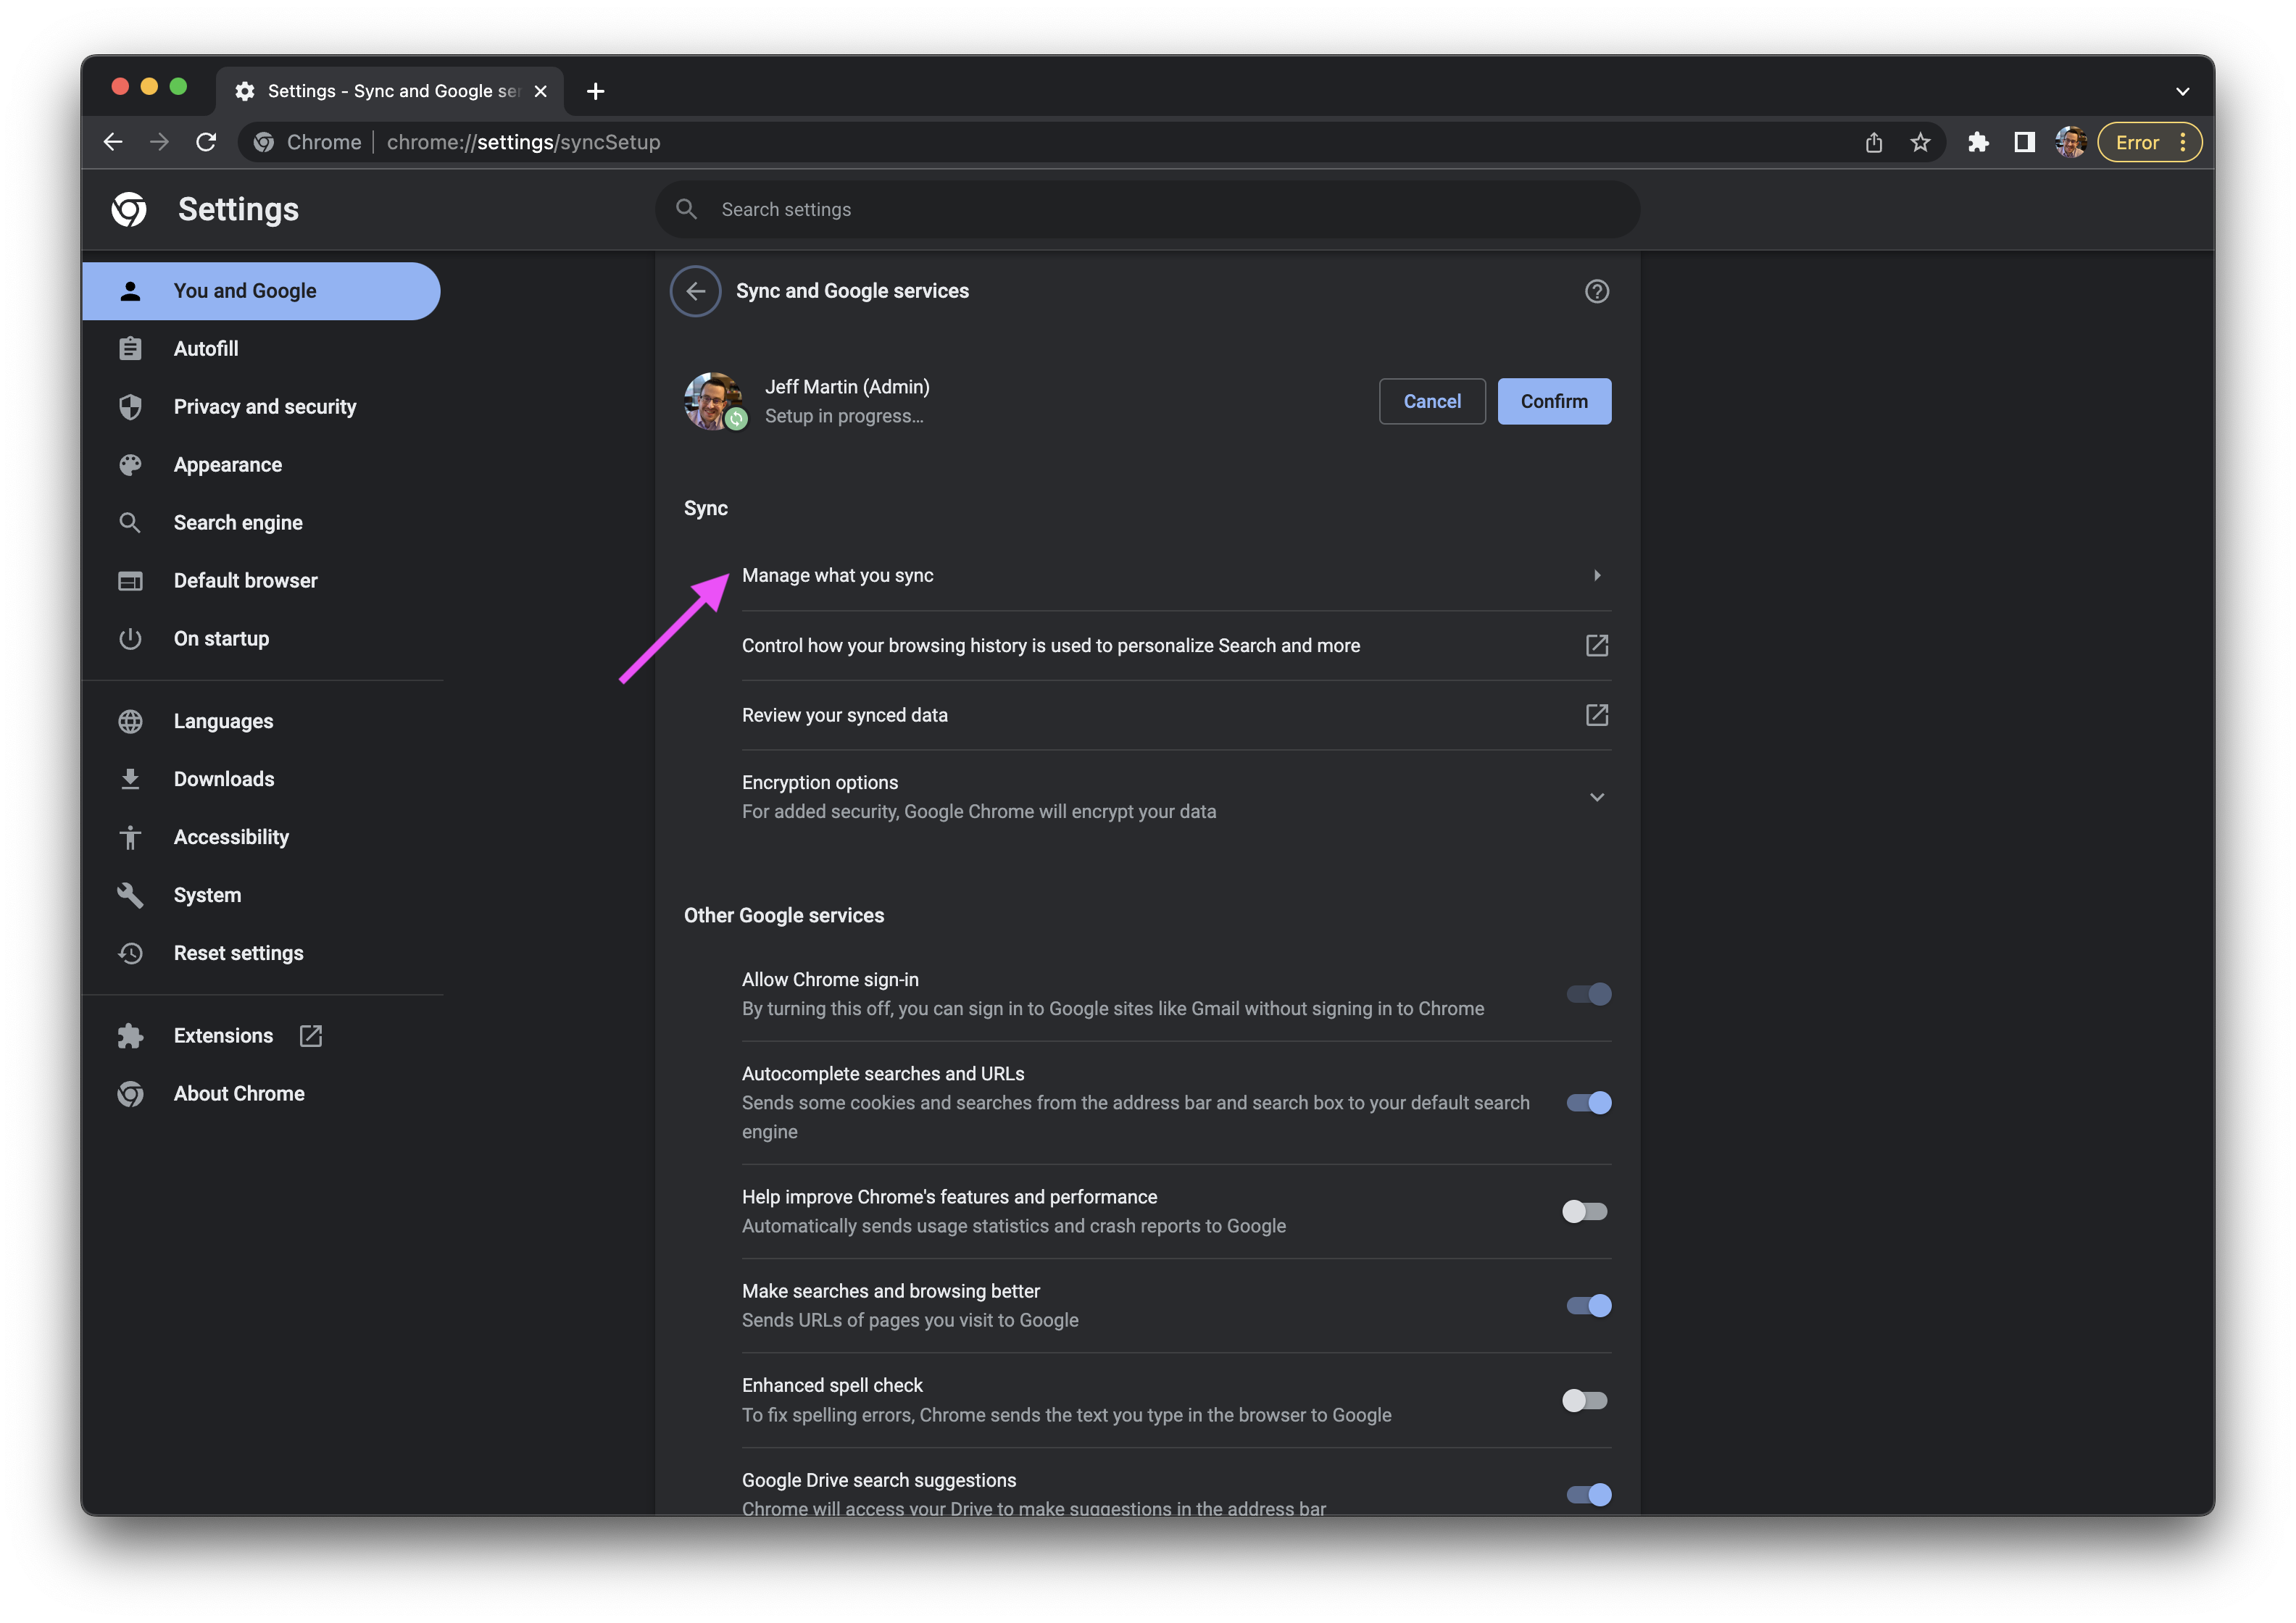
- Change the
Sync everythingtoCustomize sync, then uncheck thePasswordstoggle. - Click the arrow to the left of
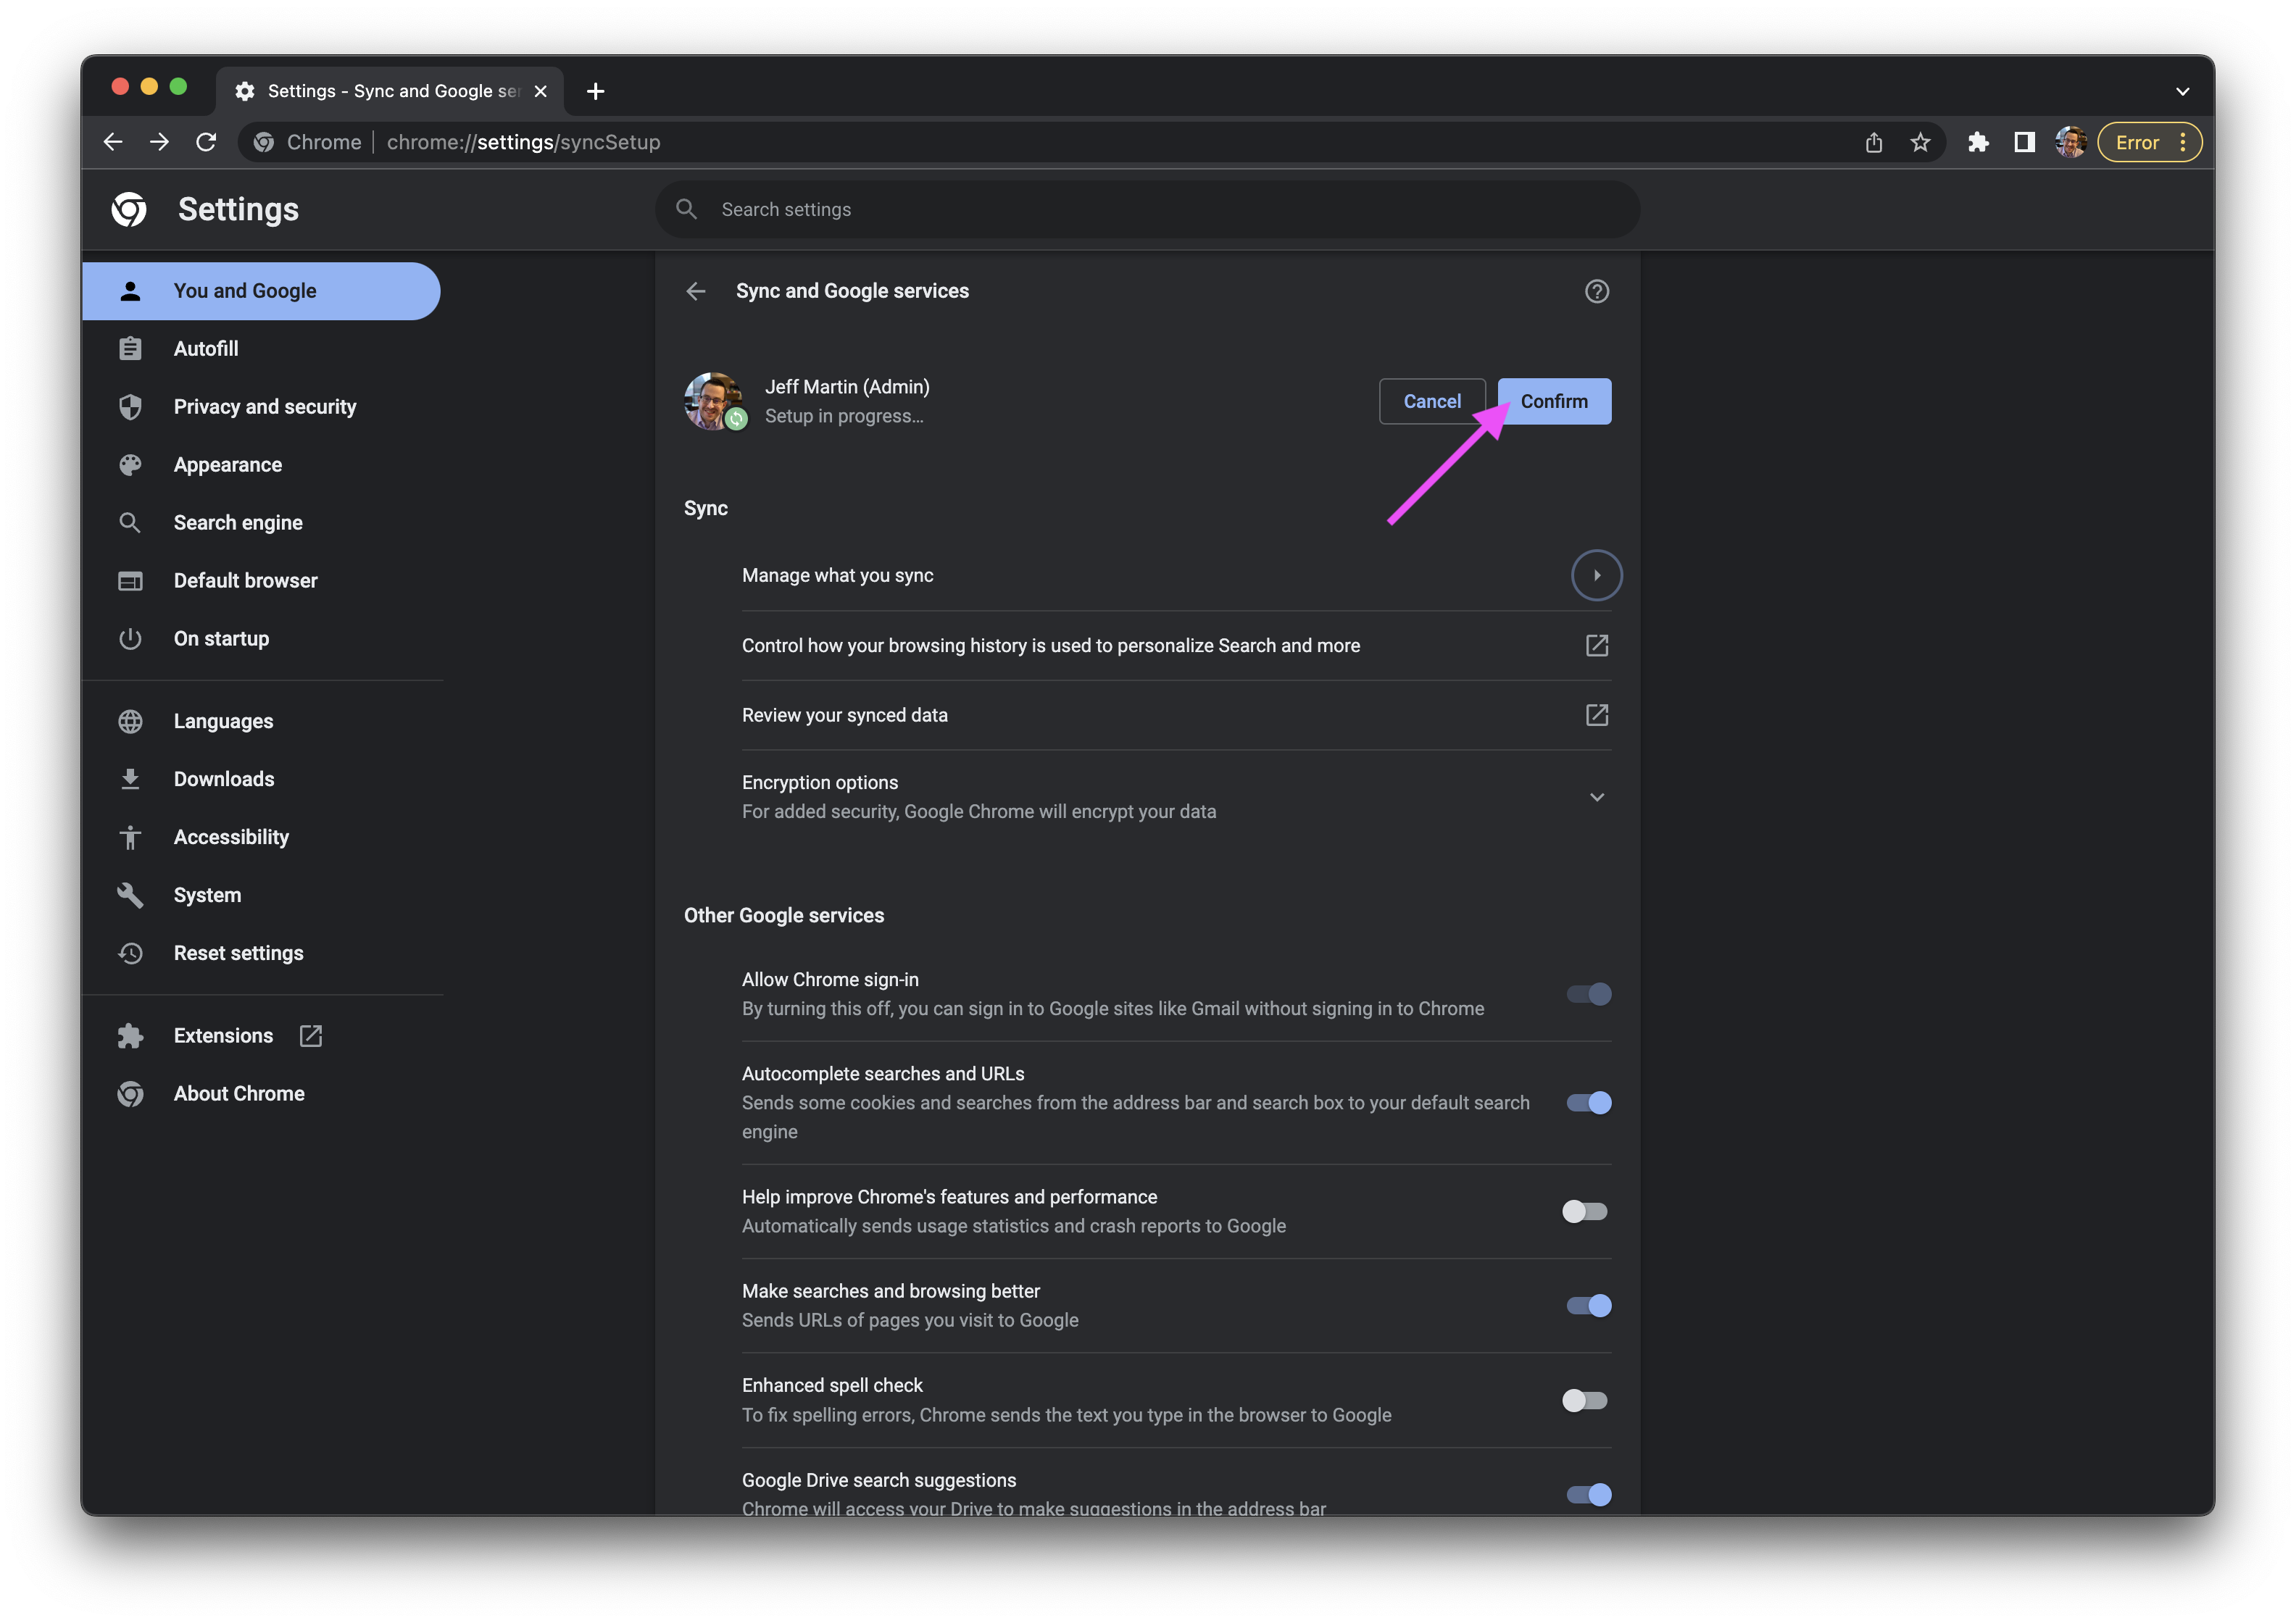
Manage what you syncto return back to the main configuration screen.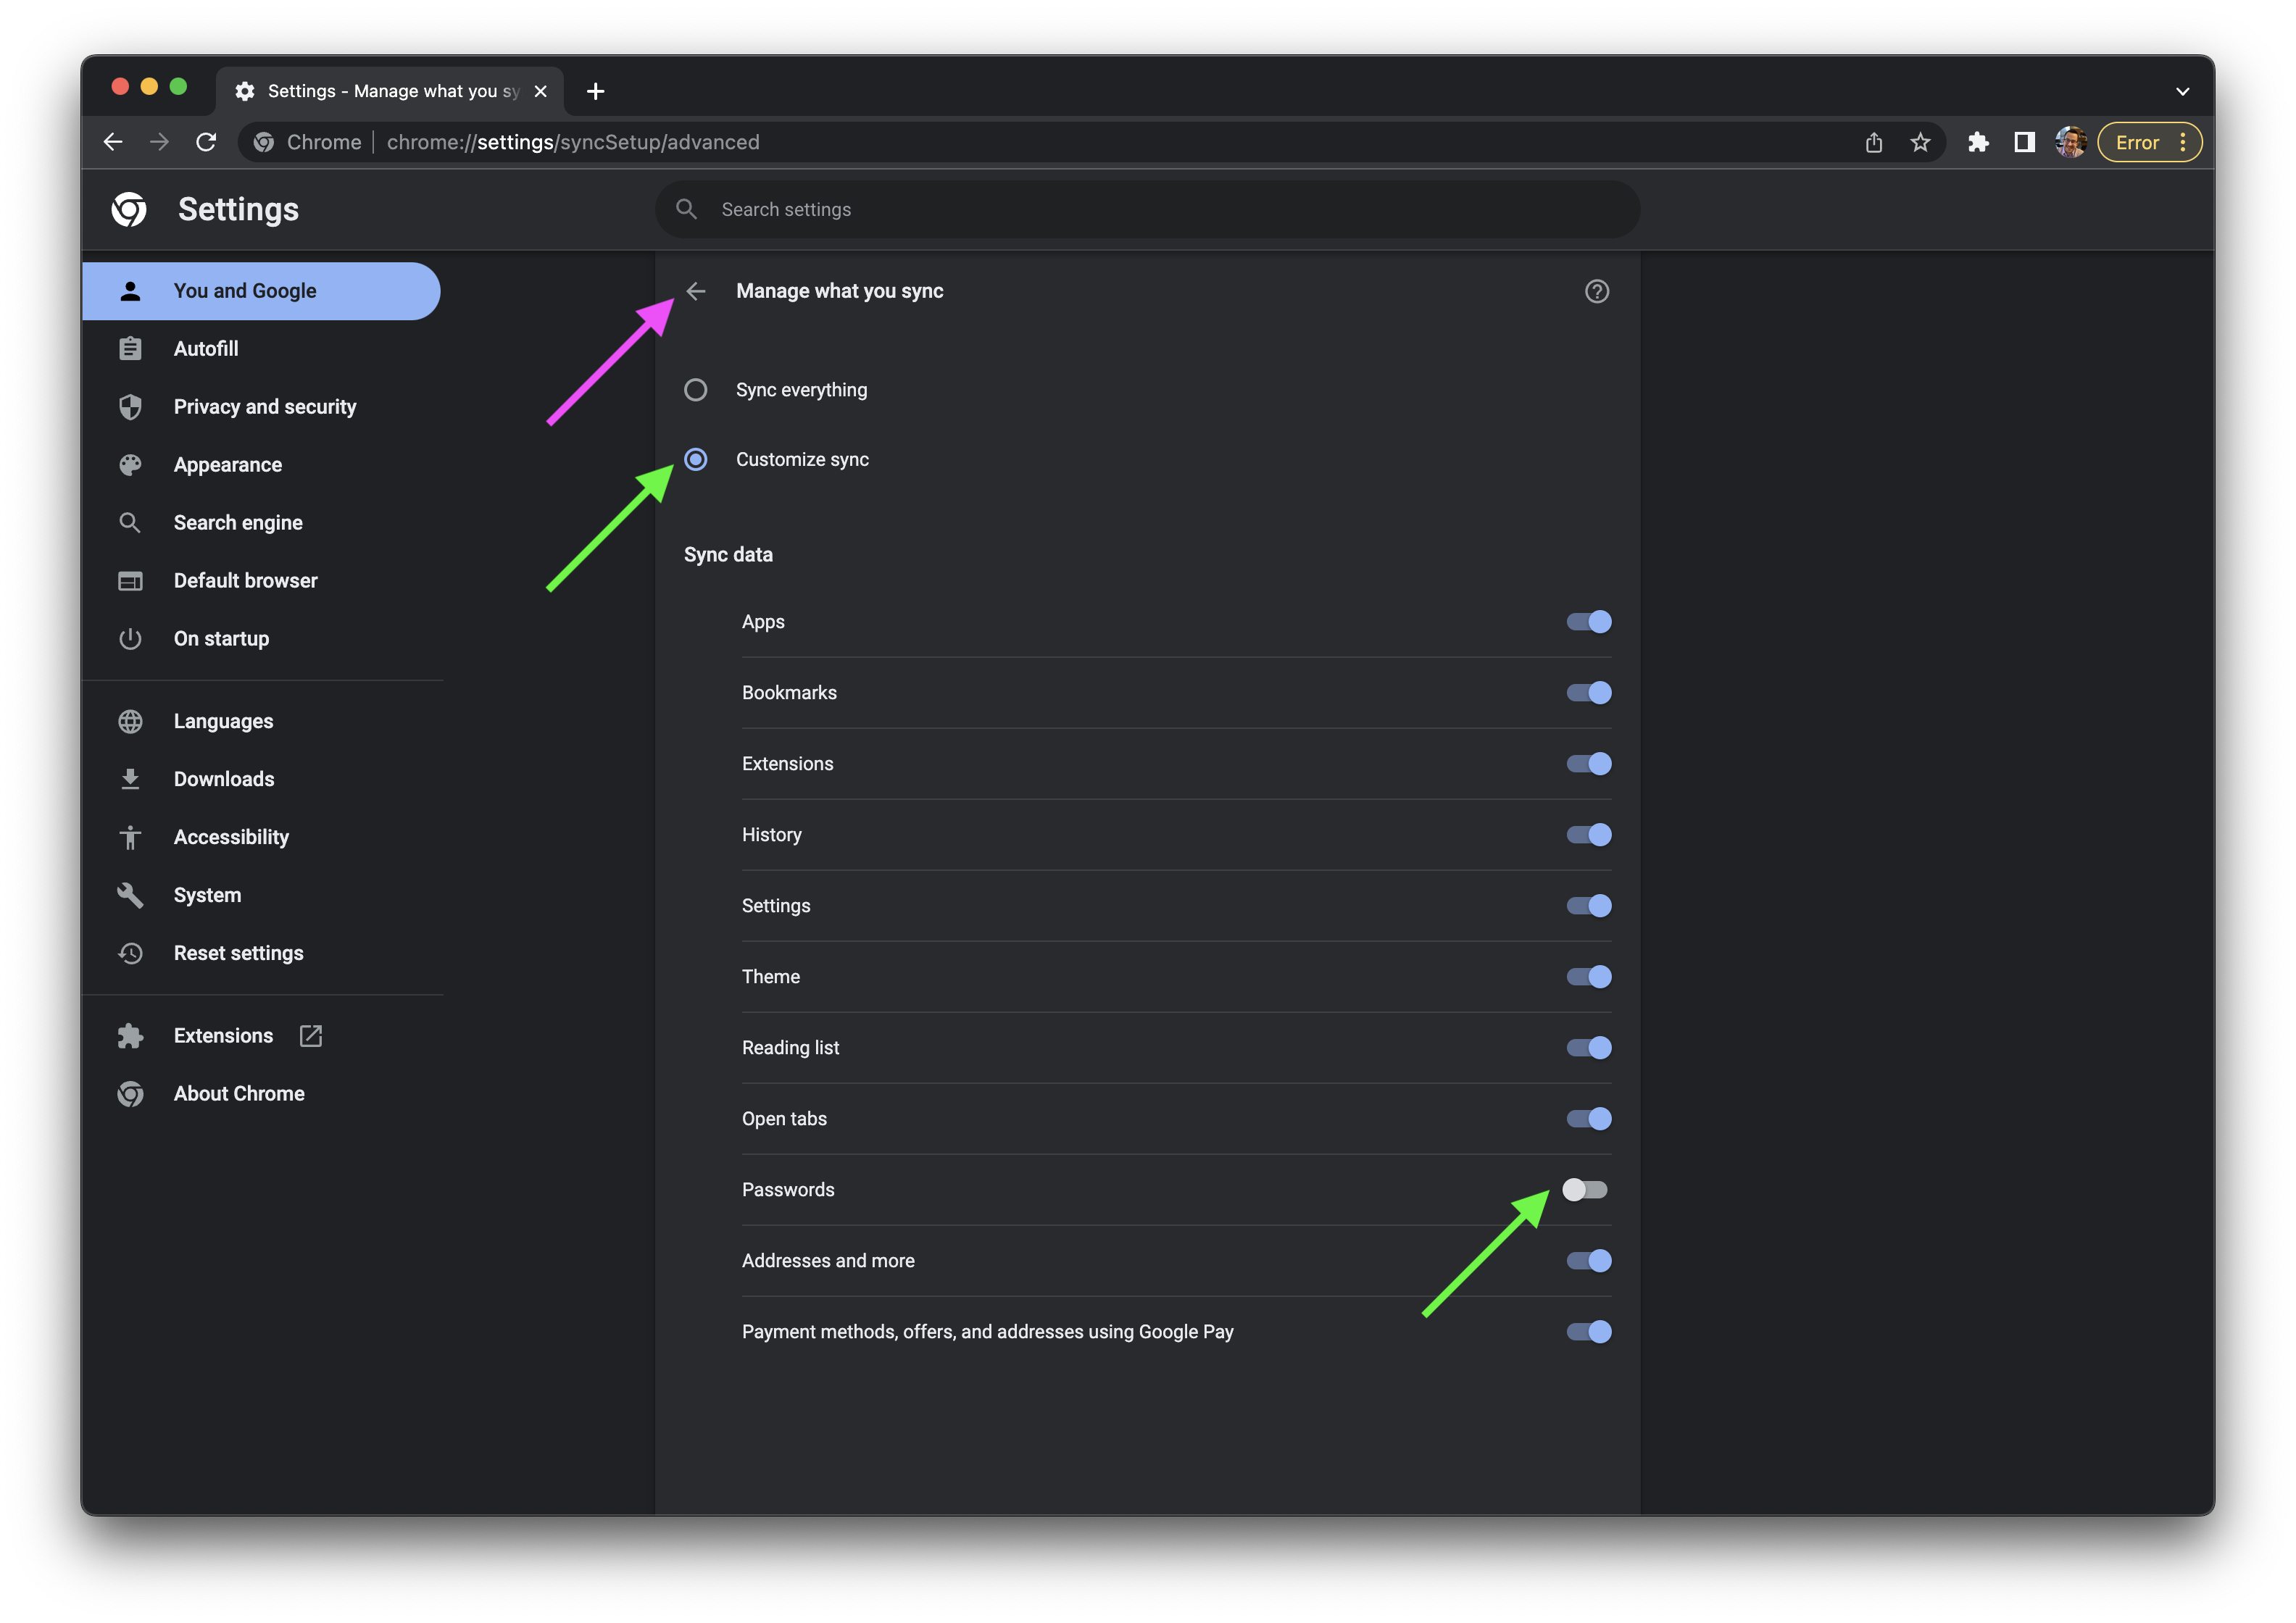
- To the right of your name, click the Confirm button.
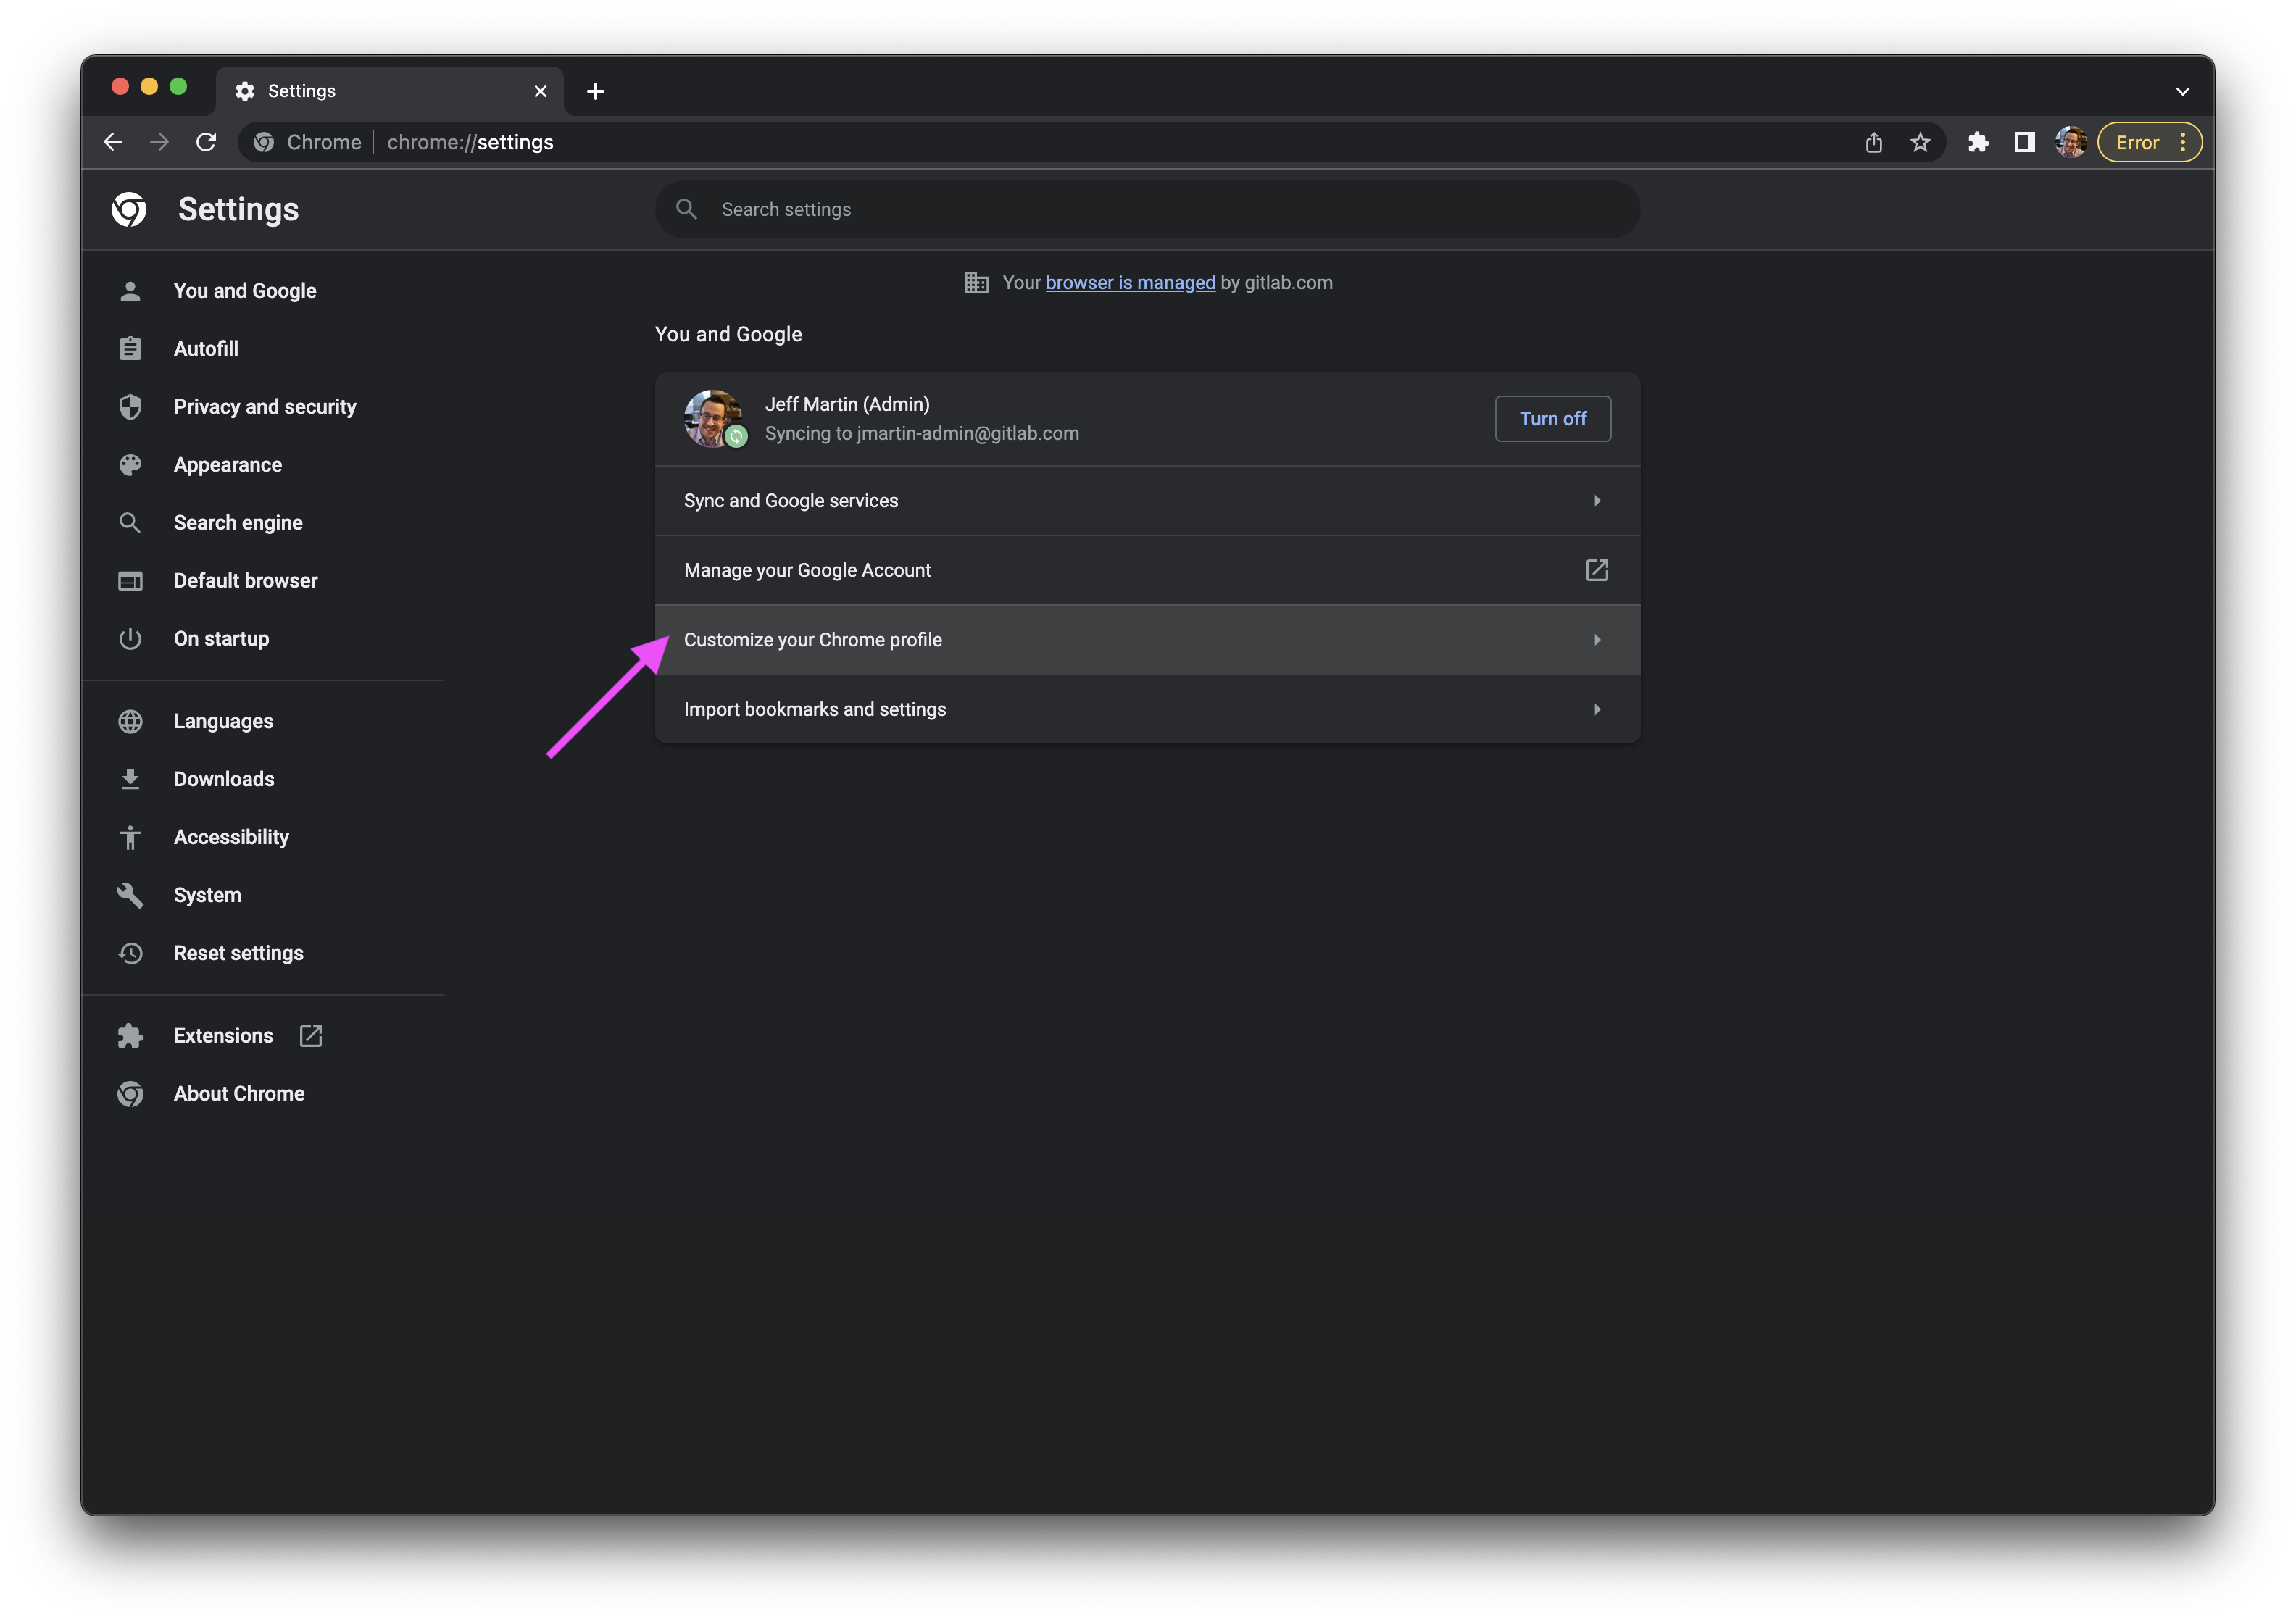
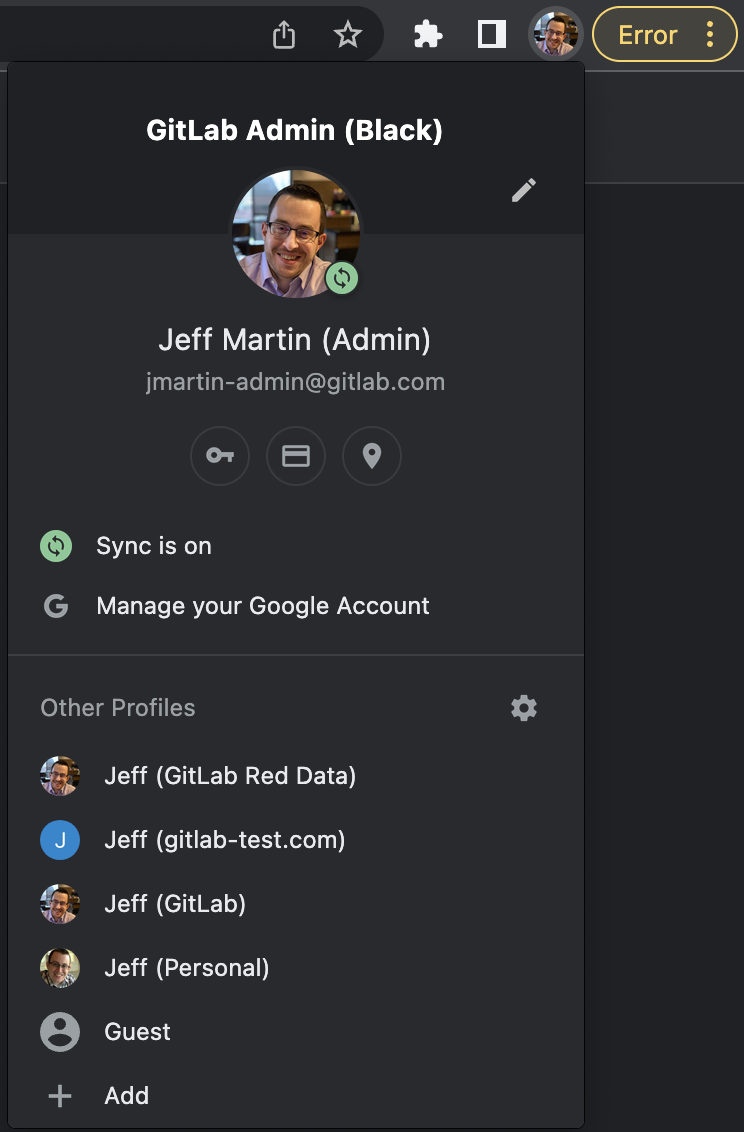
- Click the Customize your Chrome profile row.
- Set the name to
GitLab Admin (Black)and choose a theme color (ex. Black). This name refers to the PURPLE vs BLACK wristband access levels.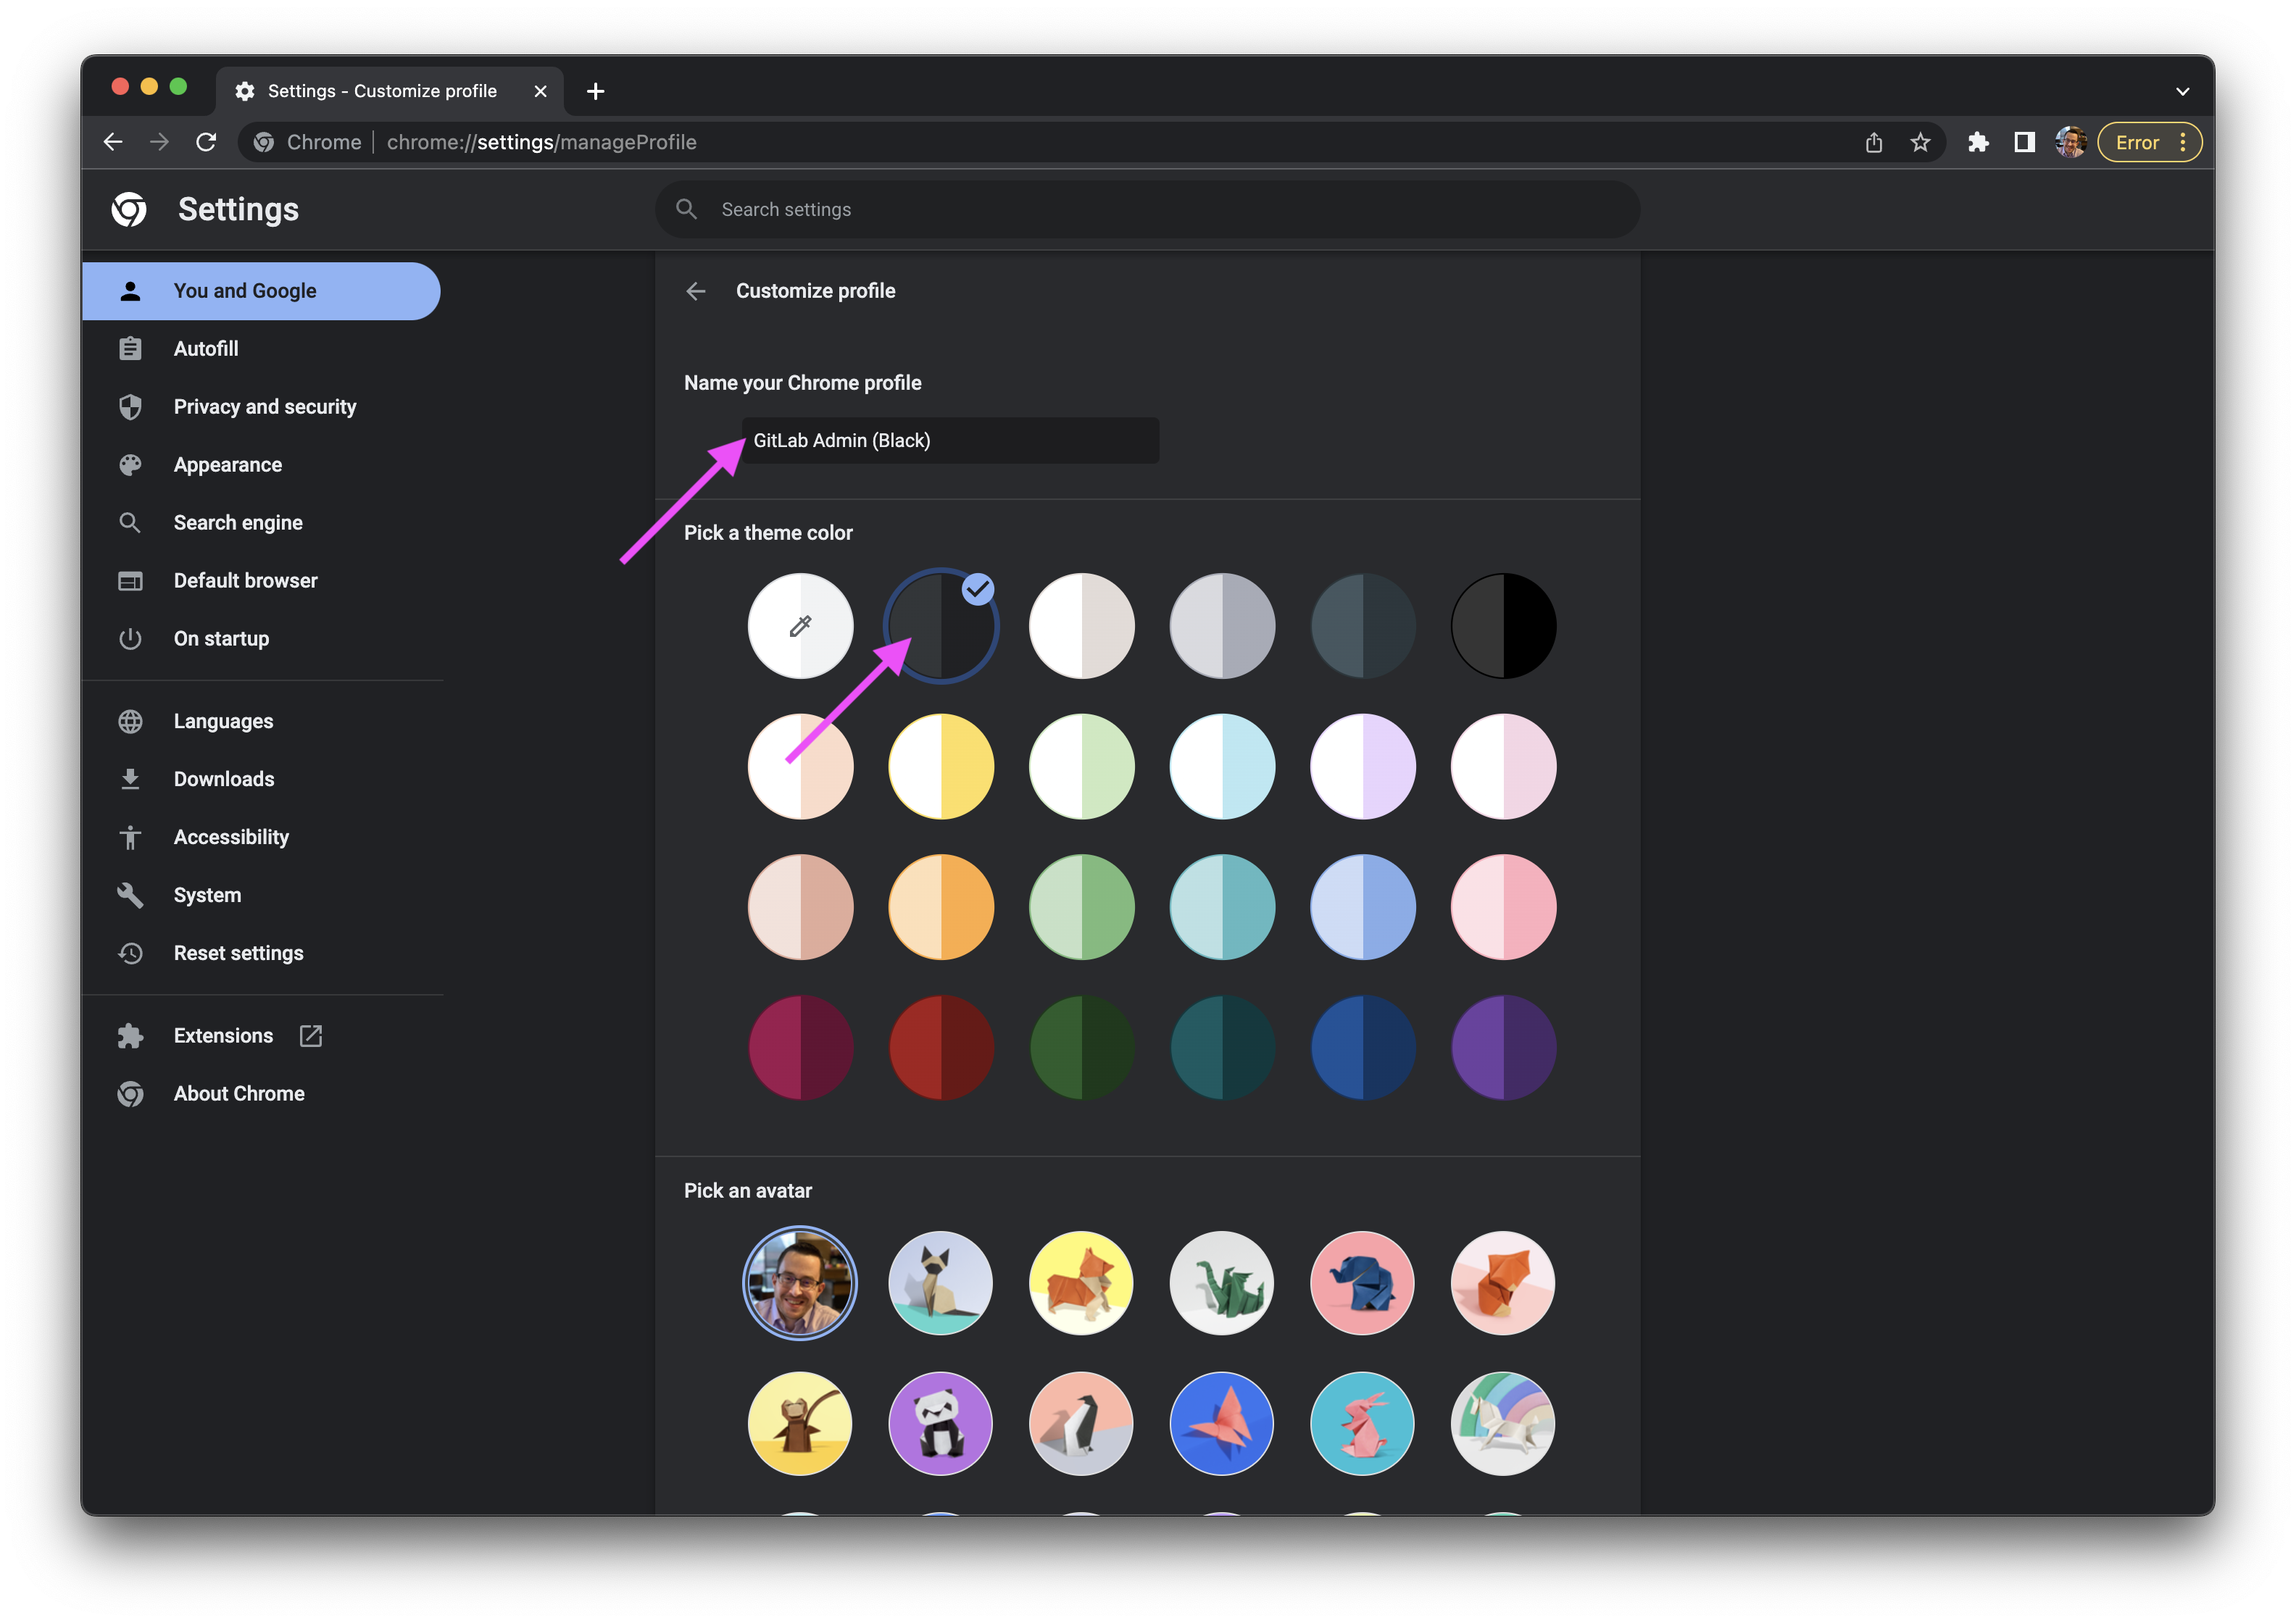
- You can verify your Chrome profile in the top right corner by clicking on your avatar. You can switch between profiles as needed.
Task 2.4: Add bookmarks for Okta and Gmail
Laptop Transfer? You can skip this task since your profile should automatically sync.
- In your Chrome browser window with your
GitLab Admin (Black)profile selected, press Cmd+Shift+B to show the bookmarks menu bar. - Navigate to
https://gitlab.okta.comand sign in with your{handle}-admin@gitlab.comaccount using the credentials stored in 1Password. You will be prompted to verify your identity with USB Key MFA and touching your YubiKey. - On the Okta user dashboard, right click on the
Adminbutton and open in a new tab. - Press the star icon to bookmark this page, and edit the name to
Okta Admin.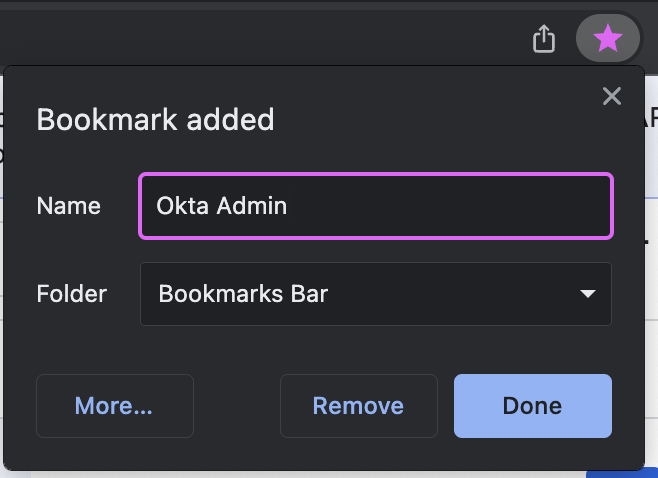
- Close the browser tab.
- On the Okta user dashboard, right click on the
G Suite SSO Mailtile and open in a new tab. - Press the star icon to bookmark this page, and edit the name to
Gmail. - Do not close the browser tab.
Step 3: 1Password Configuration
Task 3.1: Activate 1Password Account
Laptop Transfer? You can skip this task.
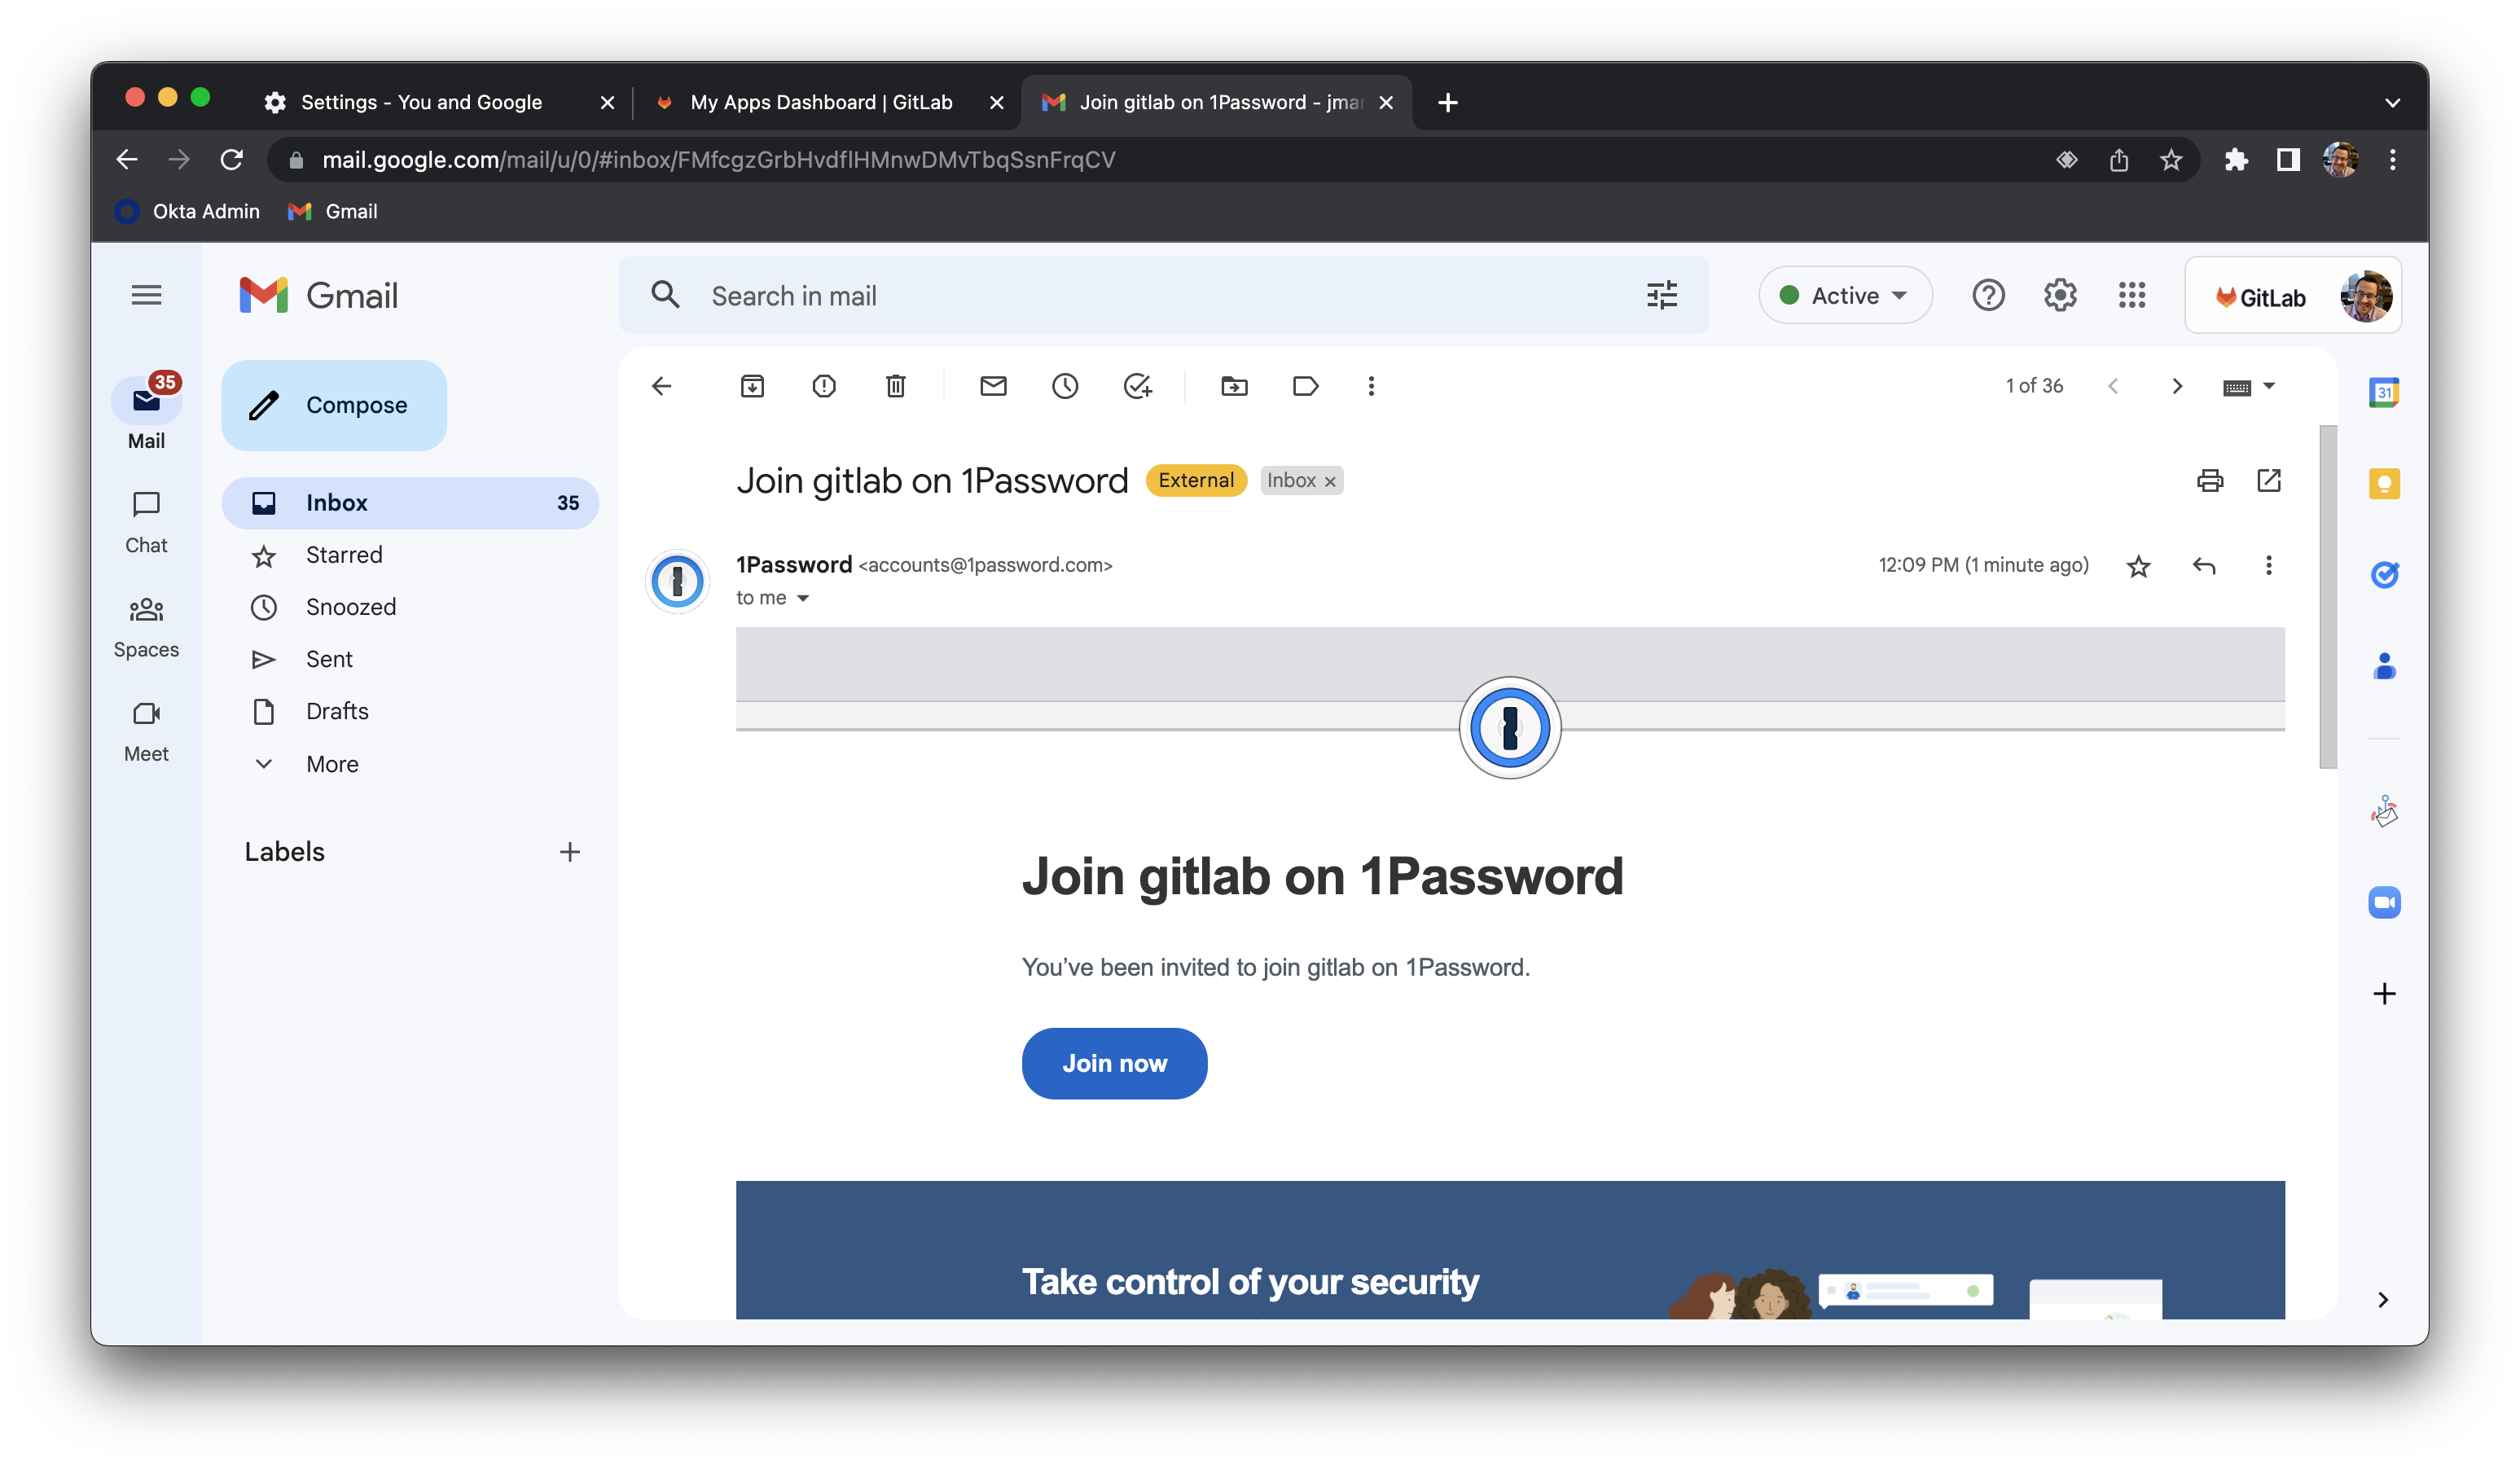
- In the Gmail browser tab, open the email titled
Join gitlab on 1Password.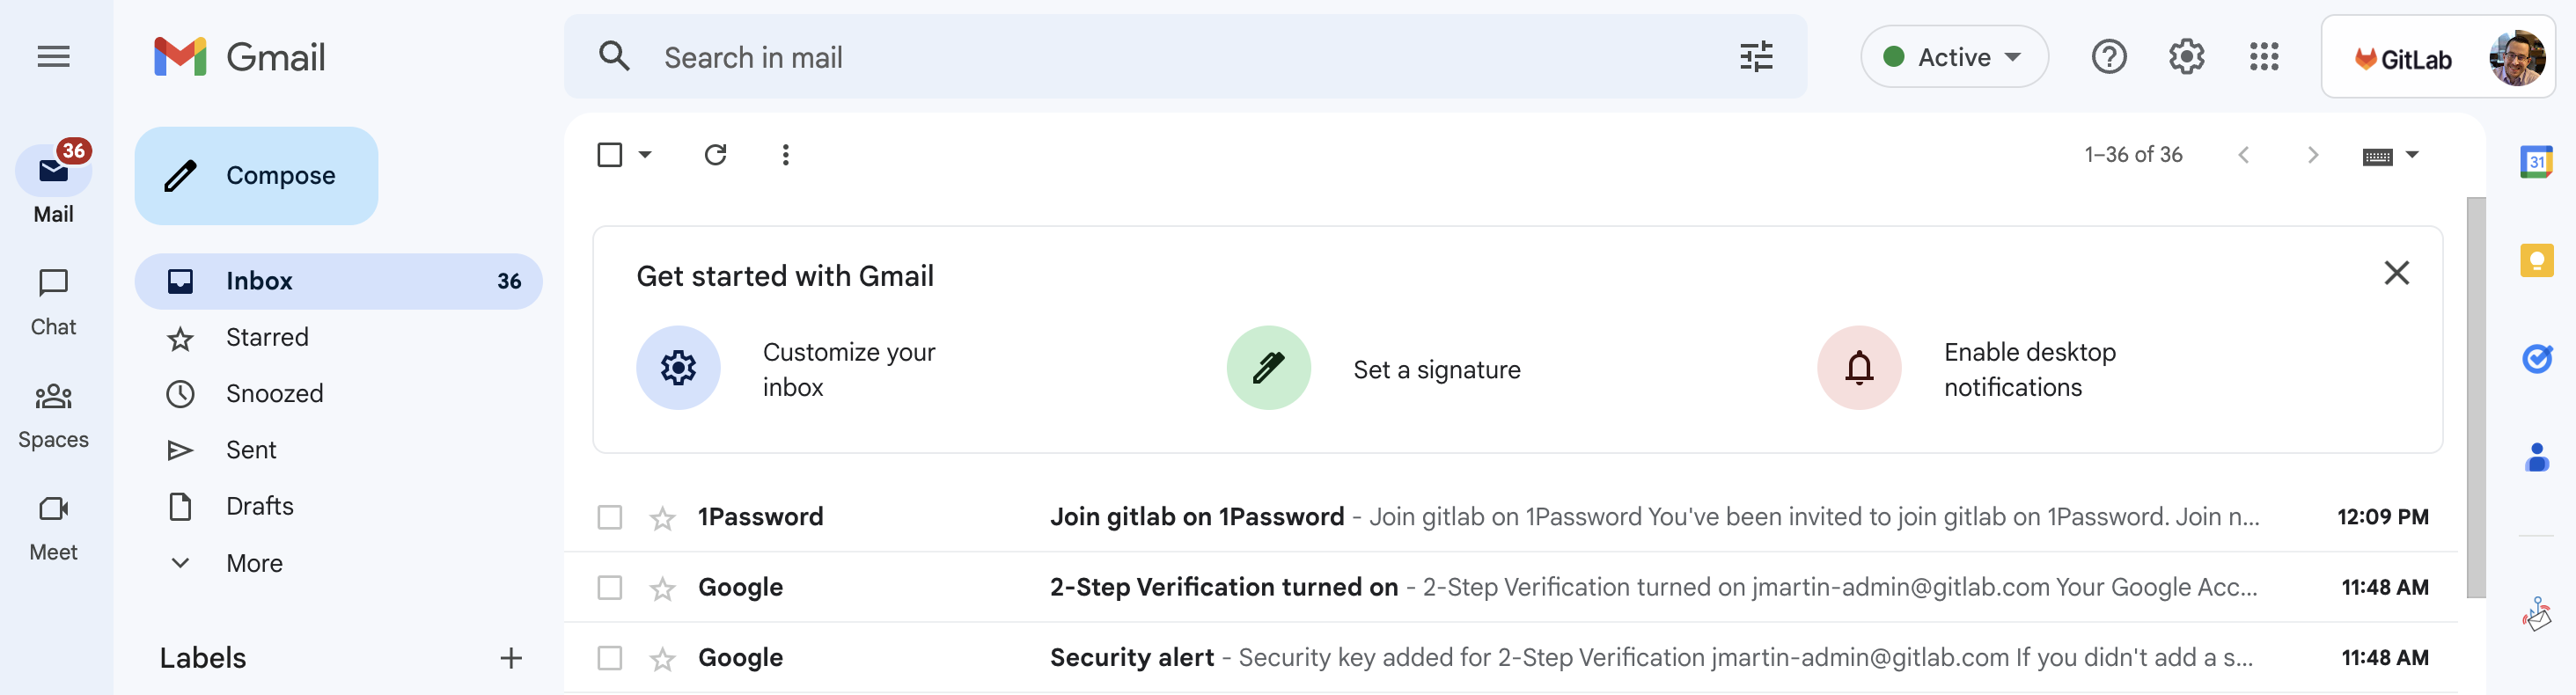
- Click the Join now button.
- You will be prompted to enter a new 1Password master password.
- This must be different than your current 1Password master password for your
{handle}@gitlab.comaccount. - This should be at least 24 characters, so it is suggested to use a phrase that you can memorably type rather than numbers and symbols that you can forget.
- Do not store this password in your 1Password vault. This should only be typed from memory and written on the printed Emergency Kit and stored in your home safe or other safe offline location.
- This is the one password that cannot be autofilled.

- This must be different than your current 1Password master password for your
- You will be showed your Secret Key. Click the button to Download your emergency kit.
- It is your discretion whether to store this in your existing 1Password private vault or only store it on paper in a safe location. Never store your secret key and master password in the same place digitally (only on paper).
- If you keep your credentials fully digital, never store your master password.
- After the PDF has been downloaded, print this on your local printer. You can then write your password on it and store it in your home safe or another safe location.
- Do not store this piece of paper in a backpack or anything that travels with you.
- Do not put this in a drawer in your desk or put it anywhere visible to anyone.
- Delete the
1Password Emergency KitPDF file from theDownloadsfolder.
- Open your Trash from the dock. Right click on the
1Password Emergency KitPDF file and click Delete Immediately.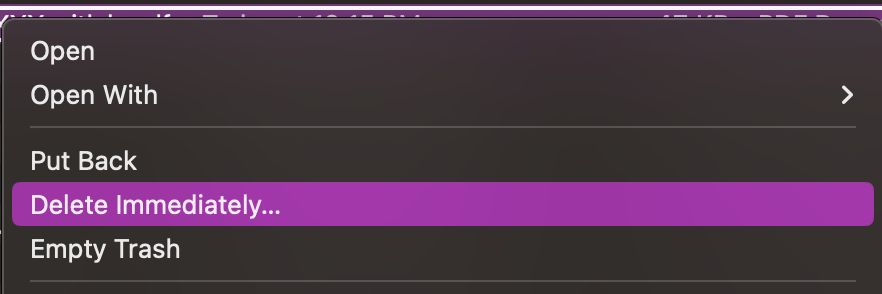
- Your account has been successfully activated. You can ignore the message
your account administrator has been notified to complete the recovery.
Task 3.2: Configure Browser Extension
Warning: You need to wait to receive a
Welcome to 1Passwordemail in your new{handle}-admin@gitlab.comGmail inbox (not your normal email account). Please refresh your email inbox until this email appears indicating that your account has been provisioned. This allows time for the background job automation to provision your 1Password account. No manual intervention is needed by an administrator, this simply takes up to 5 minutes usually.Laptop transfer?: You will not receive an email, however you should follow all other steps to setup 1Password properly for your
-admincredentials ONLY.
- After you have received the email (see above), open a new browser tab, and navigate to
https://gitlab.1password.com. - Sign in with your email address (
{handle}-admin@gitlab.com), secret key, and master password. - In the
Get the 1Password browser extensionsection, click the Get it now button.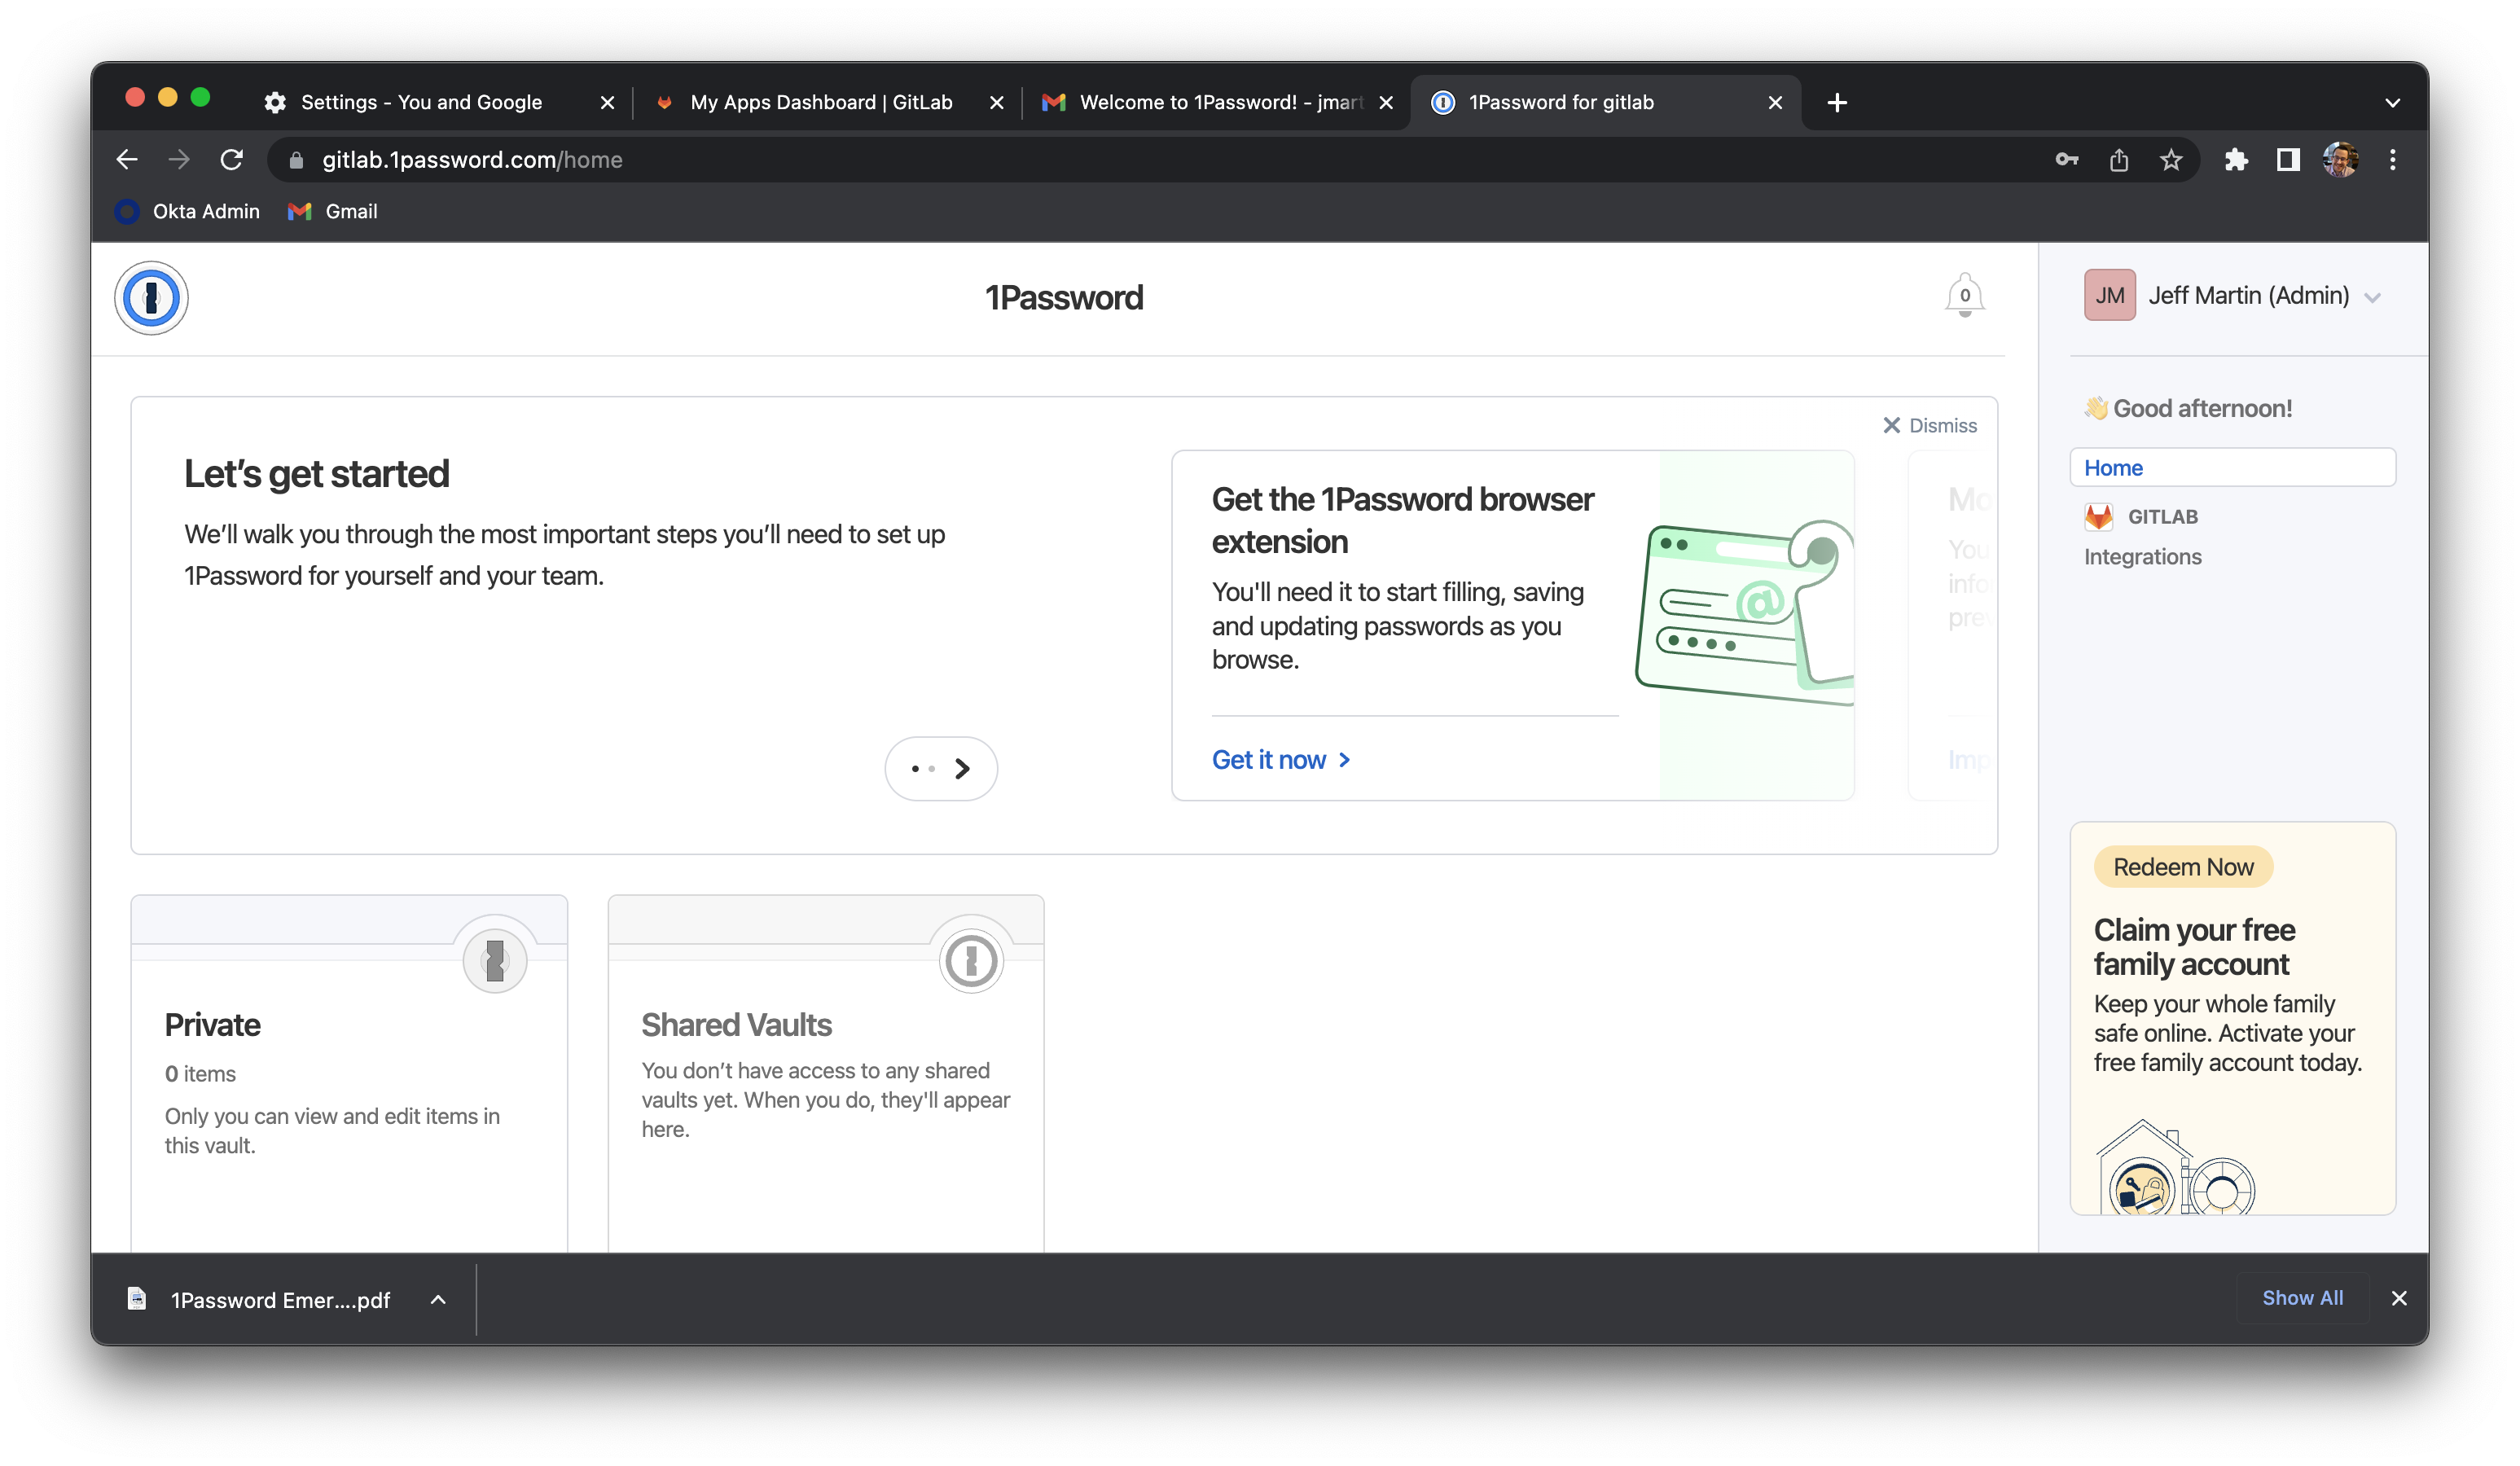
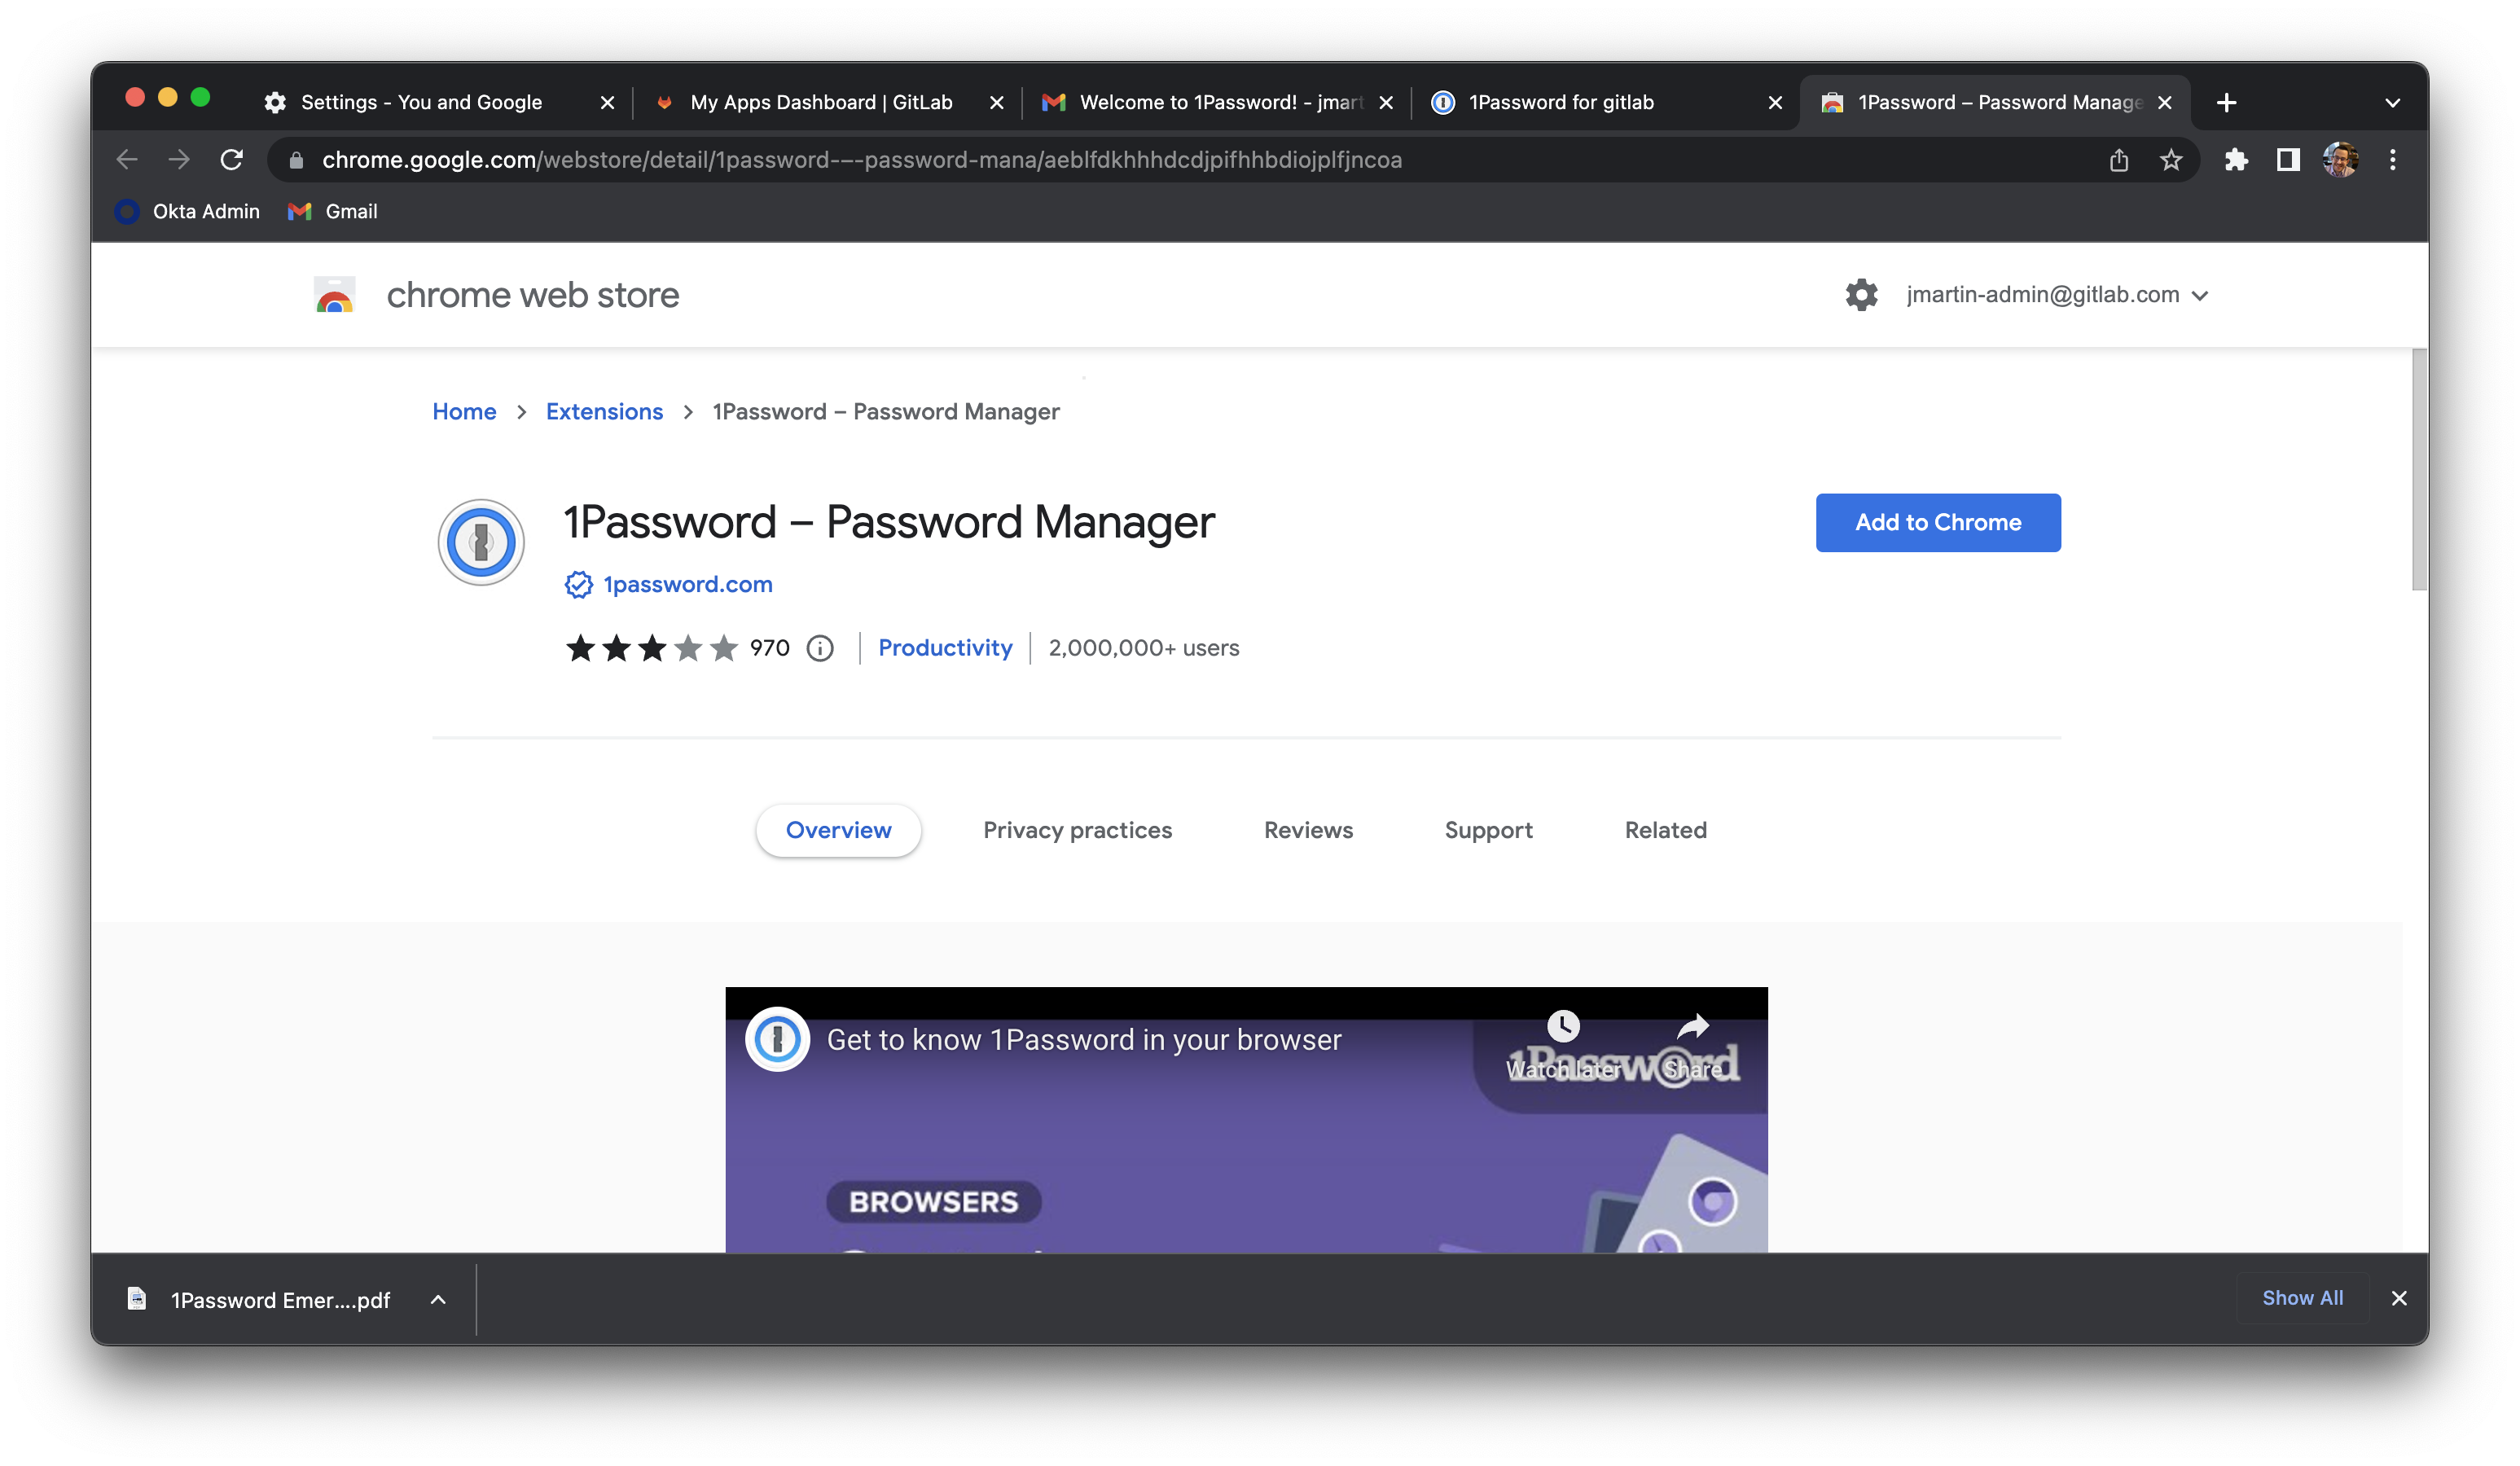
- On the Chrome Extension page, click the Add to Chrome button.
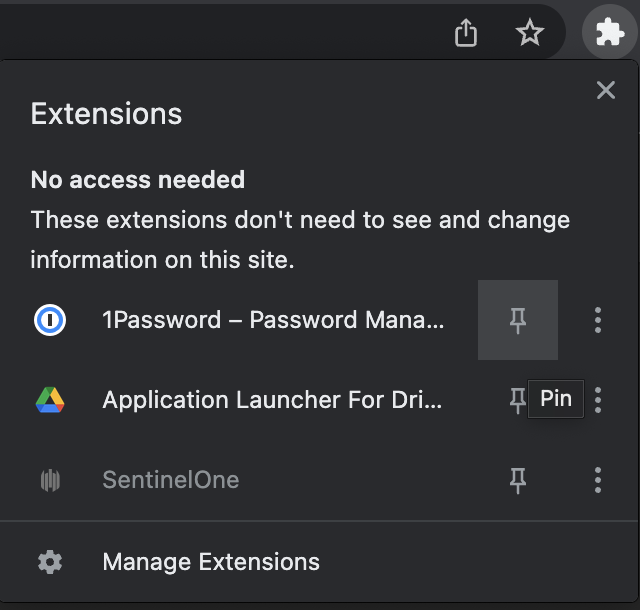
- In the top right corner, click the plugin icon and click the pin icon for 1Password.
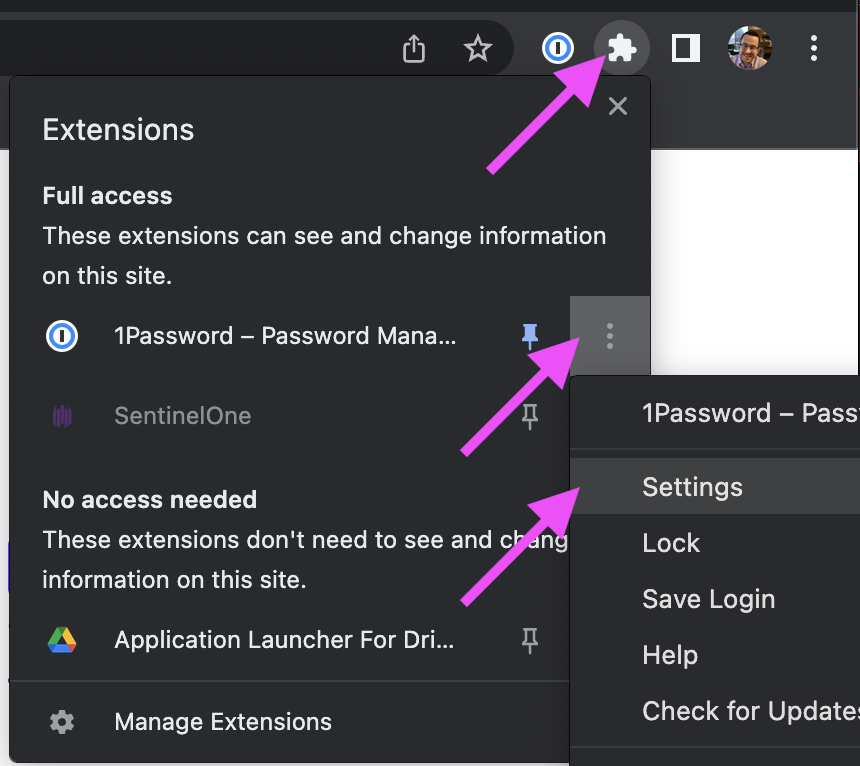
- In the top right corner, click the plugin icon and click the dots icon for 1Password and select Settings.
- On the Settings > General page, uncheck the toggle for
Integrate with 1Password app. This allows us to add separate 1Password accounts that don’t conflict with your normal user account on your laptop.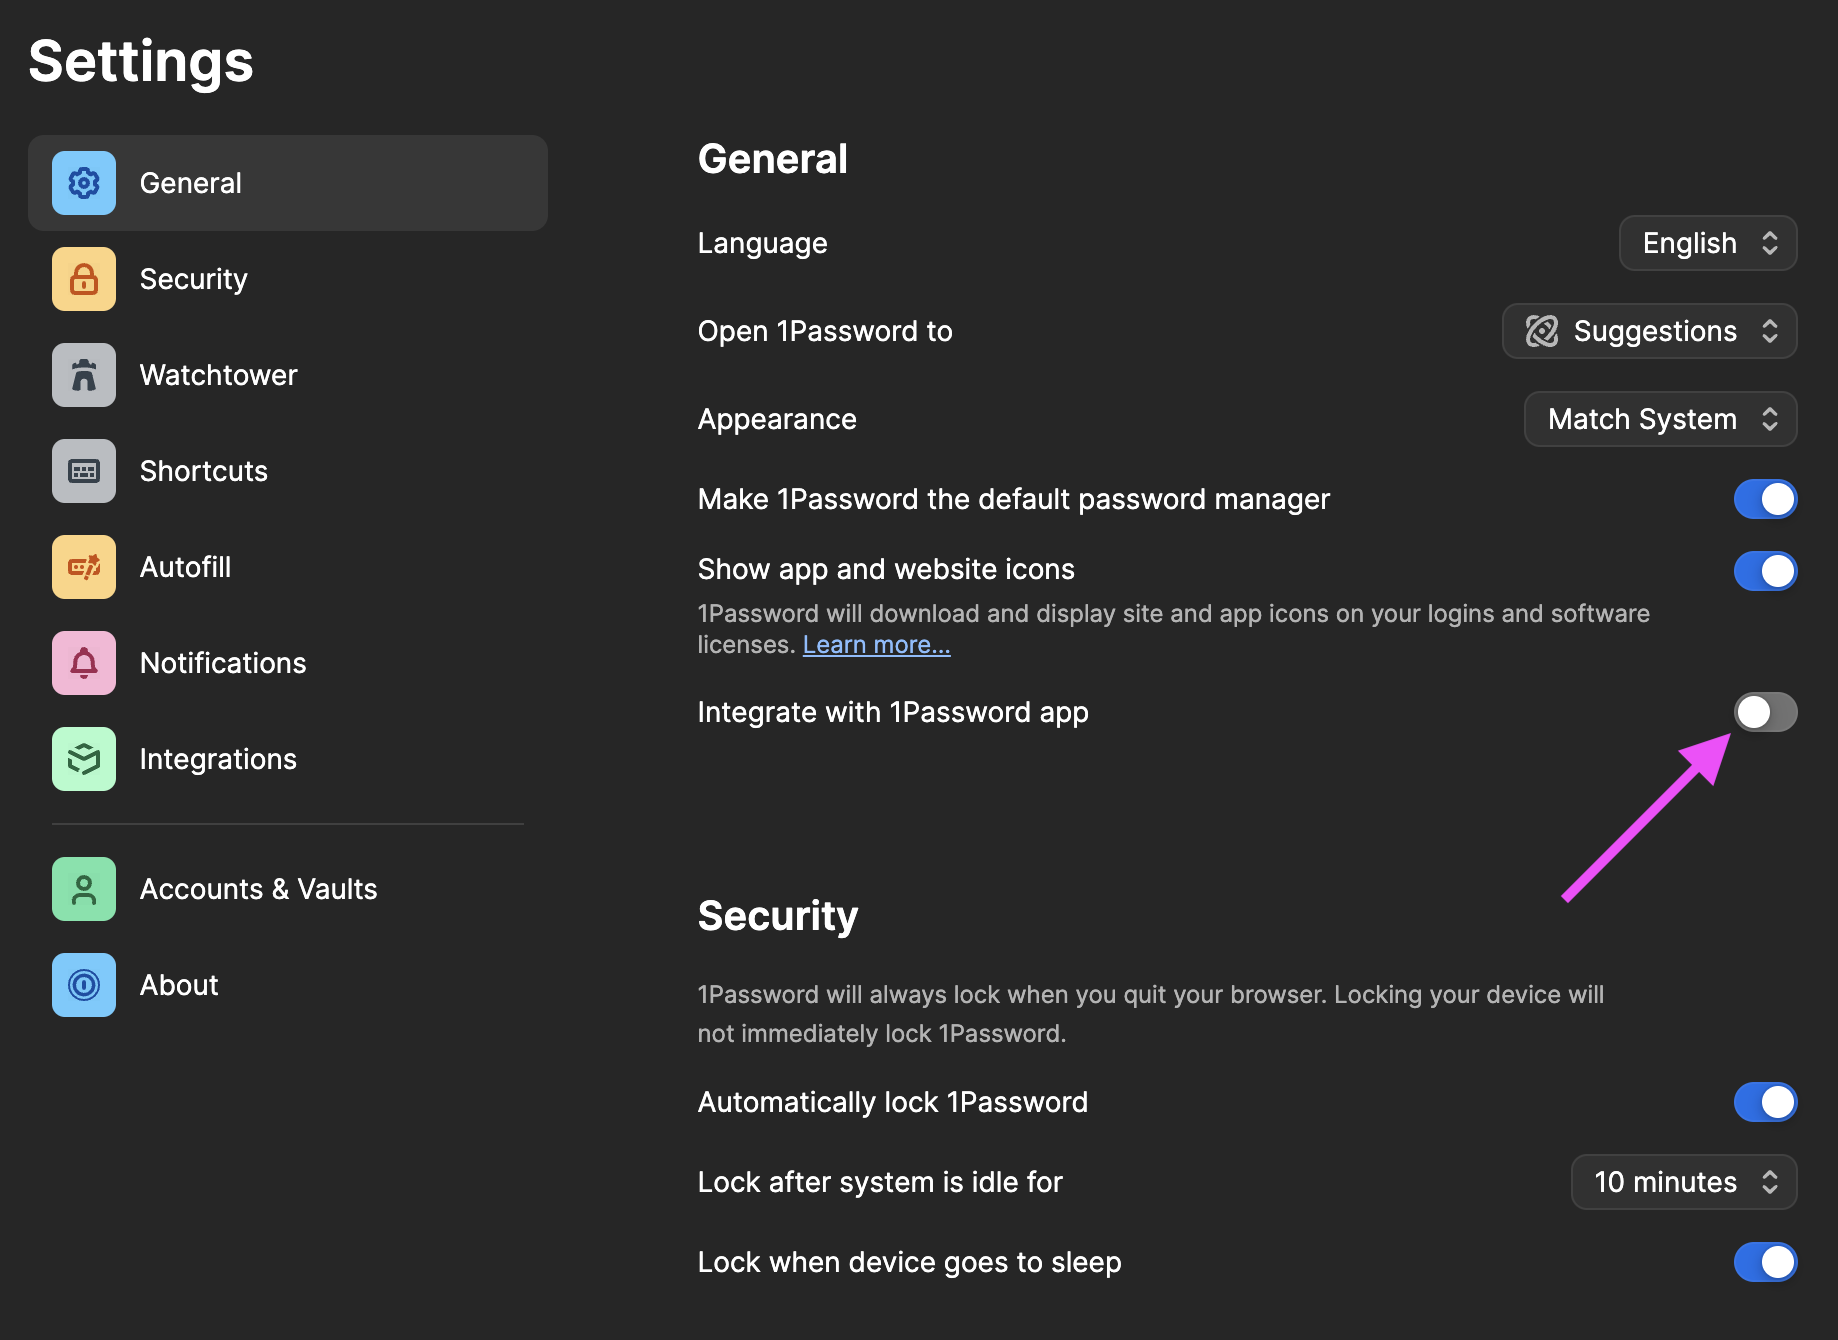
- Scroll down to
Accounts & Vaults. - (If exists) Click the arrows for your
gitlabaccount and click Sign Out. - (If exists) Remove any personal/family accounts as well. This will not affect your 1Password usage in other Chrome profiles or on your Mac app.
- Click the Sign in to a new account button.
- Sign in with your email address (
{handle}-admin@gitlab.com), secret key, and master password. - If this process gives you any trouble, you might need to repeat these steps to remove your existing 1Password accounts.
- Your browser extension has now been configured and you can access your vault credentials for your
{handle}-admin@gitlab.com1Password account from this Chrome browser profile. You will not be able to access this 1Password account from the normal Mac app. - Click on the 1Password logo in the top right corner of your browser to open the extension. If you see your vault, this is working properly. If you have a spinning wheel, try closing and re-opening the Chrome browser window to be prompted to unlock your vault.
Task 3.3 Add 1Password bookmark
- Click the 1Password icon in the top right browser toolbar.
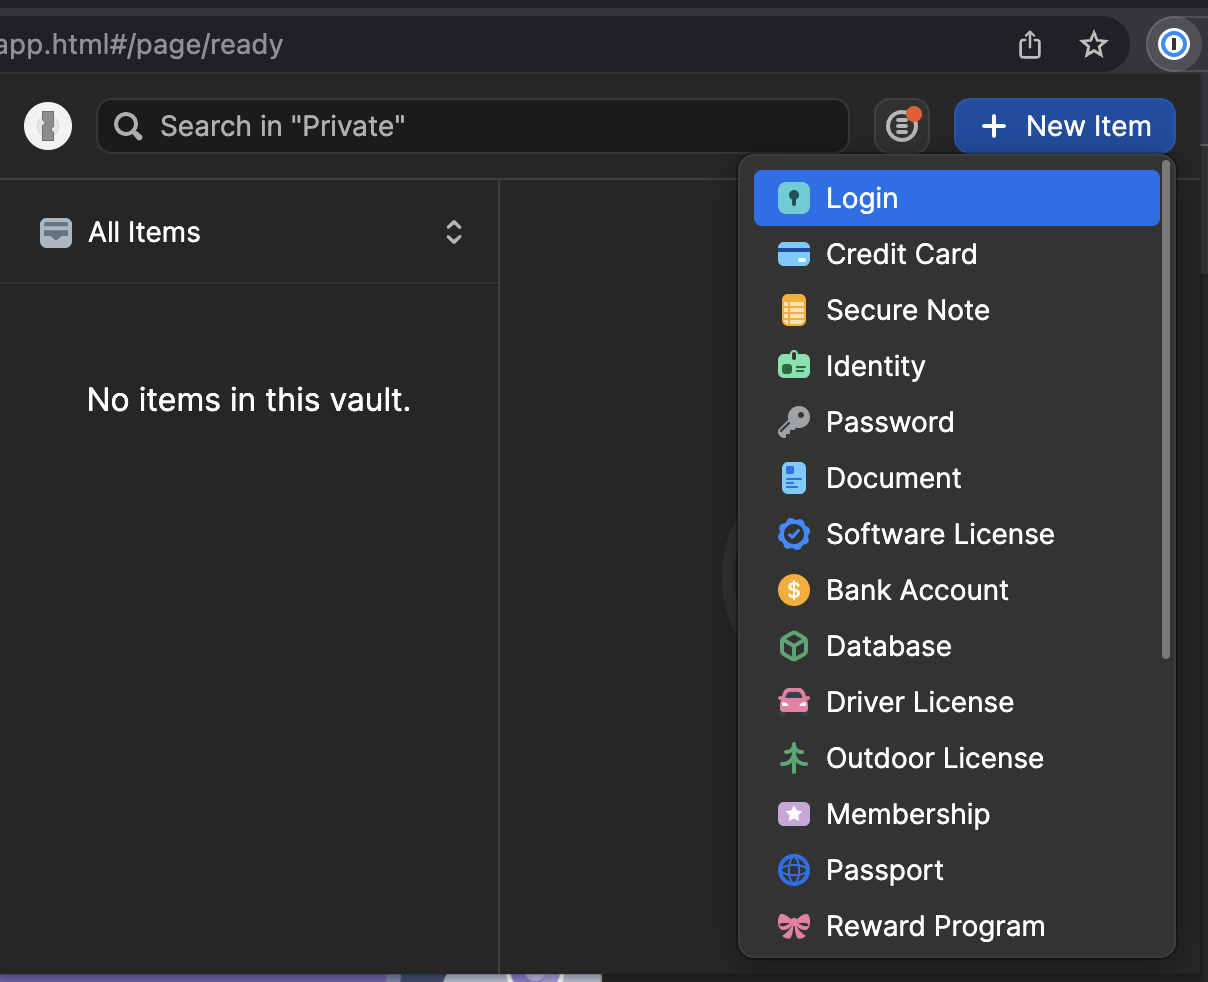
- Click New Item and click Login.
- You will be redirected to the 1Password website and automatically authenticated.
- Click the Cancel button in the top right corner.
- Click the 1Password logo in the top left corner.
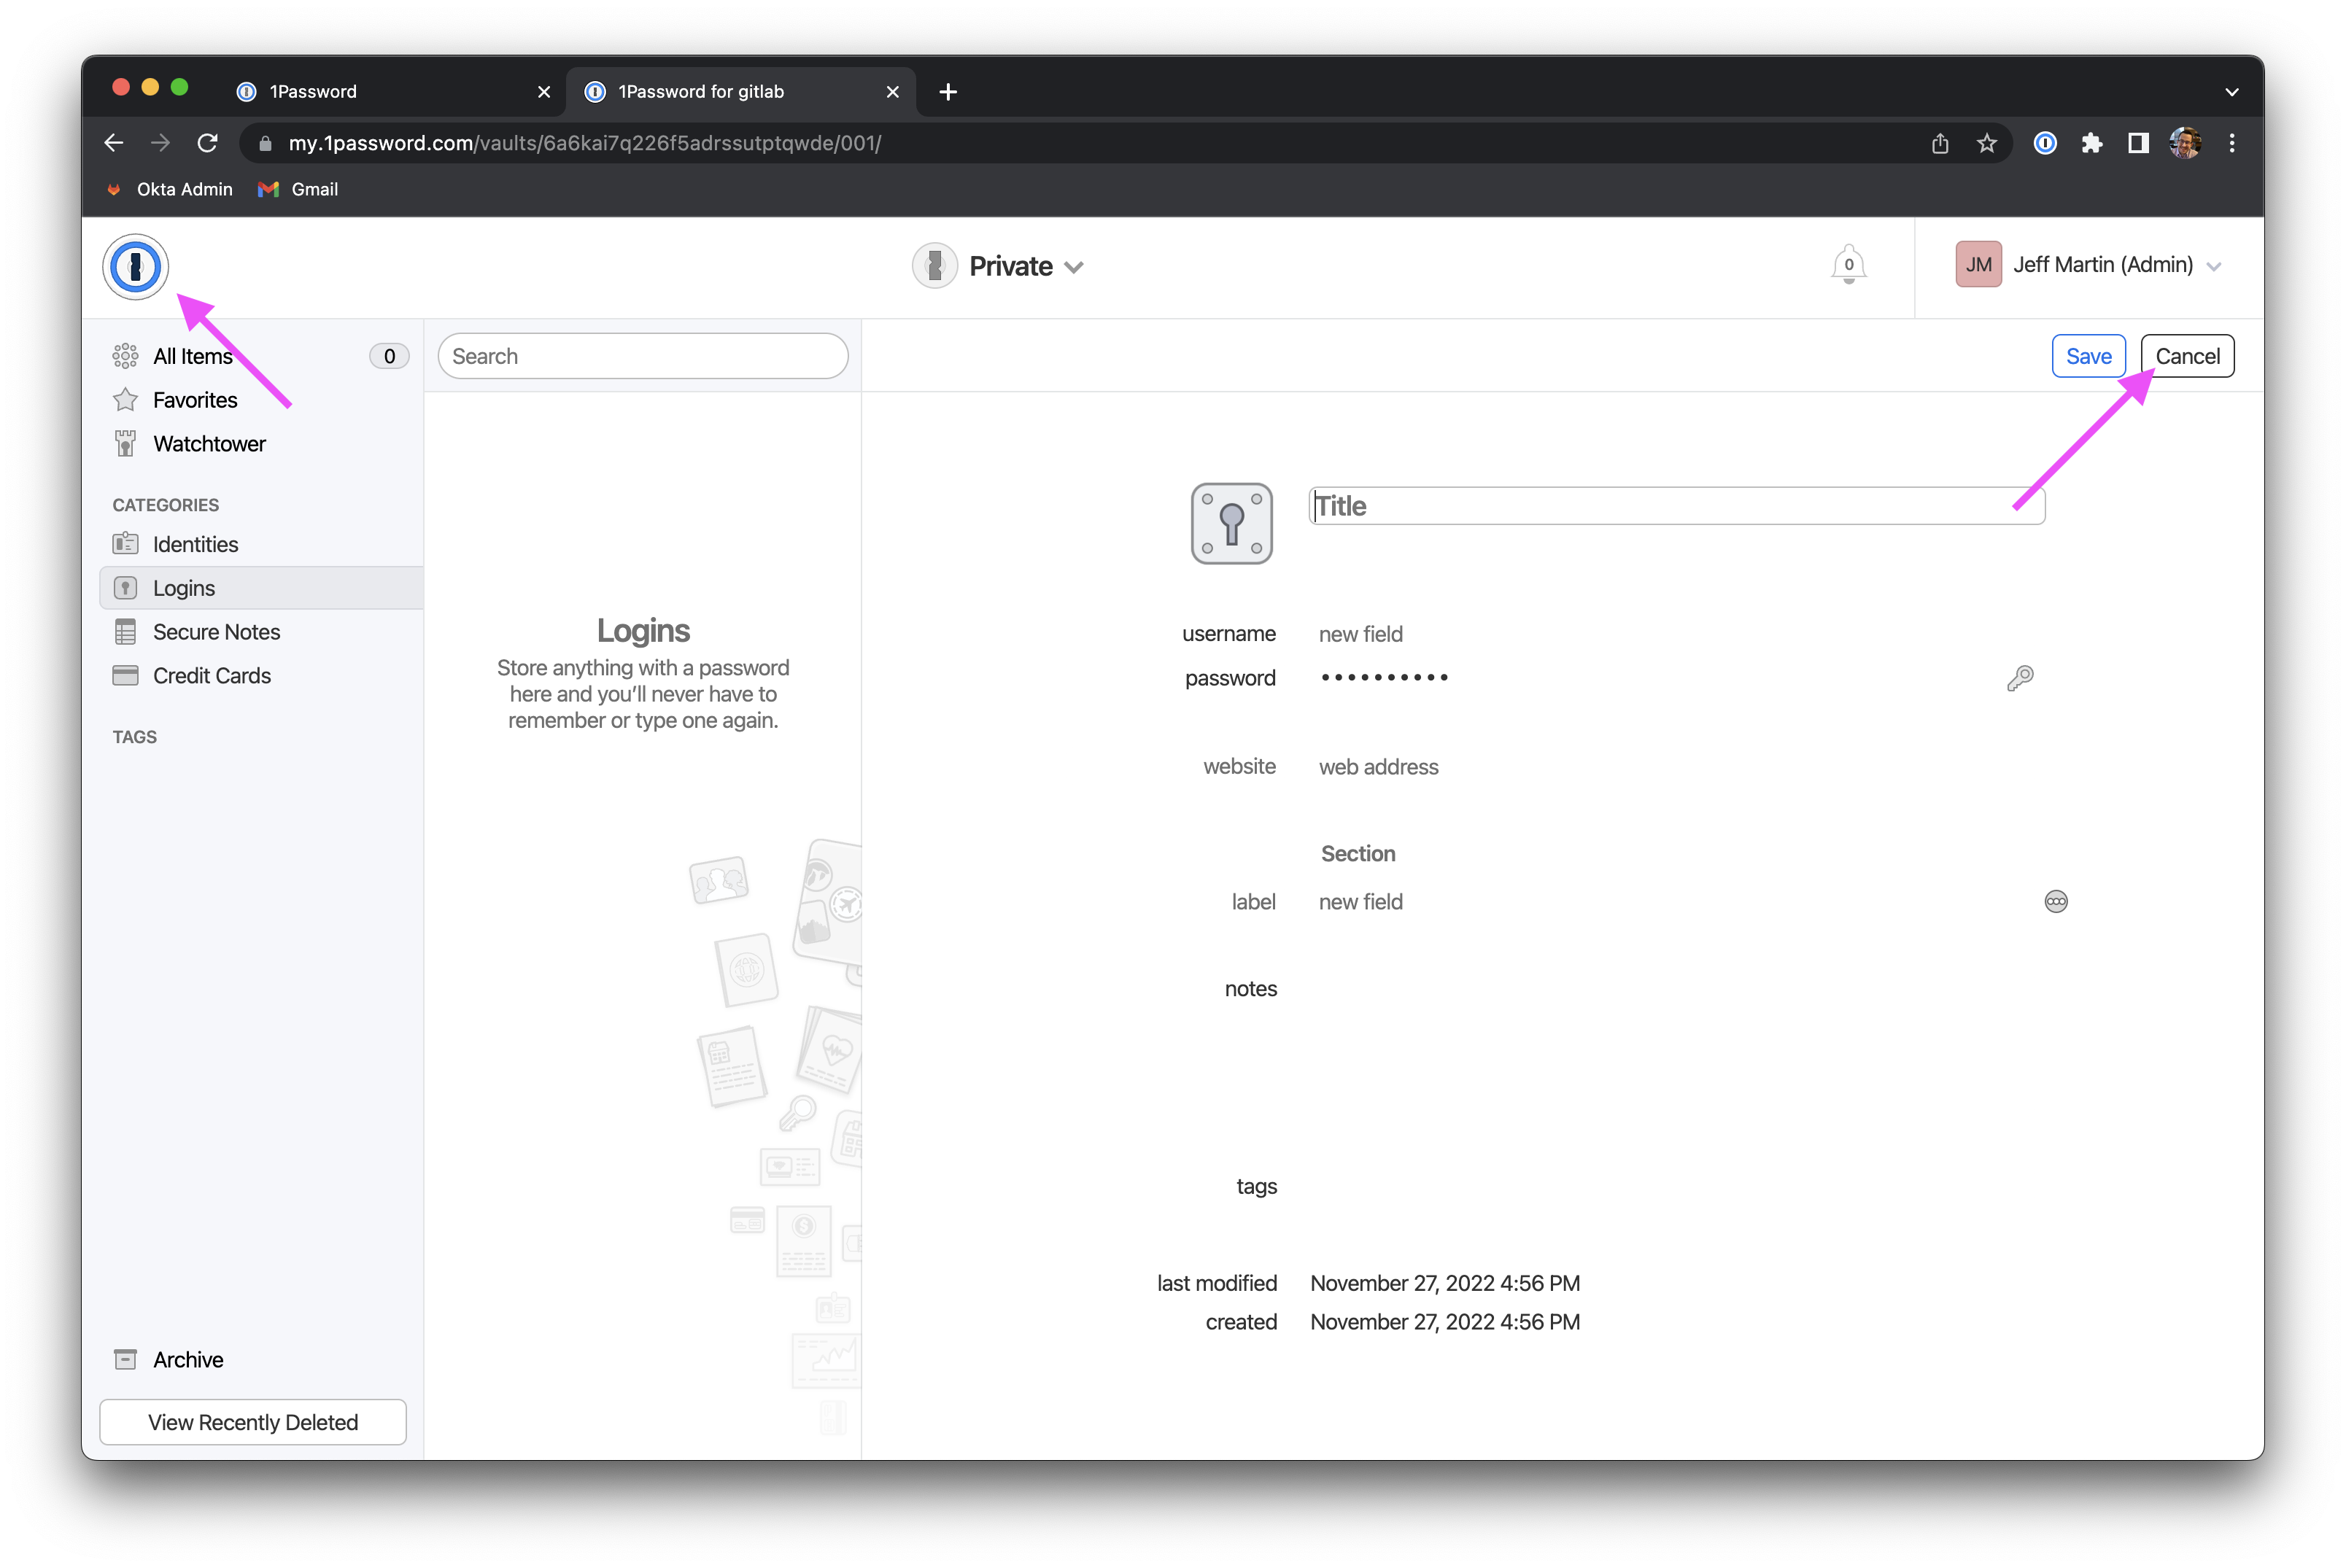
- Click the Private vault tile.
- This is the vault web UI where you can add and manage records.
- Click the star icon in the top right corner to bookmark this page. Edit the description to
1Password.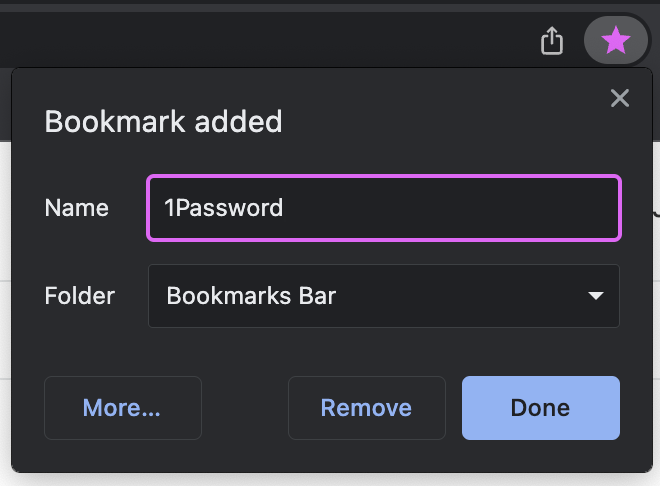
Task 3.4 Add Okta Account to New 1Password Vault
Laptop Transfer?: You can skip this task.
- In the 1Password webpage, click the
+button to add a newLoginrecord. - Use the following to fill out the record details.
- Title:
Okta Admin - Username:
{firstInitial}{lastName}-admin@gitlab.com - Password: Click the key icon and generate a 64-character password with symbols and numbers.
- Website:
https://gitlab.okta.com
- Title:
- Click Save.
- Drag this browser tab out of the current window to move it to it’s own new window.
Task 3.5 Change Okta Password
This password change allows us to rotate your credentials now that the record is stored in your BLACK account vault, and ensures that your PURPLE account vault does not have the credentials to sign into your Okta Admin account.
Laptop Transfer?: You can skip this task as long as you did not expose your password at any point.
- Using the original browser window, click on the
Okta Adminbookmark that you created. - In the top right corner of the Okta webpage, click on your name and click Settings from the dropdown list.
- On the right side of the page, locate the
Passwordsecurity method and click the Reset button. Press Yes when prompted. - You will be prompted to sign in with your YubiKey and the old password (from the
Okta Temp Admin1Password record). - When prompted to set the new password, copy the value from the 1Password record that you just created in the Web UI.
- After your password has been changed, delete the
Okta Temp Adminrecord from your 1Password app since these credentials are no longer valid and are exclusively stored in your admin vault now.
Questions and Feedback
If you experience any problems, please tag @it-eng in #it_help for assistance.
If you have feedback on this runbook, please create a new merge request with suggested changes.
cf678154)
