Tickets
How do we maintain them?
We currently maintain all groups via Zendesk itself.
Zendesk Global ticket settings
-
Comments
- Formatting options for agents: Markdown
- Enable emoji text replacement
- Agent comments via web are public by default
- Agent comments via email are public by default
-
Attachments
- Customers can attach files
- Require authentication to download
-
Tags
- Enable tags on tickets
-
CCs
- Enable CCs on tickets
- Enable CCs for end users on Help Center
- CC blacklist: noreply@google.com
- CC email subject:
[{{ticket.account}}] Update: {{ticket.title}} - CC email text:
You are registered as a CC on this support request ({{ticket.link}}). Reply to this email to add a comment to the request.
{{ticket.comments_formatted}}
-
Assignment
- Auto-assign tickets upon solve
- Allow re-assignment back to the general group
-
Suspended Ticket Notifications
- How often you want to receive email about new suspended tickets.
Never
- How often you want to receive email about new suspended tickets.
-
Ticket IDs: 161869
-
Side conversations
- Enable Slack
Zendesk Us Federal ticket settings
-
Comments
- Formatting options for agents: Markdown
- Enable emoji text replacement
- Agent comments via web are public by default
- Agent comments via email are public by default
-
Attachments
- Customers can attach files
- Require authentication to download
-
Tags
- Enable tags on tickets
-
CCs
- Enable followers
- Follower email subject: {{ticket.title}}
- Follower email template
You are a follower on this request ({{ticket.id}}). {{ticket.follower_reply_type_message}}
{{ticket.comments_formatted}}
-
Requester
- Agents can change requester
-
Assignment
- Auto-assign tickets upon solve
- Allow re-assignment back to the general group
-
Suspended Ticket Notifications
- How often you want to receive email about new suspended tickets.
Never
- How often you want to receive email about new suspended tickets.
Ticket statuses
As per Zendesk the various status are defined as:
- New
- This indicates that no action has been taken on the ticket. Once a New ticket’s status has been changed, it can never be set back to New.
- Open
- This indicates that the ticket is waiting for action by the agent.
- Pending
- This indicates that the agent is waiting for more information from the requester. When the requester responds and a new comment is added, the ticket status is automatically reset to Open.
- On-hold
- This indicates that the agent is waiting for information or action from someone other than the requester. It is similar to the Pending status in that you as an agent can’t proceed with resolving the ticket until you receive more information from someone else. However, the On-hold is an internal status that the ticket requester never sees. While a ticket is set to On-hold, the requester sees the status as Open.
- Solved
- This indicates that the agent has submitted a solution or the end-user has marked it as such. A solved ticket can still be edited or re-opened.
- Closed
- This indicates that the ticket is in a state where it can no longer receive updates. Replying to a closed ticket opens a follow-up ticket, which contains all previous tags and links to the previous ticket.
At GitLab, we define them a bit differently:
- New
- This is a new ticket. This means it has not yet been worked by GitLab.
- Open
- This means the ticket is awaiting our reply.
- Pending
- This means we are waiting on the end-user to reply.
- On-hold
- This means the end-user is waiting on us, but we are waiting on something that is blocking us from replying. We should only be using this in situations where we are waiting on something such as a different department, time to pass (namesquatting requests as an example), or some other criteria that fits along the same concept.
- Solved
- This means the ticket has been resolved, but the end-user might come back to us.
- Closed
- We use them exactly as Zendesk defines them.
Manually creating tickets
The process to manually create a ticket depends largely on the type of ticket it is.
Creating tickets on behalf of customers
When creating a ticket on behalf of a customer, you need to navigate to the support portal for the Zendesk instance you are working on in a browser that is not logged into Zendesk. From there, you would create a ticket much like any customer would. See Creating a ticket for more information.
Creating tickets for outbound requests
Warning This often requires the ability to create users in Zendesk, which is only available on specific roles i.e. CMOCs. That access is very risky and should only be used as documented in this section.
Note This only applies to Zendesk Global at this time.
Note Doing this will bring up the new ticket page. The main part of the page may look different depending on if you are using the agent workspace or not, but the left side should be uniform.
When you need to send an outbound request, it must be done in a very specific manner to ensure it routes properly and the end-user we wish to contact receives the correct notification.
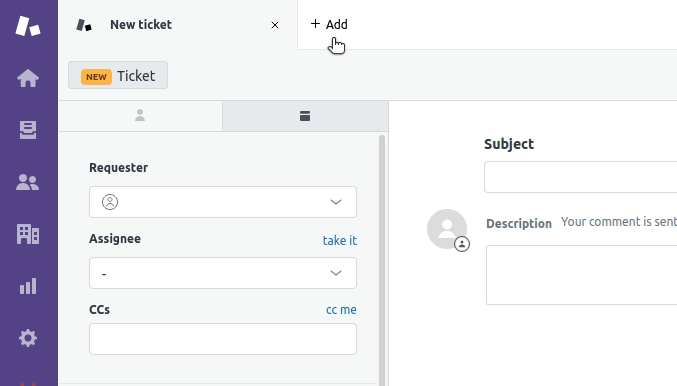
To do this, start by hover over the + Add at the top-left of Zendesk and then
click Ticket.

The first thing you need to do is select the requester. To do this, click in the
text box below Requester at the top-left of the page and put the email you are
looking to reach out to.
The action taken next depend on whether the user in question exists or not:
- If the user exists, it will show said user in a drop-down (clicking said entry
in the drop-down will select the user).
- If the user does not exist, no results will be found and you will need to
click the
+ Add userlink in the drop-down. Doing so will bring up a modal where you will enter the name and email of the user to create. If you are unsure of the name, it is always safest to use the email itself for both the name and email field. Click the blueAddbutton to create the user.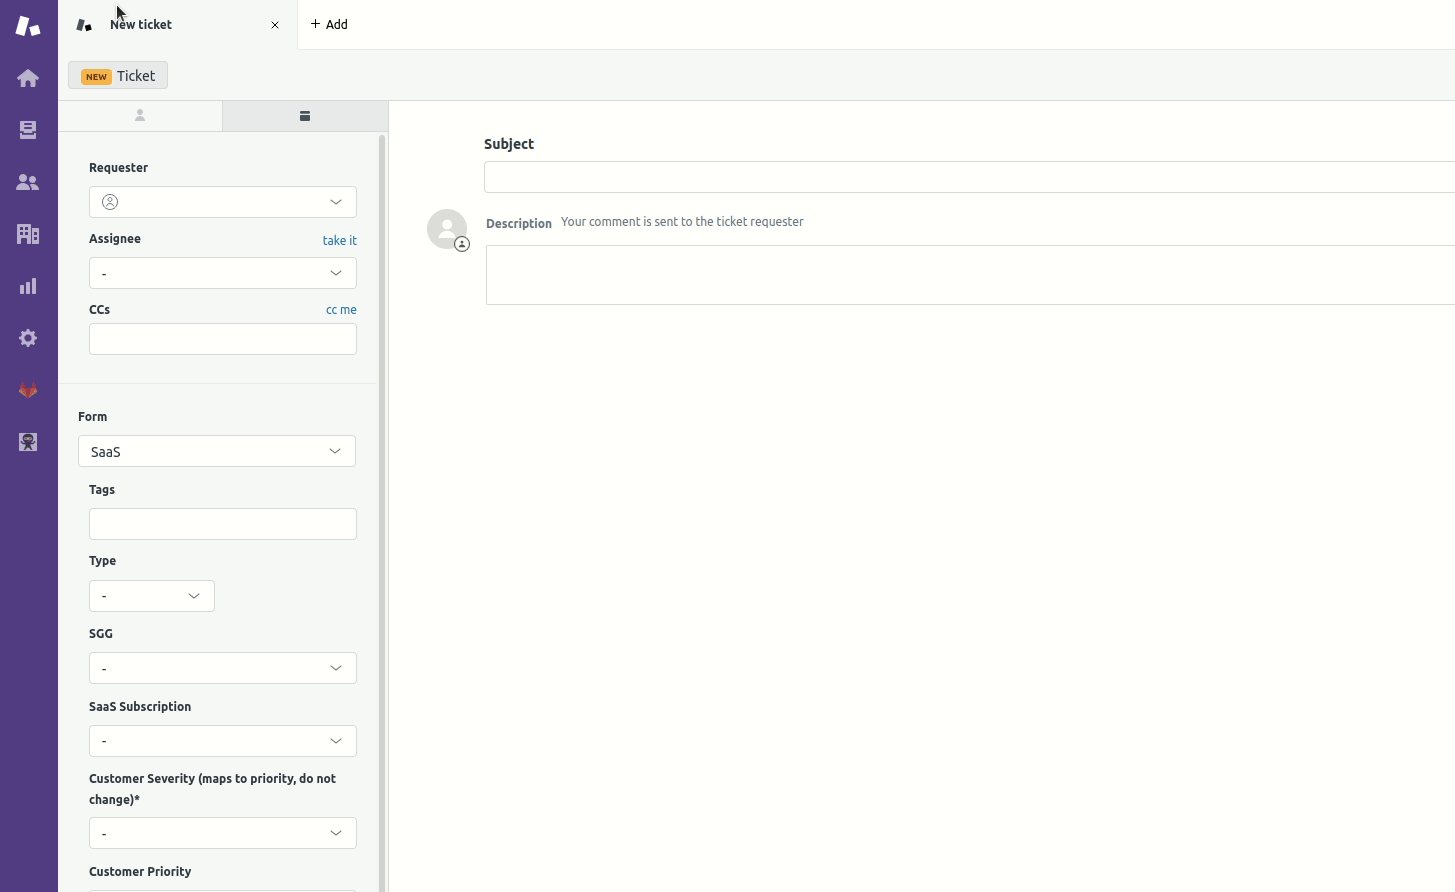
- Warning Never create a user in any other fashion. This is the one and only way a user should ever be manually created within our support system by any team other than Support Readiness. Never utilize this method when CC’ing a user.
After doing this, you should add the subject of the ticket. This should always be done via the top-center part of the page.
After filling out the subject, you now need to apply the macro
General::Outbound Contact Request. This step is vital and should never be
skipped. This macro will ensure the ticket is setup properly for an outbound
request. Skipping this step can result in the new ticket not routing properly
and encountering an untold number of problems.
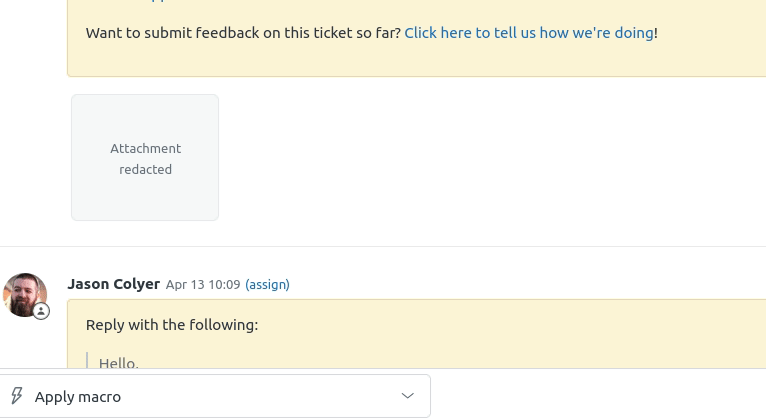
After this has been done, you will then enter the description for the ticket. This is the core of the message you are wanting to send to the end-user.
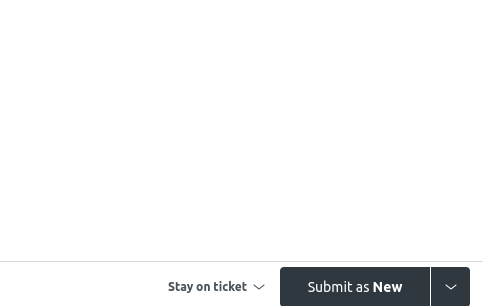
Once this has been completed, the last step is to then finish creating the
ticket by submitting it as pending. This is done by clicking the downward
arrow at the bottom-right of the page and clicking Submit as Pending.
Change management
As the ticket settings changes are unique in deployment, please see Zendesk settings change management for more information.
Labels to use
For all issues and MRs involving Zendesk settings, the label
Support-Ops-Category::Zendesk Settings should be used.
Change criticality
Due to wildly varying nature and impact adding/editing/deleting Zendesk settings can impose, all issues/MRs related to Zendesk organizations need to have the their criticality manually determined
ae555cc7)
